FO: Cloudless Lady Skater

2015-09-13_01_Cloudless-Lady-Skater

Another dress ahoy! It’s that long-time love of sewing-blog-land, the Lady Skater dress from Kitschy Coo. I actually completed this before my Garden Party dress. I was in the midst of forsaking the original pattern in search of a better fit for the fabric and in dire need of a faster, easier project that would inject my sewing with more confidence. Basically, I needed something that would prove concretely that I could, in fact, sew clothes that fit and that I would actually wear without driving me up one wall and down the other in the process. A knit dress seemed like just the ticket.

2015-09-13_03_Cloudless-Lady-Skater

I actually picked up the pattern in October 2014, but my first attempt didn’t go very well. I made two mistakes. My first mistake was choosing a very light, very slinky cotton blend jersey. It felt great to the touch and featured a lovely pointillist print in purple, black, and white, but it was an absolute beast to handle and cut, which resulted in some pretty wonky pieces. My second mistake was cutting the wrong size in defiance of the very explicit instructions about how to choose the correct size: instead of picking a size based on my high bust measurement, I picked a size based my full bust measurement, and then rounded up just to be safe. The result was a huge, saggy sad dress that I instantly didn’t want to wear. (Don’t despair, I didn’t get rid of it—I’m thinking of cutting it up to make underwear.) Although I had plenty of fabric leftover to cut another dress, I decided to set the pattern aside and return when emotions weren’t so high. 

When I pulled out the pattern this time around, I re-read the instructions and had a pretty good idea of what I had done wrong, so I felt more confident tackling it as a feel-good project. I started by choosing a 100% cotton interlock, which is heavier and more stable than a jersey and much easier work with. Still, I was really concerned about cutting every piece precisely on-grain, so I scoured the internet to find the best tip for marking the grain. Advice ranged from Tasia’s meticulous approach of pinning the entire length of the yardage to Gillian’s self-proclaimed “lazy” approach that involves identifying the grain, folding the yardage, and having done with it. Neither was really working for me, however, because both methods ended up with distortion and gave me fits of anxiety.

Then, in a thread on the Sewing Pattern Review forums, I saw this most excellent tip from user Emelle:

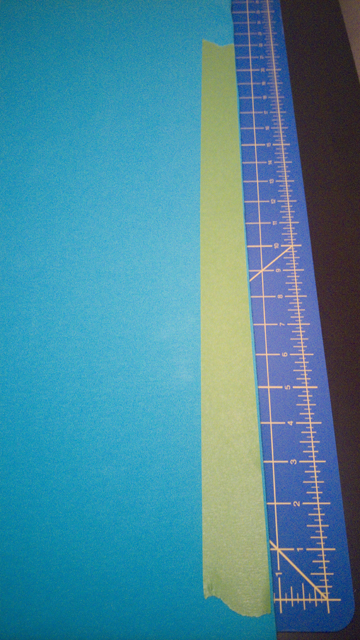
To keep track of where the grain is, I use a trick I learned here from Nancy K….take painter’s or masking tape, find the grainline and mark it all the way across the fabric with the tape (since you can’t pull a thread on knits….This works well on the shifting knit material.)

Since the tape is (relatively) wide with a straight edge, once you line up the first inch or two with the edge of a column of knit stitches, you can lightly lay down the rest of the tape without having to carefully position it all the way down, because it doesn’t have a tendency to curve or twist. And if you don’t get it exactly right the first time, you can always re-position it. (Disclaimer: Check a small patch of your fabric first to make sure that lifting and re-positioning the the tape doesn’t stretch out your fabric or leave any residue. I didn’t have any issues, but a more delicate fabric might. Basically, your mileage may vary.)

2015-09-13_10_Cloudless-Lady-Skater

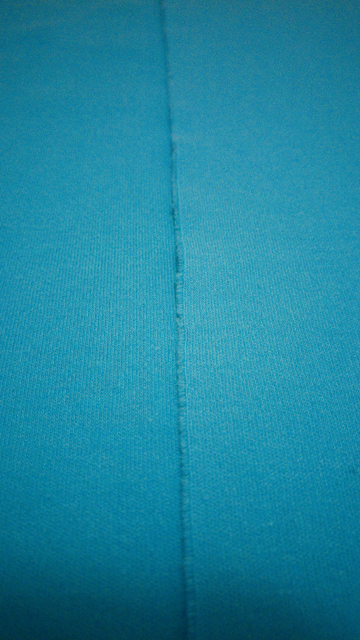
You don’t even have to put tape down the entire length of the yardage, just enough so that when you go to fold the fabric the tape acts as a guide and encourages the fabric to stay straight down the length of the fold.

2015-09-13_11_Cloudless-Lady-Skater

Thank you, Emelle and Nancy K—you saved my sanity.

I cut a size 2 at the shoulder/bust and graded out to a size 3 at the waist and hips. I shortened the bodice a scant 1/8″ based on measurements I had taken sweater knitting. When I tried on the dress for the first time, I felt the waist was a little too low; since I had washed and dried the fabric prior to cutting, I assumed it had shrunk as much as it was going to, so I guessed I would probably need to raise the waist of future dresses by about an inch. But after washing and drying the completed dress, it seems it’s shrunk a little more, so raising the waist may not be necessary. Could be a different story with a drapier fabric, though.

I did all of the construction on my serger and all of the finishing (twin-needled hems and tacking down bands) on my sewing machine. Rather than buy four cones of sky-blue serger thread that I may or may not use again, I opted to borrow a trick that I’ve seen many people use and bought medium grey serger thread instead. While it certainly won’t fool anyone into thinking it’s blue, it’s a lot more subtle than a stark white thread would be, and it’s a lot more versatile for future projects.

2015-09-13_08_Cloudless-Lady-Skater

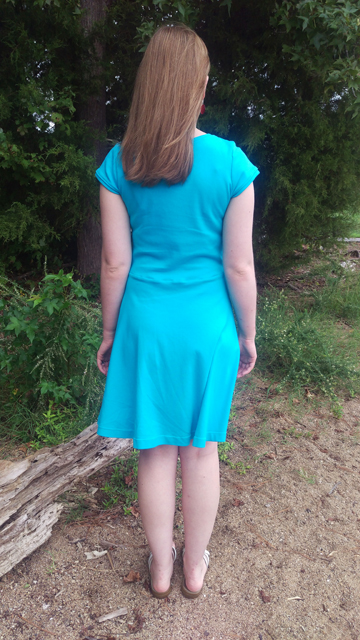
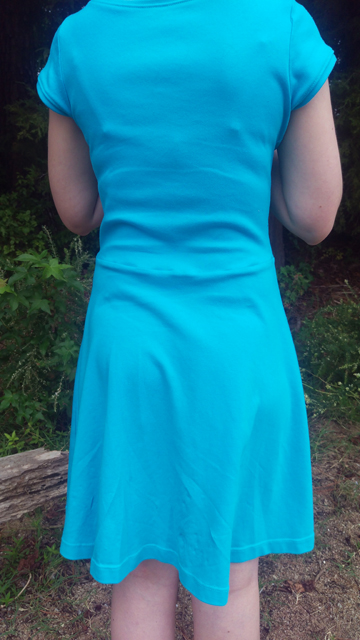
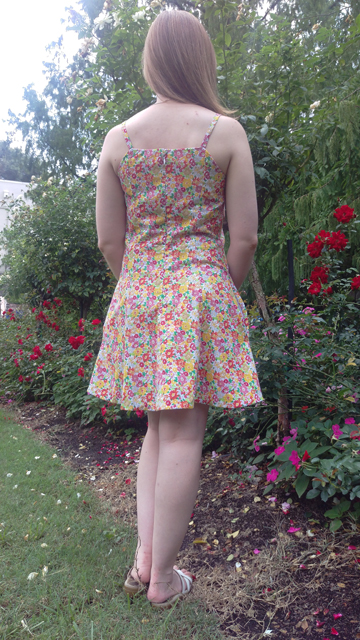
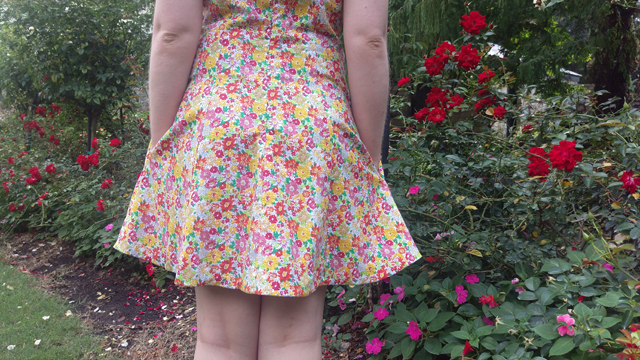
Per the instructions, I stabilized the shoulders and waist with clear elastic, which I can apply at the same time as I’m serging. It’s not noticeable at all on the shoulders, but I’ve noticed some rippling around the waist.

2015-09-13_02_Cloudless-Lady-Skater

Ironing reduced the problem on the front, but it’s still pretty pronounced on the back.

2015-09-13_04_Cloudless-Lady-Skater

2015-09-13_05_Cloudless-Lady-Skater

Did I stretch the clear elastic too much? Is this just par for the course?

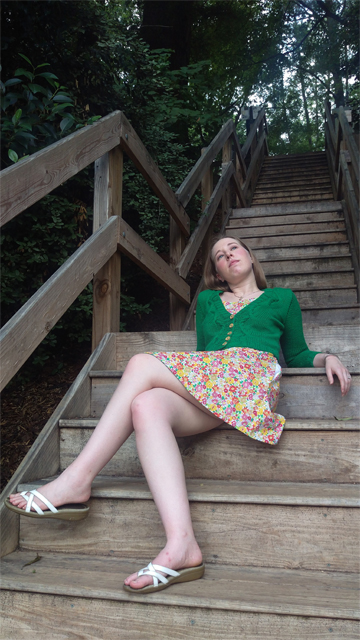
Looking at these photos, it seems like I might need a swayback adjustment, which is crazy because I’ve got good standing posture. (But let’s not talk about my sitting posture.) Then again, I think the back bodice piece is longer than the front bodice piece, so it might be a simple matter removing some of the unneeded excess length.

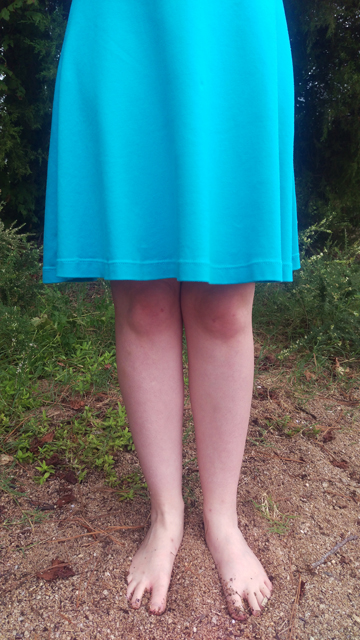
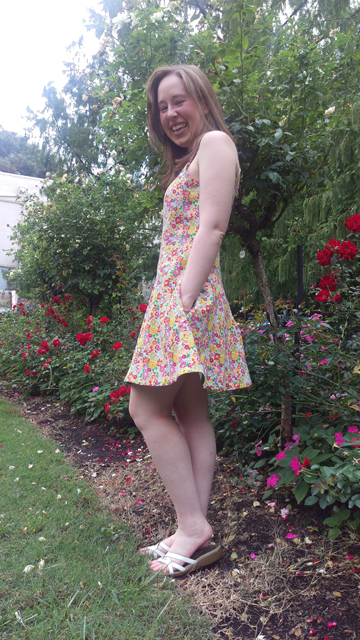
Speaking of excess length, the skirt is definitely on the longish side on my 5’2″ frame.

2015-09-13_06_Cloudless-Lady-Skater

On the one hand, it’s nice, because I can tuck my knees up into it and have no fear of a stiff breeze causing problems. On the other hand, in this fabric, it’s a little heavy, especially for a summer dress in a notoriously humid climate. You could make the argument that the 100% cotton interlock is more of a problem than the length, and you would probably be right. In any case, it’s something I’m definitely going to think about for future iterations.

2015-09-13_09_Cloudless-Lady-Skater

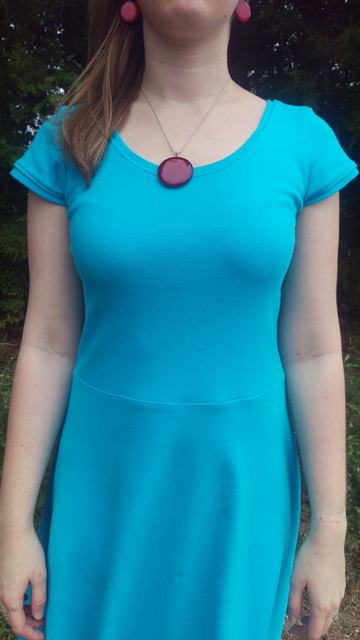
I have no idea why I look pissed off in this photo, but I’m including it anyway because it shows that the armholes came out a good size. Initially I thought they were too loose, but as with the waist position, I feel like things improved after a trip through the washer and drier. My plan to raise the entire dress from the shoulders by an inch shouldn’t be necessary now—a good thing, since I’m not sure how to translate that change to the height of the sleeve cap.

For these photos, I tried experimenting with a few serious faces, since I feel like I can do big smiles just fine but look pouty or just plain weird when I try to do a neutral/non-smiling face. (Don’t even get me started on “sexy” faces. Talk about derp city.) This one is the only one that came out looking pretty okay.

2015-09-13_07_Cloudless-Lady-Skater

Taking photos out and about will only get better as the weather starts to cool, and I’m looking forward to having a new permanent backdrop during the winter months this year. I’ll be sharing more about that soon. 🙂


 

FO: Garden Party Dress and Mashion Cardigan

2015-09-10_01_Dress-and-Cardigan

AKA Outfit Along 2015

2015-09-10_02_Dress-and-Cardigan

AKA Third Time’s the Charm

2015-09-10_03_Dress-and-Cardigan

AKA Better Late than Never

2015-09-10_04_Garden-Party-Dress

If I had actually sewn the dress I said I was going to sew, I probably would have finished on time instead of more than a month late. Then again, “finishing” may have consisted of wadding the dress up in disgust and refusing to think of it ever again. In the balance, satisfaction was clearly more important than punctuality.

The problem with the original dress plan is that I bought McCall’s M6887 solely as a result of peer pressure, in direct defiance of my own stated preferences and without regard for my previously purchased fabric. Don’t get me wrong—I like the pattern, and I think I actually will make it at some point. But in order to not hate the feel of the waist seam/fit-and-flare silhouette, I’m going to have to make it out of a stretch woven at least, or possibly even adapt it for a stable knit like ponte. My fabric was neither of those things, and I didn’t even make it as far as I muslin before I had a reality check and realized that I already didn’t like the road I was headed down.

After reviewing my recent haul of patterns, I briefly considered making McCall’s M7084, a shirtdress, instead. But it also has a waist seam, and I didn’t have enough fabric to do the fuller skirt, which felt like a must on a breezy summer dress. Instead, I settled on McCall’s M7156, which has princess seams and no waist seam. I’d been imagining it in a rayon challis or possibly a lightweight jersey, but decided that it should work with my fabric. And if it turned out a bust, I wasn’t any worse off than I would have been by sticking with the original plan.

I decided to skip the muslin on the grounds that there are a total of 8 seams on the dress, all designed to be sewn at 5/8″, which allowed plenty of leeway if I needed to take it in or let it out anywhere. After a recent knit dress project, those seams looked enormous! *cue the faintly ominous music of foreshadowing*

As I was handling my fabric in preparation for cutting, I confronted the fact that, no matter what my husband said, it was too lightweight to sew on its own and liable to be see-through in strong sunlight. So I quickly went out and purchased a white cotton sateen to use as an underlining. It came on a ridiculously wide bolt, something like 109″. I feel like I’ve heard somewhere that because sateen is a satin weave, it’s warmer than a plain weave, but you just can’t beat how smooth and lustrous it is. Besides, when it’s 95°F with an equally high humidity index, nothing is really going to feel cool, you know?

It’s a good thing it felt so lovely, because I struggled mightily to prep it for cutting. When I went to square the cut edges to the selvage, I expected it to behave like a plain weave and attempted to snip into the edge and tear it straight across, but instead it tore on a diagonal. (I tried to find a scientific explanation for this, but nothing at all came up in my searches. Is it because it’s more similar to a twill than a plain weave? If anyone can tell me what happened, I’d love to hear about it.) Since I couldn’t use the torn edge to position the grainline of the pattern pieces, and because the fabric was so wide, I went through an elaborate ritual that involved positioning the first piece relative to the selvage and then each subsequent piece according to the grainline of the piece that directly preceded it. It took forever, but I think I must have done it right, because everything hangs really nicely in the finished dress.

2015-09-10_05_Garden-Party-Dress

I started with a size 10 at the bust and graded out to a 14 at the waist and hip. I also took advantage of the For Petite line at the hip to shorten skirt. I cut everything on a single layer for accuracy, and I stole the pocket pieces from McCall’s M7084 since I’d cut them out when I though I was going to be making that pattern. I hand-basted all of the underlining pieces to my fashion fabric by hand, and followed the advice of this Threads article to account for turn-of-cloth. It took a couple of evenings in front of the TV to get it all done, but it was well worth the effort because I avoided any slipping or bunching during the actual sewing.

Since I didn’t make a muslin first, I machine basted all of the seams to check the fit. But because of the wavy nature of my hand basting and a couple of places where I had to staystitch per the instructions, I didn’t baste all of my seams at 5/8″ as I intended to sew them because I didn’t want to a) sew over any other temporary stitching or b) take out my hand-basting stitches before the actual, final stitching was done. I know, I know. This is a decision that seems completely absurd when I type it out now, but that was my thought process. I had plenty of excess fabric throughout with the narrower seams, so I reasoned that sewing them at the correct width would bring everything perfectly into line.

2015-09-10_06_Garden-Party-Dress

Rather than test this theory in a semi-rational way by sewing them at that distance, I decided to double-down on my questionable decision-making and proceeded to disassemble the basted dress and serge the vertical edges of each piece first. (I should have done this—with the knife disabled, if I was worried about accidentally shaving off too much fabric—before I basted everything together, but since I’m new to serger ownership I forget this and no commercial pattern I’ve ever encountered actually tells you to do it.) And, because my brain works in ways mysterious even to me, I elected to serge the edges at different widths. I know, I know. This doesn’t make any sense. Sure, avoiding a bulky seam on the princess seams makes sense, but do not ask me why I sewed the center front/center back seams and the side seams at different distances. I do not know. Also don’t ask me why I thought it was safe at this point to cut into the corners between the pocket bags and the side seams to allow me to press the seams open—I was just blindly following Lauren’s tutorial for adding pockets and conveniently forgot that she didn’t need to check the fit of her dress midway through.

Once I had the edges tidied, I sewed the dress up properly. Shock of shocks, it was too tight pretty much all over. Who would have guessed that barely estimating the changes you planned to make and then making said changes inconsistently would result in an outcome other than the one intended? Not me, apparently.

I had a bit of a cry about it, and then I unpicked all of the seams and sewed them as narrowly as I dared. I believe it was ¼” for all of the seams except the princess seams, which had already been serged together, but I can’t be sure, because I’d trimmed off different amounts while serging.

Lucky for me, this solved all of the fitting problems. But because I cut close to the original stitch line to free the pocket bags for pressing the seams, and then moved the seam outward, I ended up with holes above and below the pockets on the outside of the dress. To fix this, I carefully sewed a line of stitching that blended between the old and new seams to close the holes. The only downside was that my excellently constructed pockets are a little lumpy at the top and bottom and no longer completely hidden; they now have a tendency to peek out a bit, as you can see in a couple of the shots at the top. Otherwise I daresay they would have been perfect.

Once the fit was resolved, the rest was, if not exactly smooth sewing, at least more pleasant sewing. Taking advantage of the various feet for my machine was, I think, a contributing factor. The invisible zip, while still a little uneven at the top, is easily my best to date. (Well, as long as you ignore the fact that I sewed the seam to the dress and, while unpicking it, poked a hole through the underlining and fashion fabric. I was able salvage it by embroidering a red flower over the hole. Justin suggested I put a tiny flower on all of my makes. It would be sweet, I’ll admit, but I don’t think I have the patience for that.)

2015-09-10_07_Garden-Party-Dress

Since I underlined the whole dress, I elected to skip the facings in the pattern and use bias facings instead. I used self fabric for the neckline edge and stash quilting cotton for the hem. It was a great excuse buy Clover bias tape makers. (I love gadgets). I used this tutorial from Colette for making continuous bias tape. It took a couple of tries to get everything just so, but it was totally worth it and I don’t see myself ever buying pre-packaged bias tape again unless I’m in an absolute crunch. I used my overcasting foot to attach the bias tape, since I don’t have an edgestitching foot (yet) and it gives me basically the same result; I turned and sewed them down by hand using blind stitches. The bias facing along the neckline ended up narrower than intended, but it hasn’t popped free during wear, so I get to pretend that it was a deliberate and delicate touch rather than another miscalculation.

I attached the straps before the bias facings, but forgot to also check their length before I sewed the facings down, and they ended up too long and with exposed ends showing through in one or two spots. I solved the problem by pinching out the excess right where the straps meet the dress and then sewing them to themselves and to the bias facings with more hand-sewn blind stitches. You can’t tell from the outside, and you can honestly barely tell from the inside, either.

2015-09-10_08_Garden-Party-Dress

As I mentioned earlier, I took advantage of the For Petite line to shorten the skirt portion, but it still came out quite long so hacked off about 4 inches from the bottom.

2015-09-10_12_Garden-Party-Dress

I didn’t use the For Petite line to shorten the torso between the bust and waist because it seemed to align with my own measurements, but in hindsight I think it would have been a good idea to do that too. It would make a subtle but positive difference.

2015-09-10_09_Garden-Party-Dress

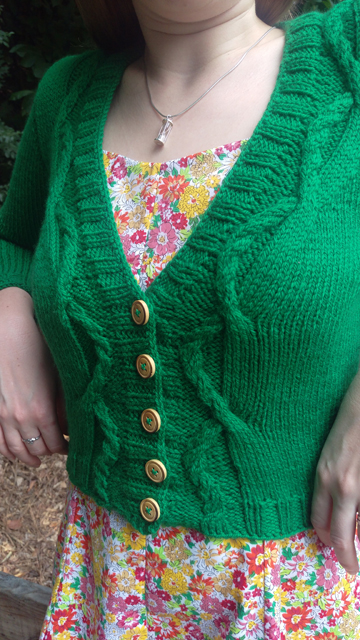
I think that’s everything for the construction and fit of the dress. There’s a lot less to say about the cardigan, although there are a few key things I’d like to share. First, I’m apparently such a tight knitter that I had to go up not one but two—TWO!—needle sizes to get gauge. I’m not sure I would have knit it quite that loosely if I’d had my way, but so far nothing has snagged so I can’t complain about it.

2015-09-10_10_Mashion-Cardigan

Second, and a thing I feel justified in complaining about, is the construction of the sleeve. Now, I’ll admit that this approach to a top-down set-in-sleeve is new to me, but it’s not the short rows that tripped me up (I’ve done them before on my Black Cherry Tart Cowl). No, it was picking up stitches that nearly drove me to madness. It’s not clearly spelled out in the pattern, but you should pick up a stitch in every other stitch, regardless of whether the edge is vertical, angled, or horizontal. That may not seem like a big deal, but one constant that every knitting resource agrees about is that you pick up stitches at a 1:1 ratio along horizontal edges. That’s what I tried doing on this cardigan, and it resulted in too many picked up stitches. I ripped this part out and re-did it several times, attempting to pick up fewer stitches everywhere else, before I realized what had to be done. I understand that designers shouldn’t be expected to hold the knitter’s hand every step of the way, but if you’re going to require the knitter to fly in the face of one of the few universally accepted pieces of wisdom, I’d appreciate it you’d say so up front.

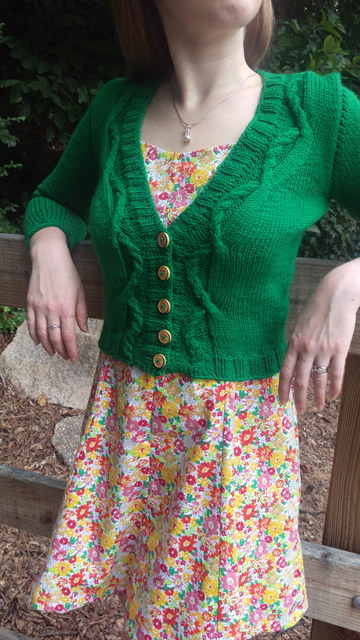
That frustration aside, I’m not convinced about the fit/attractiveness of this set-in-sleeve construction method. Picking up every other stitch results in an almost hole-y pickup, especially around the underarm. The cap shaping seems okay, but I think the way the sleeve connects to the body at the underarm is causing the large wrinkle you see at the bust in every photo where I’ve bent my elbows away from my body.

2015-09-10_11_Mashion-Cardigan

Third, I found that the final cable cross happened in a weird place relative to the ribbing, so I adjusted by crossing later than specified to align with the pattern set by prior crosses. It’s possible this was my fault, since I had issues with the cables shifting too early (detailed here), but I thought it was worth mentioning.

I’m aware that it sounds like I’m being rather negative about the knitting, but I did truly enjoy it and I love the final result. It’s toasty warm even with the three-quarter sleeves, and it perfectly complements the dress. The buttons are easily my favorite part, though. I was going to use plain green plastic buttons, but at the last minute chose these wood-look ones instead and really love have they contrast the yarn but tie into the natural theme of natural fibers and flowers.

Oh, and in case you’re wondering, the name Mashion comes from the name of the pattern, Marion, and the fact that Justin and I embarked on a journey to watch all of M*A*S*H from the beginning around the time I started knitting, and much of it was accomplished during the first couple of seasons. Plus it’s green, which is ubiquitous on a show about Army life.

Overall, I’m so glad to have participated in the Outfit Along and so happy to have two handmade items that I know I’ll wear because I know I can wear them with each other if nothing else.

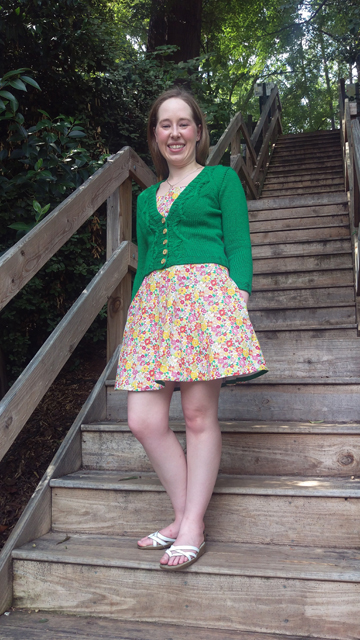
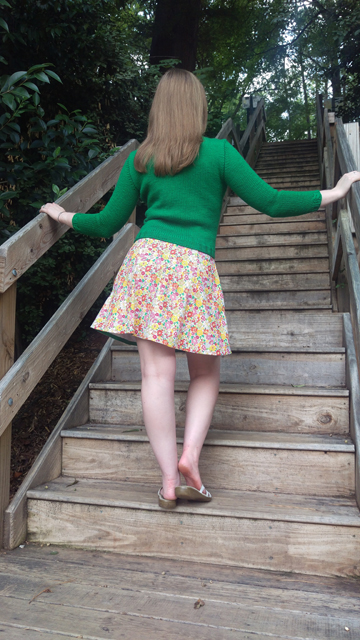
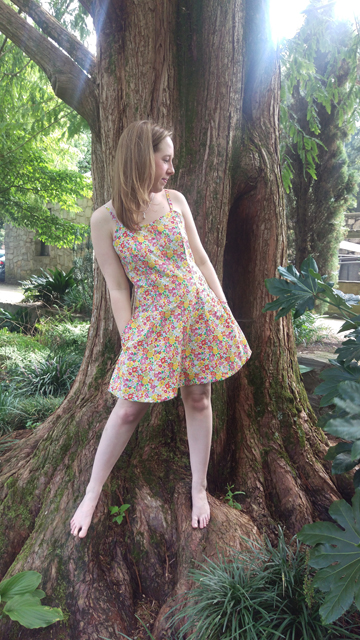
I’m also really happy to be following along with Gillian’s Better Pictures Project, which is aimed at taking better blog photos even if you don’t have a fancy camera or fancy training. This month’s prompt was to step away from the blank wall and take pictures out and about. This is something I love to do anyway, so it wasn’t out of my comfort zone to visit the Raleigh Rose Garden for these photos. And, in an effort to increase the number of usable photos that came out of the shoot, I had Justin take a ton. People, he took 187 photos. Is that not crazy? Here are several more that I liked:

2015-09-10_13_Garden-Party-Dress

2015-09-10_14_Garden-Party-Dress

2015-09-10_15_Garden-Party-Dress

2015-09-10_16_Garden-Party-Dress

2015-09-10_17_Garden-Party-Dress

And tied for absolute favorite:

2015-09-10_18_Garden-Party-Dress

2015-09-10_19_Garden-Party-Dress