The Great Paper Purge, Part 1

How much paper do you keep at home? Do you diligently recycle flyers and shred credit offers, or do you find receipts constantly piling up on end tables, nightstands, and the kitchen counter? Do you keep just seven years of personal tax documents, destroying the oldest return each year after you file a new one, or do you still have pay stubs and W-2s from a part-time college job almost 10 years ago? Do you keep a log of car maintenance, or do you rely on a heap of invoices from every oil change and tire replacement to keep track of what you’ve done and what you haven’t?

Since I’m writing about it, you can probably guess which boat I’m in. I’ve got it all. I have pounds of paper of every conceivable kind. Fortunately, I haven’t had too much trouble keeping it organized: most of it is neatly sorted into labeled hanging file folders, although some of it inevitably collects on clipboards and in baskets around the apartment. Unfortunately, I’ve taken an overly zealous approach to saving things since I moved out and got married in 2009, which means I have whole folders full of papers that I don’t really need to keep.

Then about a month ago, I started a new job and got my own office for the first time in my working life. I was told that it had been cleaned out before I arrived, but I quickly discovered that this was not the case. The woman I inherited it from, who had been with the company about 10 years and quit a couple months before I came on, had an attachment to paper records coupled with a complete lack of an organizational system. I spent the first two weeks just wading through shelves and drawers jammed full of manila folders, opened envelopes, and scraps with notes written on them. (I also found personal items like nail files, open packets of water flavoring, and partially used lip gloss and perfume—eww!—but that’s neither here nor there.)

Attempting to sort through someone else’s work clutter and general detritus cast my own paper situation in stark relief. Faced with a mountain of paper—some of it half a decade old—it’s hard to know what, if anything, is important. I realized as I never had before that the longer I wait to do it, the longer and more unpleasant it will be to do. Plus, I’m not planning to live in this apartment forever, so at the very least I’d like to avoid hauling around unnecessary documents (again). Paper’s heavy!

Breaking the project down into more manageable tasks helped, and I accomplished a lot in a couple of hours the course of a week. Here are the steps I took:

1. Find a large, clear surface and round up documents. When I want to spread out, I prefer to work on the floor, but if your dining table or desk is large enough and clean enough, more power to you! You could even use your bed, as long as it’s made. If you keep things in a stationary file cabinet, it’s probably easiest to stay in whatever room is closest to it. Once you’ve got a safe place to make a mess, grab the accordion folder, banker’s box, or hanging files that keep your important papers, then gather any unsorted mail, notes posted on the fridge, and scrap papers on the desk.

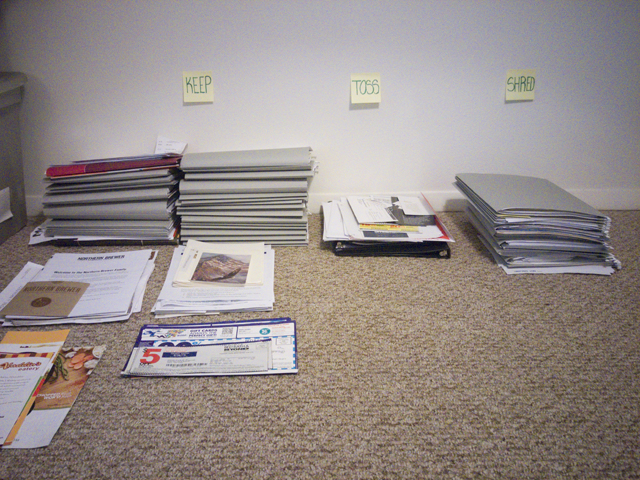
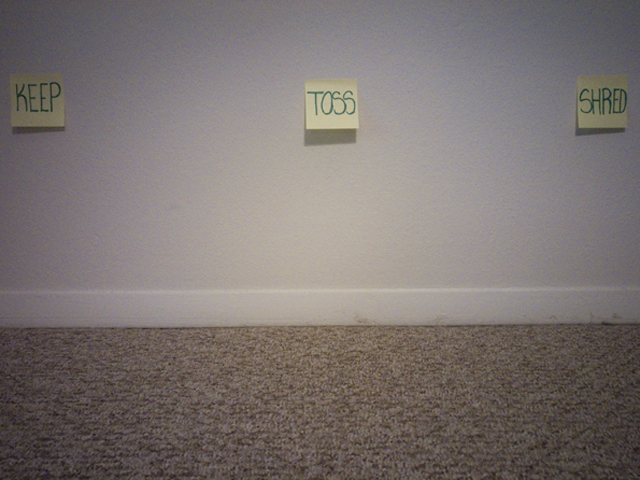
2. Designate three piles: keep, shred, and toss.

2015-07-20_01_Keep-Toss-Shred-Setup

I labeled my piles, because I wanted to be 100% certain I didn’t lose track of which pile was which halfway through the exercise, especially if I got interrupted unexpectedly; you’re not obligated to stick Post-It notes to your wall like I did.

Individual papers went into the keep pile if I definitely needed to keep them; folders went into the keep pile if I knew or suspected there was at least one important paper in them. When in doubt, send it to the keep pile—you can (and probably should) do a second review, so putting it here doesn’t mean you’ve absolutely committed to keeping something for ever and ever. Sensitive documents that I didn’t need to keep went into the shred pile; non-sensitive documents went into the toss pile.

Not sure what you should keep and what you should dispose of? Me neither. That’s how I ended up in this situation. Lucky for you and me, Consumer Reports has a handy guide for what documents to keep and how long to keep them, the IRS has a guide for how long to keep tax documents, and House Logic has a more detailed rundown tax- and investment-related documents you’ll want to keep, for how long, and why you might need them. Don’t forget to check with your bank/credit union, insurance carriers, etc. for more specific information, as their requirements may differ from the general guidelines provided elsewhere.

Once I had permission to get rid of things, this…

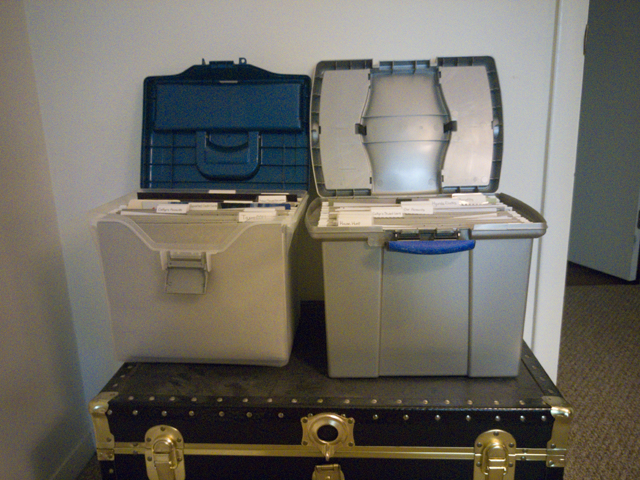
2015-07-20_02_File-System-Before

…quickly turned into this:

2015-07-20_03_Sorting-in-Progress

3. Recycle the toss pile, and savor a little (or a lot) of shredding. A couple of years ago we bought a seven-sheet cross-cut shredder designed for home use for about $40, and we don’t regret the expense. It shreds plastic cards and staples no problem, which is a nice plus (and pretty common in consumer shredders these days). The shredder can overheat if used for a large amount of shredding at once, but shredding in smaller batches with short breaks in-between helps, and letting the device rest for 30 minutes if it stops working always solves the problem. If you don’t have a shredder, find out if your workplace, your bank, or your city has shredding events. While not as convenient as home shredding, they usually have only have minimal requirements (like how much each person can drop off or how it should be delivered) and they’re often free.

I’m going to be 100% honest: I optimistically thought that I could knock out this task in an evening or two of dedicated shredding. I grossly underestimated how much there was to do and overestimated how sturdy our little shredder is. Don’t get me wrong, it fought like a champ. But I tripped the circuit on the motor every single time I sat down to shred. The task definitely dragged on, but I kept reminding myself how much easier it would be moving forward if I created a streamlined system once and for all.

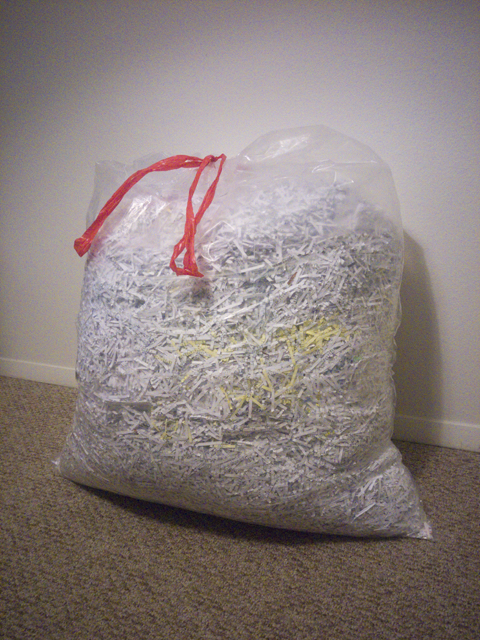
In case you think your own paper Everest is insurmountable, or you just want the satisfaction of knowing that there’s someone out there as badly off—or worse—than you, let me present my own wood pulp behemoth:

2015-07-20_04_Shredding-After

That’s not a kitchen trash bag; that’s a lawn-and-leaf bag. It weighs 13 pounds. It doesn’t even include the stacks and stacks of things that went straight into the recycling bin.

4. Organize what’s left. Actually, pat yourself on the back first, because at this point you definitely deserve it. Then, take a look at what you’ve decided to save, and assess whether your current storage solution is working. I had no complaints with my hanging file folders inside a portable plastic file box, so I decided to stick with them. You might decide that you’d rather switch to an accordion file, a filing cabinet, or some other solution. You might consider re-purposing an unused or under-used storage solution you already have. If you don’t have something like that, now’s the time to make a list of the things you need for your ideal storage system so that you can start shopping around.

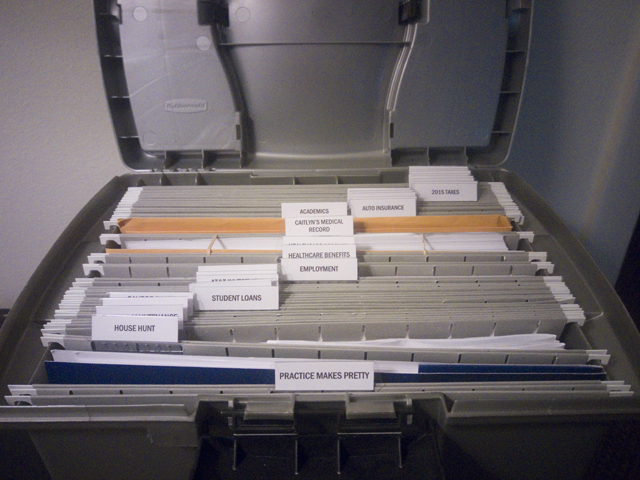
I decided to replace my handwritten labels with nice, neat typed labels. I didn’t do anything fancy like color-code them but you certainly could—maybe as a reminder of how often they need to be cleaned out? I used this opportunity to do a second review of everything, which allowed me to consolidate some files (like all of my academic records) and separate others (vehicle financing and property taxes versus vehicle maintenance records). I was able to shred a couple more small trash cans’ worth of unneeded documents as a result.

2015-07-20_05_Old-Handwritten-Labels

2015-07-20_06_File-System-After

I moved all of our product manuals and warranty documents out of one overstuffed folder and put them into sheet protectors, organized by room, in a three-ring binder designated “home stuff.” It’s not a perfect solution yet, since the sheet protectors aren’t designed for multiple thick booklets and the binder itself is too small, so I’d eventually like to get a beefier binder with envelope-style pockets so that nothing slips out of the top.

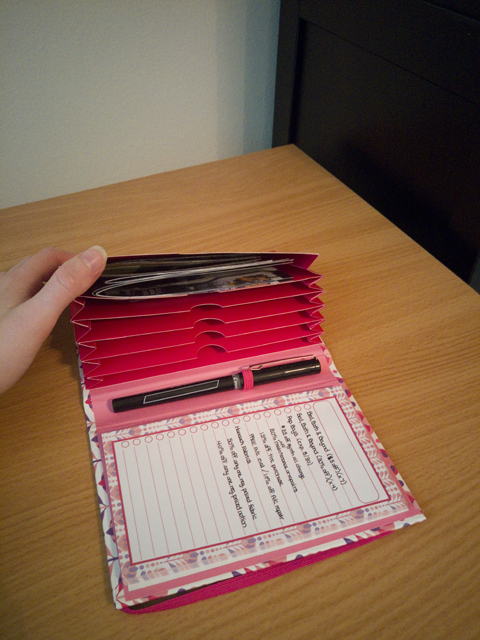
Finally, I stole borrowed a page from Sherry Petersik’s book and bought a little notebook for $5.99 that contains a mini accordion file on one side and a notepad on the other for organizing coupons. I made a list of the coupons I have and their expiration dates before sliding them into the pockets and tossing the whole shebang into my purse. As I use the coupons (or find that they’ve expired) I’ll cross them off the list. If/when I eventually run out of paper, I can just glue in a new pad.

2015-07-20_07_Coupon-Keeper

5. Optional (but highly recommended): Vacuum! Seriously, I did all of my shredding in our office and still ended up tracking little bits of paper all over the place.

When all is said and done, to the casual observer it probably doesn’t look like anything has changed. But after thinking hard about whether I really need each and every sheet, it’s a lot easier to assess my mail and decide what needs to stay permanently, what needs to hang around only temporarily, and what can go straight to the bin. I expect to accumulate paper at a much less alarming rate.

So, are you motivated to clean out your hard copy files? Have any suggestions to make my system even better?

Fixing a (Knitted) Cable

When last we left the Outfit Along, I was lamenting the fact that I made the cable on either side of the front opening travel too soon, which meant that it wasn’t in position to line up with the pattern on the bottom band. I could have modified the pattern on the bottom band—in fact I did try it, but I didn’t care for how it looked—but in my heart of hearts I knew it would bother me. So I set out to fix it.

Since my cable was not crossed in the wrong direction, instructions for duplicating stitching over it or (egads!) cutting into the knitting to reverse the crossing were not going to solve my problem. Instead, I learned that you treat it like any other mistake: isolate the offending stitches, drop them off the needles, and then gently tug free the strand of running yarn on each row until you get down to problem row. Correct the mistake(s), then use your knitting needles to re-knit (or a crochet hook to latch up) the stitches until you’re back on the working row.

I had very much hoped to photograph my steps, but the lighting just wasn’t cooperating. Instead, may I recommend Yarn Harlot’s and Twist Collective’s handy photo tutorials? I referenced both and would definitely recommend them if you find yourself in the same boat as me.

To their excellent advice, I would add the following four suggestions:

  1. Thread a DPN through the target row of the isolated stitches. Don’t worry if you don’t catch all of them, or you pick up the wrong arm of a stitch. Once you’ve unraveled most of the rows and are close to the row with the mistake, you can use one of your knitting needles to slip stitches off and on the DPN until all of them are accounted for and oriented correctly. Keeping them on a holder stops additional rows from unraveling, which is more common for tight knitters like me, and which is the #1 cause of knitting-induced panic around here. No need to make the fix more complicated or stressful than it needs to be, right?
  2. Count each loose strand of running yarn as you unravel it to make sure you know what row you’re on. Cables can be difficult to read, especially if they haven’t been blocked yet and are all scrunched up under their own tension. I had a pretty good idea about where I went wrong in the cable chart, but I made sure to count each row I unraveled to be sure I landed on the correct row for my fix. It also allowed me to confirm that the fix was happening on the side of the knitting that I intended (in this case, the public side) and that when I went to reknit I knew exactly where to pick up the pattern in the chart. The last thing I wanted was to go through all of this trouble only to be off by one row the whole way through and have to do it all over again.
  3. Use a smaller needle to hold the stitches to be worked; use the needle size needed to get gauge to work them. Even though the section of sweater I was dealing with was 9 stitches wide and worked on US 10 needles, it was tight and difficult to maneuver. I was concerned that in every row, the first few reknit stitches would be correctly sized and tensioned, but the last few would end up too tight and too small as I struggled to catch the dwindling span of the running yarn for the row. To mitigate this issue, I put the stitches to be worked on a US 8 DPN, and I did the actual knitting with a US 10 DPN. This did mean that each time I successfully reknit a row, I had to transfer the new stitches from the US 10 to a US 8 to work the next row, but the extra time was worth it because the reknit stitches are a pretty close match to the surrounding stitches that were left untouched. If you use interchangeable circulars, you could put a different sized tip on each end of a longish cord and eliminate the transfer step.
  4. Use a cable needle or DPN to rearrange the stitches for the cable cross, and then knit the entire row. If you try to knit part of the row, move stitches to a cable needle for the cable cross, knit half the cable, transfer the stitches back and knit them (or knit directly from the cable needle), and knit the remainder of the row, you’re in for a struggle. The cross is liable to be tight to the point of straining, the stitches will be scrunched up and difficult to work, and there’s a good chance you’ll end up stabbing yourself. Again, it takes a little extra time to rearrange things, but the payoff in appearance (and painlessness) is worth it.

The process was time-consuming, but the result was deeply satisfying: the cables are now correct, and it’s nearly impossible to tell that they were ever wrong; any remaining vagaries in tension/stitch size can be resolved during blocking. Best of all, by being patient and following the four steps above, I was able to avoid any weeping, gnashing of teeth, or questionable language. (I also wasn’t tempted to turn to booze and/or ice cream, which most certainly would not have improved the outcome.)

Have you ever had to fix a mistake in a cable? How did it go? Do you have any tips to add?

Wardrobe Architect Week 14: Overcoming Editing Hurdles

It’s fitting that the final assignment of the original Wardrobe Architect series would be about editing. As a writer, I’ve heard all the aphorisms and pithy advice about the importance of revision, that the real work—and real success—comes not from writing but from re-writing. Once you have both the idea and the raw material, you have to lay one over the other and trim away all the little bits that don’t line up. You change one to fit the other; in the end, you’ve changed both. It makes sense that cultivating a wardrobe is much the same: you’re continually trying to shape what you have to match what you want, or reconsidering what you think you want in light of what you’re actually buying/making.

I know these things, but man! is it hard to live them. This is probably because, as a writer, I am a terrible editor. Wait, I retract that statement in favor of this one: I am a terrible self-editor. I can be absolutely brutal when I’m revising someone else’s work, scratching out words and rearranging sentences or paragraphs with cruel efficiency, with no regard for the author’s feelings. But when it comes to my own work? I’m basically useless.

You would probably assume—completely understandably—that this is because I think my work is too precious to be changed, or because I can’t take criticism. Not so! (Okay, a little bit so for the second one, but I’m working on it.) Really, it comes down to how I write. I’m a slow writer. A really slow writer. (The last time I clocked myself on a creative writing assignment was in college, but I remember that it took me an hour per page. The pages were double-spaced.) I deliberate over each sentence, each word, because I crave coherence, and I need each part to hang together with all the rest. I can’t move forward if something doesn’t make sense or doesn’t flow. I tend to edit as I go; in fact, I tend to edit before anything actually makes it out of my brain and on to the page screen. So when I come back afterward to do that all-important second pass for revision, it’s hard to imagine things written any other way.

It’s a little bit like that with clothes, for me. I don’t shop for clothes very often. I never have. I usually buy things in small groups: a pairs of slacks and a couple tops for work, a handbag and a pair of shoes to match a dress I own, or a sweater in three different colors. The items in these bundles usually work with each other, but they don’t always work so clearly with other things I have. Sometimes I’m in a pinch for something specific, like warm tops in winter, or there’s a sale, so I buy something that’s not quite right. I don’t usually fall prey to trends (at least not in the sense that I-must-have-this-only-because-it’s-popular), but I’ve certainly bought things I didn’t love to fill a hole or score a deal without a lot of consideration for the long-term.

And because I don’t buy clothes very often, it’s hard to get rid of things. It took time to accumulate what I do have, so if I give something up, my brain reasons, it will take a long time to replace them. It’s faulty logic, of course. If I’m barely wearing something anyway, and I don’t particularly enjoy it when I do wear it, it’s no great hardship to give it up. Even if it were, if I have a clearer idea of what I want instead, I can deliberately seek out or make a well-made, well-fitting replacement, rather than hoping to stumble upon something or continuing to fill up my closets piecemeal with whatever seems important in the moment.

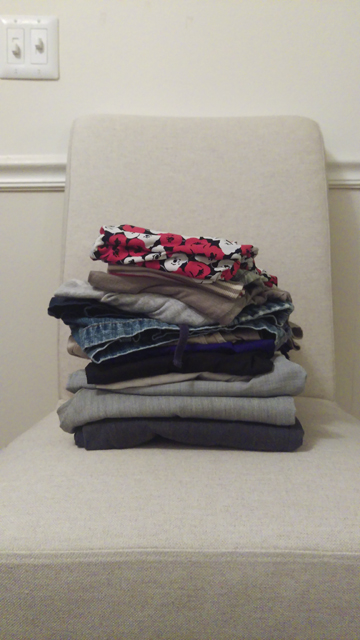
After repeating these things to myself a few times, I scoured my closets and drawers and came up a little pile of clothes.

2015-07-08_01_Clothes-for-the-Outbox

The only thing I’m really bummed about are the two pairs of light grey slacks toward the bottom. They’re two different cuts and fabrics, but they’re identical to several other pairs of slacks I have in black and brown. But for some reason, they’re just tighter in the waist and shorter in the rise than the other colors, which makes them just too snug for comfort. I can only assume that they’re on the extreme end of the sizing tolerance. If I thought I could let them out I would, but they’re not exactly a high-end brand, so they don’t really have seam allowances to work with.

To be safe, I’m not going to get rid of these garments immediately. Instead, I’ll let them marinate in the Outbox until I have a chance to go to a used clothing or thrift store. That will give me a chance to rescue anything if I change my mind. But most things that go into the Outbox don’t come out again, so I’m pretty confident I’ll finally be letting these go. It feels a bit tough now, but I know it will be a relief later. I’m looking forward to things that will take their places, because they’ll be thoughtfully planned and carefully sewn me-mades.

Wardrobe Architect Week 13: Downloadable Planning Worksheet

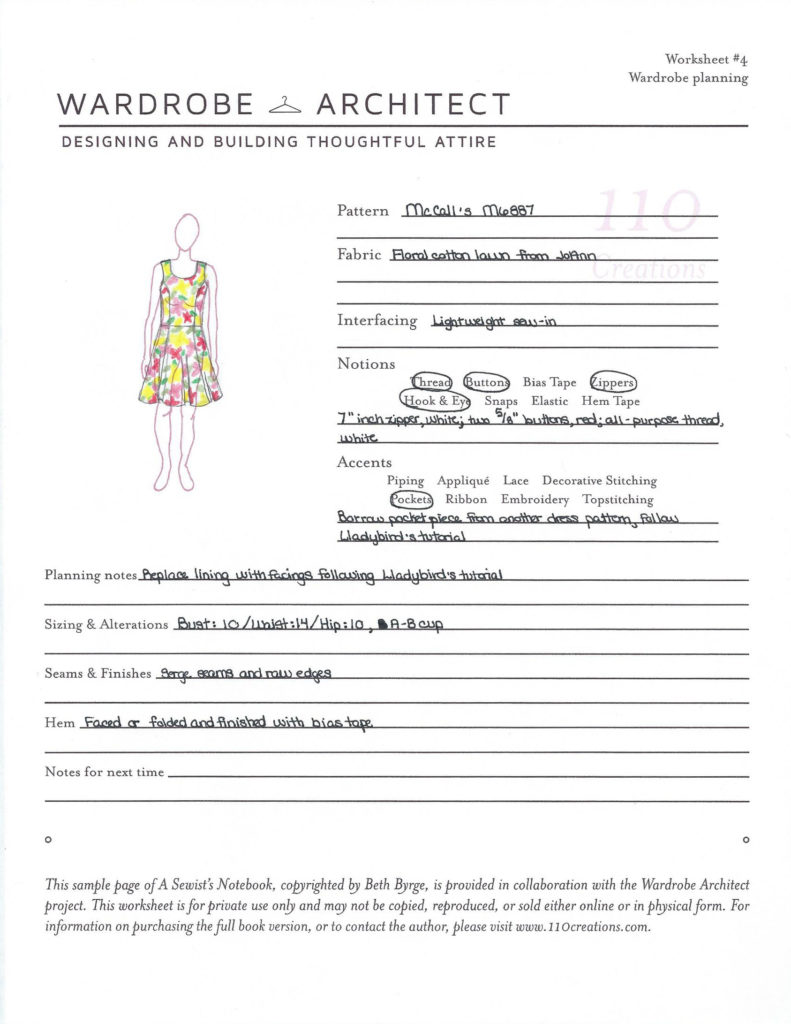
Since this week’s “assignment” was originally just a giveaway with a bonus (free!) one-page downloadable worksheet to plan sewing projects, I decided to print one off and use it to jot down my intentions for my OAL 2015 dress. I’ve gathered most of the things I need already (although I realized I’ll probably need to pick up some lightweight sew-in interfacing, since I’m not sure what I have lurking in my stash at the moment), but it gave me a chance to look over the pattern and anticipate the next steps, like what size I intend to cut and how I want to deal with seams and such. Plus, I got a chance to bust out some long-neglected color pencils and do a little drawing.

2015-07-01_1_Sample-Worksheet

Cute, yeah? Figuring out what size I want to sew was the hardest part, because the back of the pattern envelope lists the finished measurements for the bust and hip only, and it’s the waist that usually trips me up. I had to carefully unfold the tissue so that I could find the marking for the finished waist size. With any luck, the largest size in the envelope should be big enough. But I’m planning to muslin at least the bodice before I cut into my fashion fabric, just to be sure. I have Friday off from work, so I’m going to try to do the bulk of the sewing then. Wish me luck!