Everyday Joggers | Itch-to-Stitch Tierras

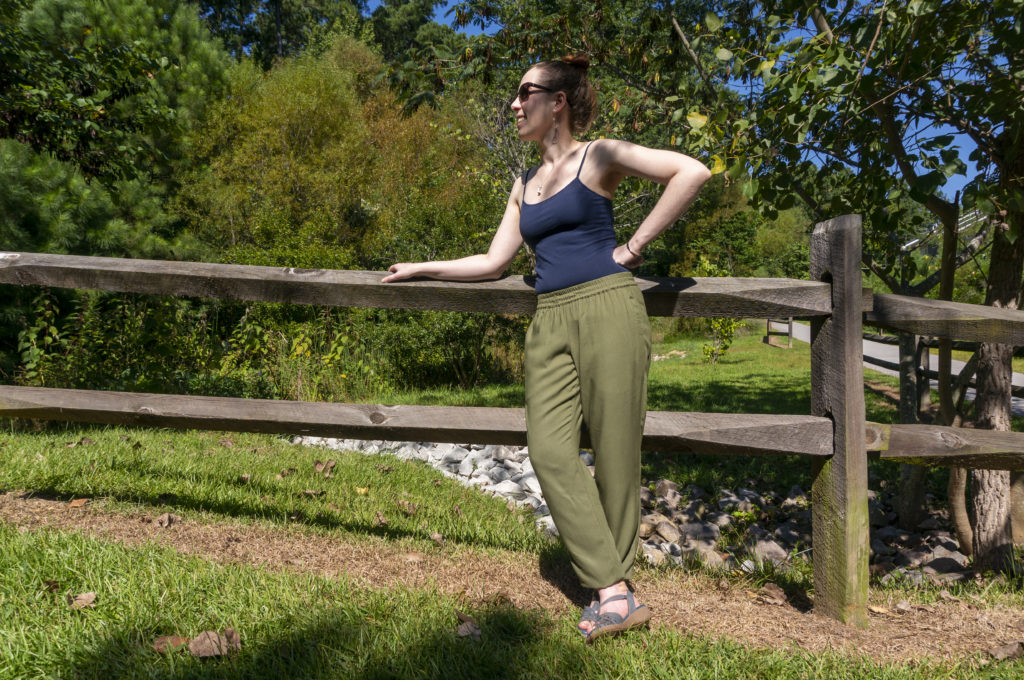
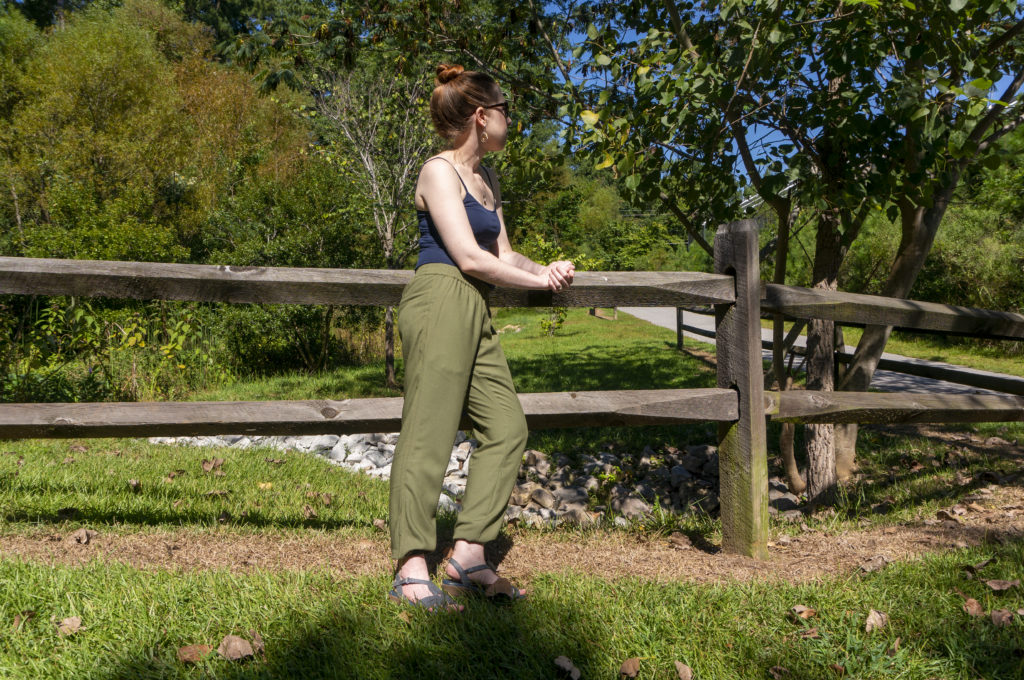
After finishing my Colette Zinnia skirt, I had enough of the sage green fabric leftover for one more project. A top would have been the obvious choice, but this sleeveless number is already pretty much perfect for me, I wasn’t feeling a boxy tee, and besides, I had a more pressing need: comfortable pants. Since I started working from home, I’ve been rotating between the same identical pairs of black leggings and my tartan pajama pants; the latter have been worn and washed so many times they developed a hole in the bum. While they waited to be repaired, I decided to see if I could eke out a pair of pants from my remaining mystery yardage.

Remembering that joggers had had a moment (more than five years ago, geez, am I slow to a trend or what?), I did a little searching around and landed on the Itch-to-Stitch Tierras, which had three things to recommend them:

  1. Designed for lightweight wovens
  2. Low-rise fit right out of the virtual envelope
  3. Deep, deep pockets

Bonus: Itch-to-Stitch is based in North Carolina, in nearby Sanford. Hi neighbor!
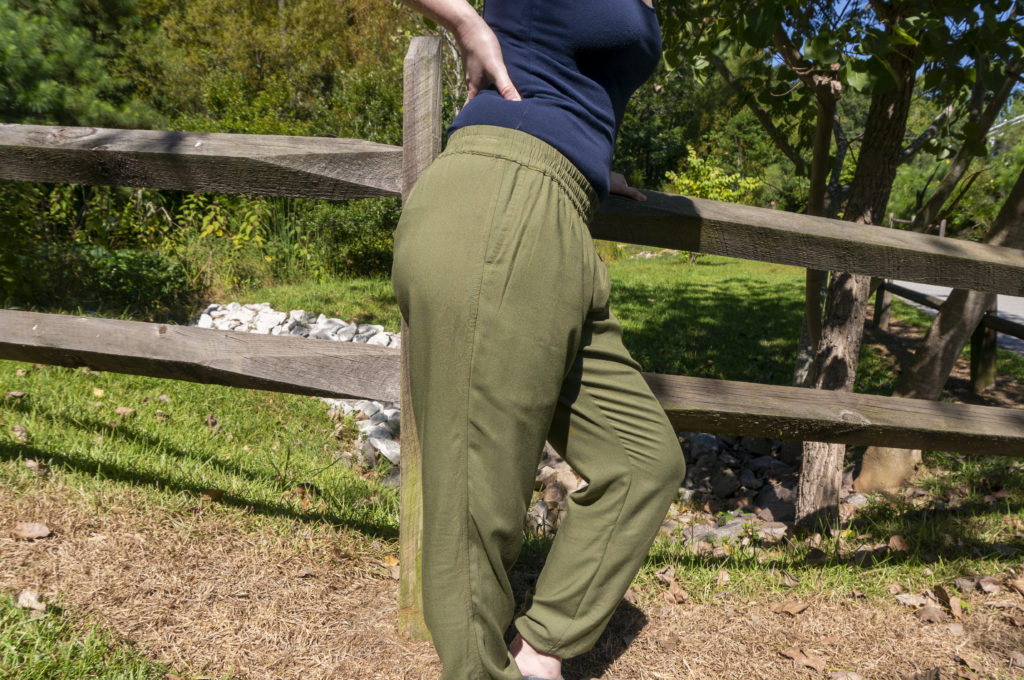
When I say the Itch-to-Stitch Tierras pockets are deep, I mean that wrinkle some six inches below the pocket opening is the bottom of the pocket bag.

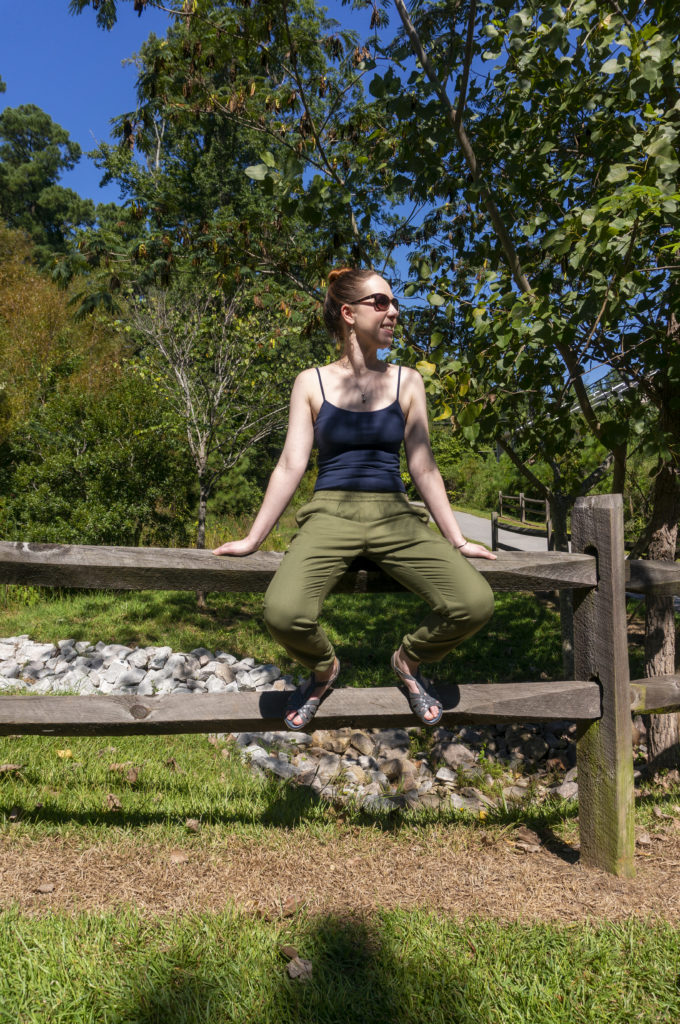
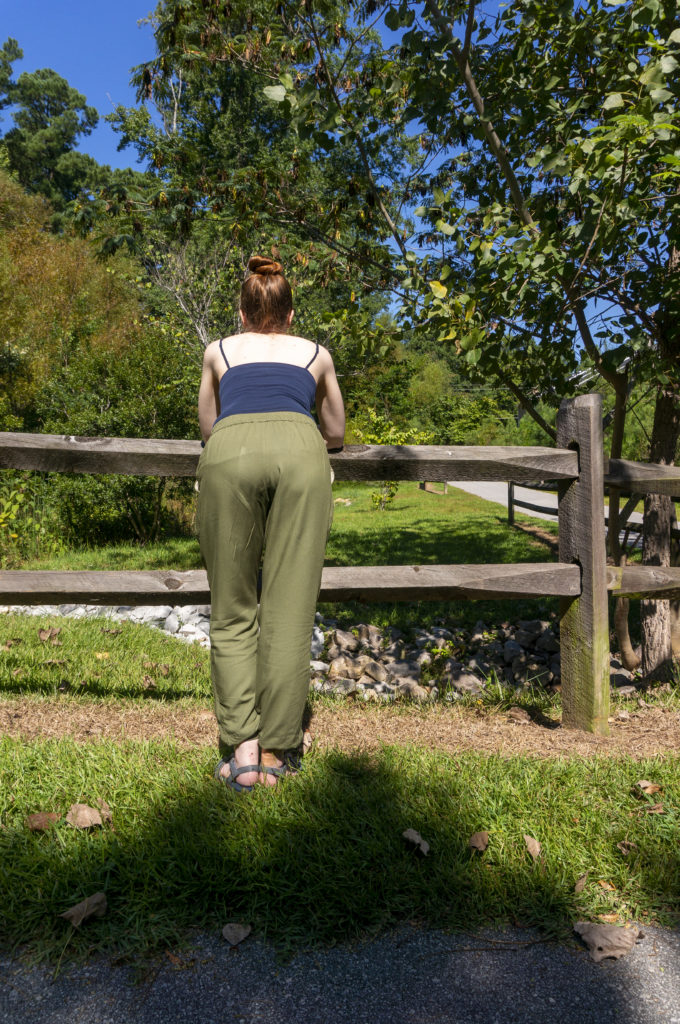
The PDF pattern went together without any issues, and the provided instructions were quite thorough, including—hallelujah!—the finished garment measurements. Based on those measurements, I opted to shorten the inseam by a whopping 4″ and raise the front and back rise by 1″.

Now, I well and truly hopped on the low rise train in high school and I’ve never looked back, but after comparing the rise measurements to several pairs of stretch woven pants I already own, I was concerned they’d be too low even for my tastes. I’m only 5’2″, so if you’re average height or above, definitely check the rise before diving in.

Since my changes were significant, I made a muslin using an old cotton sateen bedsheet. It was the closest match I had to my fashion fabric in terms of weight and drape, but it wasn’t an objectively close match. I figured if the muslin came out okay I could wear them as pajamas, and if it didn’t, I could still cut the fabric down into pocket bags or handkerchiefs or something.

Let me tell you, the muslin very nearly did me in. Not because anything went wrong—again, the preparation and assembly instructions are clear—but because the fabric was different enough that the practice pants were crazy unflattering. They stuck out at the hips, stood away from my thighs but clung to my calves, and generally looked horrible to me. I wavered mightily, not wanting to waste the last bit of my nice fabric on wadder.

Justin observed that the altered length and rise, the two things I was actually checking on the muslin, were, in fact, good. He persuaded me to press onward, and he was right: the thinner, drapier fabric looks and feels loads better than the muslin did.

I briefly despaired about running out of fabric for both pieces of both pockets, then I remembered I had a bit of cream rayon bemberg leftover from this other sage green project that I could use for the pocket facings, which are invisible from the outside. The bemberg is a nice match in weight for my main fabric and a pleasure to slide your hands into. Hooray for saving scraps and shopping le stash for creative solutions!
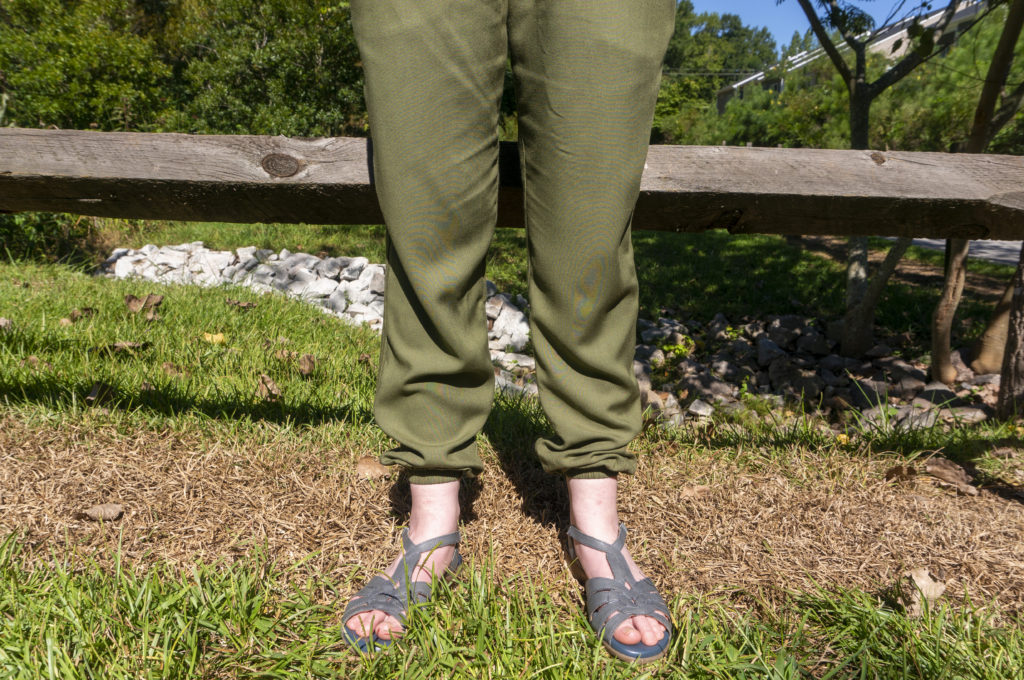
I used the prescribed 1.5″ elastic for the waist, but sized down to a 3/4″ elastic for the cuffs since it’s what I had on a hand and my slightly wobbly stitching meant that the recommended 1″ elastic would have been a tight fit. For both the waistband and the cuffs I attached the casings to the inside of the garment and then wrapped them to the outside and topstitched down. This is the opposite of what the instructions call for, but when topstitching I prefer not having to worry about whether I’m catching the casing on the inside, so this has turned into a normal adjustment for me.

I stitched buttonholes in the waistband for a drawstring per the pattern, but after wearing them several times I don’t think I’m going to bother with one; I don’t have another self fabric left for one, and I doubt I’d be able to find cord in the right color. My buttonhole placement is off, which means the topstitching on the waistband meander drunkenly to avoid sewing through them, but I love the overall look of the waistband too much to care. I dig the slightly sporty vibe it gives, I guess?

Honestly, the Itch-to-Stitch Tierras have been such a surprise to me all around. While I was specifically looking for a jogger silhouette, I more than half expected to feel meh about the outcome and never actually wear them. Instead I reach for them several times a week, often wearing them two days in a row. They’re also nice enough (in my opinion) that they don’t need to be relegated to the realm of house clothes. I personally love to throw them on to pick up takeout and pretend I’m an undercover celebrity.

These pants will continue to see weekly wear as the temperatures slowly cool off. Eventually I’ll want to switch them out for the season to something warmer, like French terry. An excuse to pick up the True Bias Hudsons, perhaps?


Outfit Details

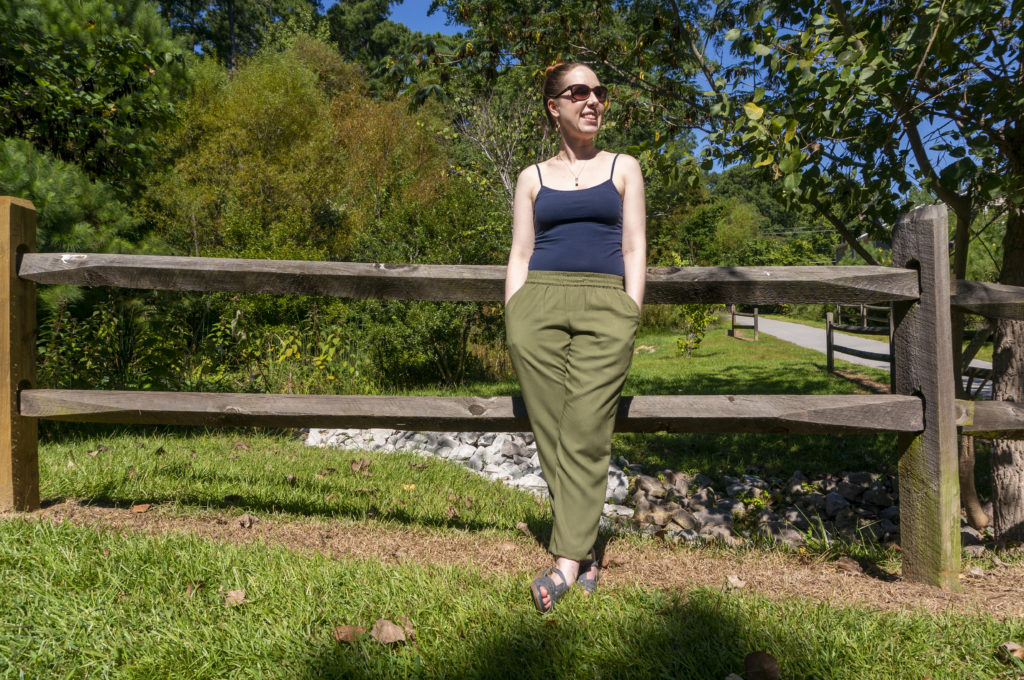
Camisole: Aeropostale | Pants: Itch-to-Stitch Tierras | Sandals: Naturalizer | Sunglasses: Target | Earrings: Gift/unknown | Bracelet: Gift/unknown

A Pocket Full of Posies | Colette Zinnia

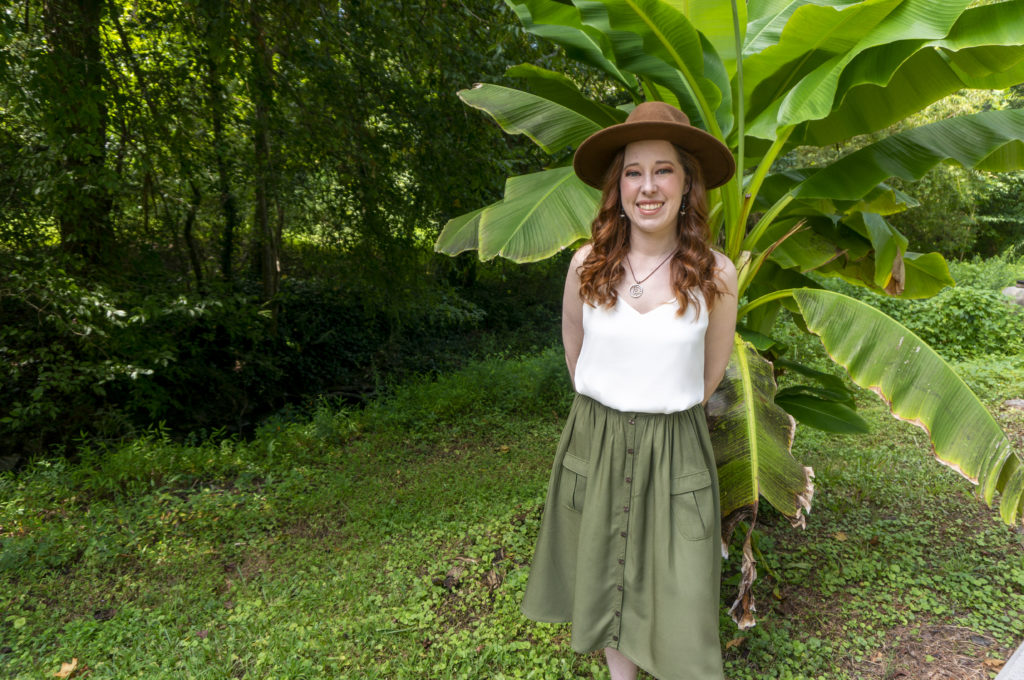
Over the years, my interest in Colette Patterns has waxed and waned. Initially enchanted by the idea of a small, independent sewing pattern company with a cohesive aesthetic, I quickly came crashing back to reality when I remembered that I don’t actually wear close-fitting woven dresses with a vintage vibe. My interest piqued again a few years later when they started offering knit patterns, and again when Seamwork launched, but I never quite loved anything enough to take the plunge. (Although I must say, Leah’s enthusiasm for Seamwork has very nearly convinced me to get a subscription!) I’d already stashed a bunch of Big 4 patterns that I hadn’t cut into yet, so it was hard to justify buying more—and more expensive—patterns.

So what changed? It’s embarrassingly simple, really: I was checking out Freeman’s Creative Craft Supply in Durham for the first time and they had a handful of Colette patterns on sale, a result of Colette announcing they were discontinuing paper pattern production. Unable to resist the combination of a vanishing product + a deep discount + a sense of duty to support the small craft businesses of the world, I scooped up several patterns I’d eyed over the years, including the Colette Zinnia.

I doubt there’s much to say about the pattern that hasn’t been said before by much more accomplished sewists than me, so rather than a review I’ll stick to what I did.

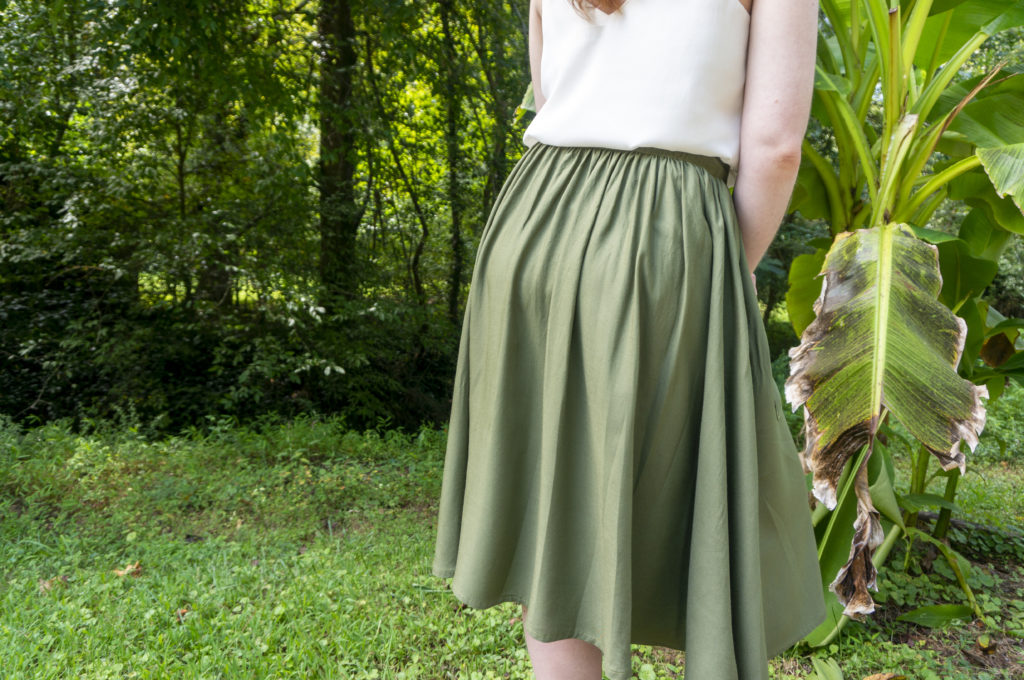
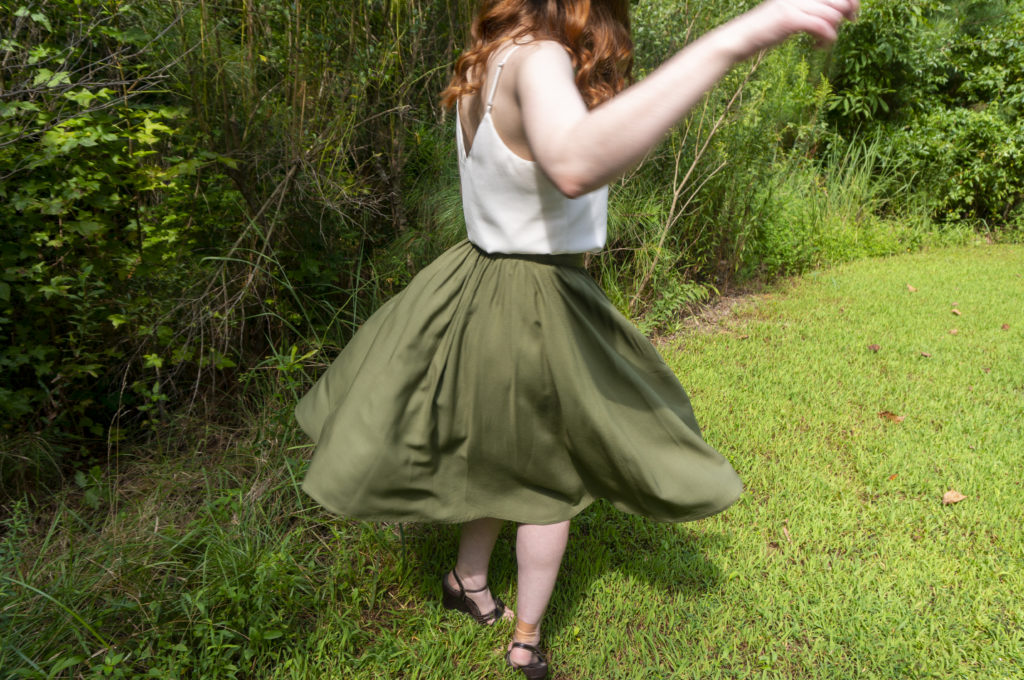
The fabric is something of a mystery, a lightweight plain weave made from natural fiber(s) that both wrinkles and presses easily with heat and humidity; it’s the same fabric as this top. It’s wonderfully pleasant to wear and I wish I had ten more yards of it, but sadly it was a hand-me-down from my mom and I have no idea where or even when she got it. I think she intended to use it for window valances.

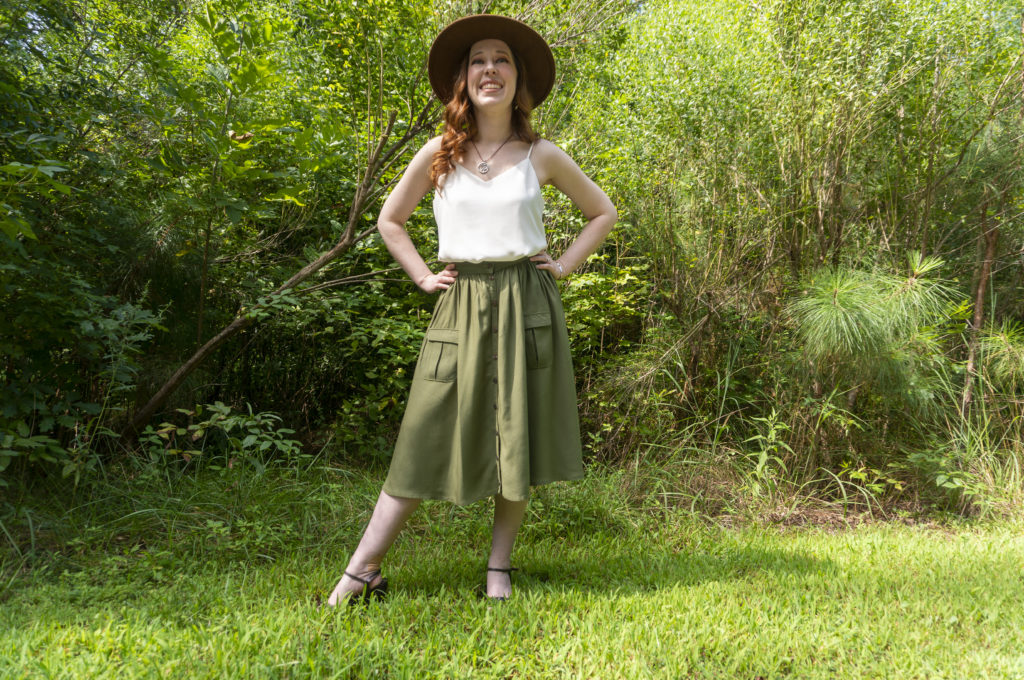
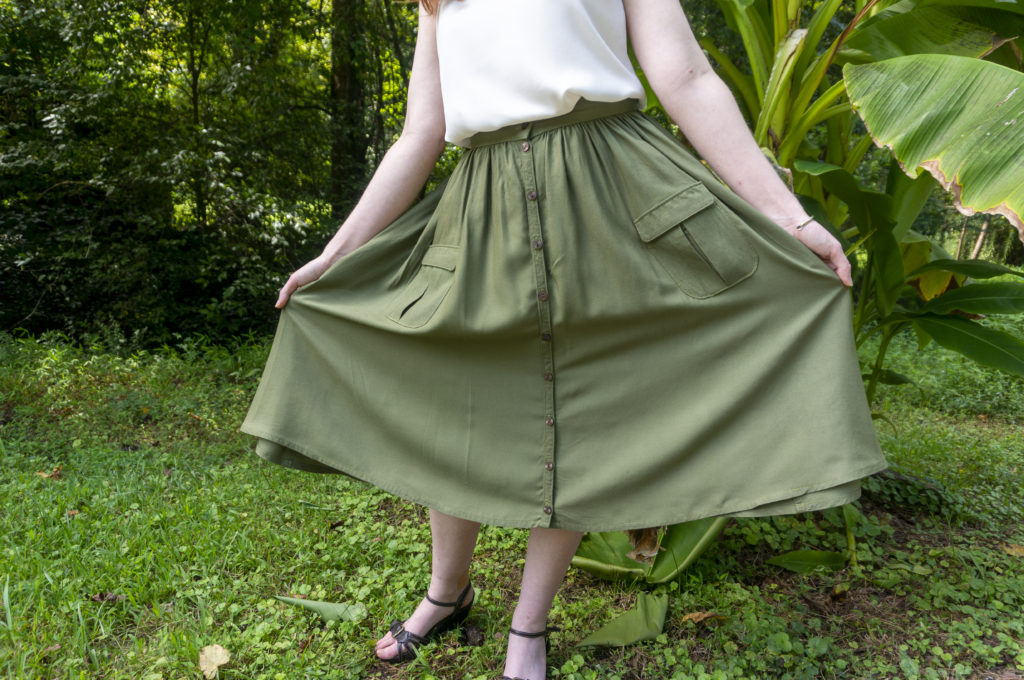
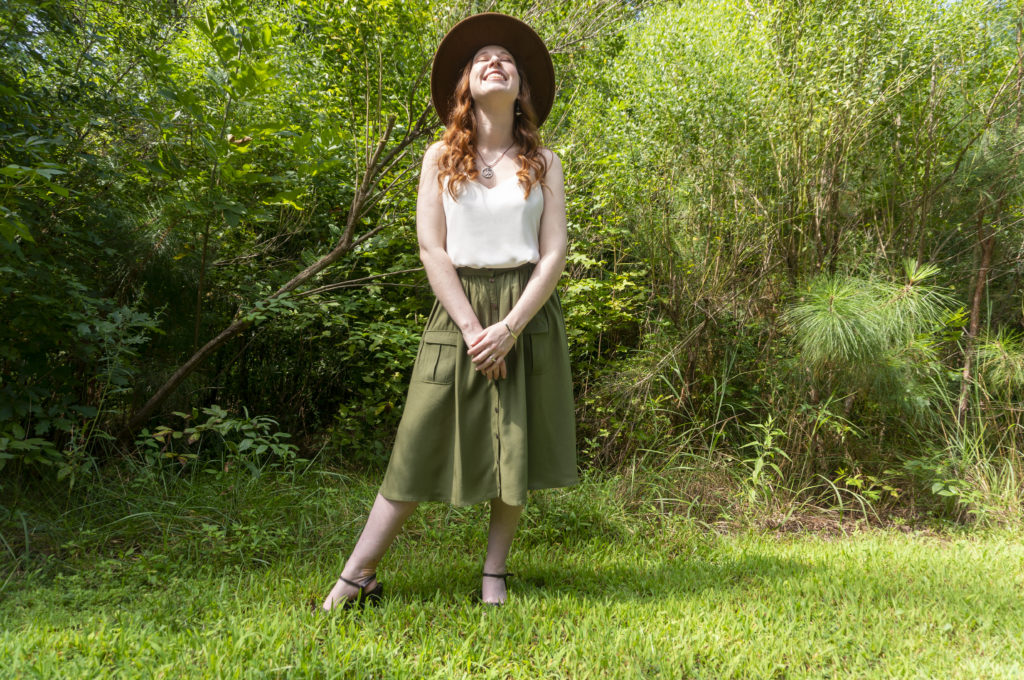
I went with View 1, which has a gathered skirt attached to a waistband, a button placket, and patch pockets with flaps. I cut a size 8, preferring to err on the side of a larger waist since like most people my measurements fluctuate and I abhor the feeling of anything too snug on my midriff. I didn’t bother to adjust the length for my shorter-than-average height since it’s designed to fall below the knee anyway.

To keep the waistband from being too big, I took a page from Cashmerette’s book and added an elastic to the back waist only. I was inspired by this tutorial, but since her construction order is different from that of the Colette Zinnia and I’d already sewn up the side seams—which I French seamed and then edgestitched down to produce a mock felled seam—I had to improvise a bit:

  • Cut the waistband pattern piece apart at the side seam circles to create front waistband and back waistband pattern pieces
  • Add 5/8″ seam allowances to the new front and back waistband pattern pieces
  • Cut front and back waistband from fabric; interface the front waistband piece only
  • Sew front and back waistband pieces together at side seams
  • Attach waistband to inside of skirt (rather than outside)
  • Calculate elastic length using Cashmerette tutorial and cut a piece of 1.25″ no-roll elastic to length
  • Cut two rectangles of fabric measuring 2″ x 1.25″ and stitch one rectangle to each end of elastic
  • Place the elastic along the inside of back waistband and sew the rectangles into the side seams
  • Fold waistband over to the outside and topstitch in place, stretching the back elastic to fit as you sew

Other notes include edgestitching everything, using three rows of basting stitches to gather the skirt, and not interfacing the placket. (To be clear, the instructions don’t call for interfacing, but that seemed odd to me, so I tried it anyway. As it turns out, a narrow cut-on placket doesn’t need it because of the layers of fabric involved, and I ended up peeling the interfacing off before re-sewing it. It seems Colette knew what they were about with this one.)

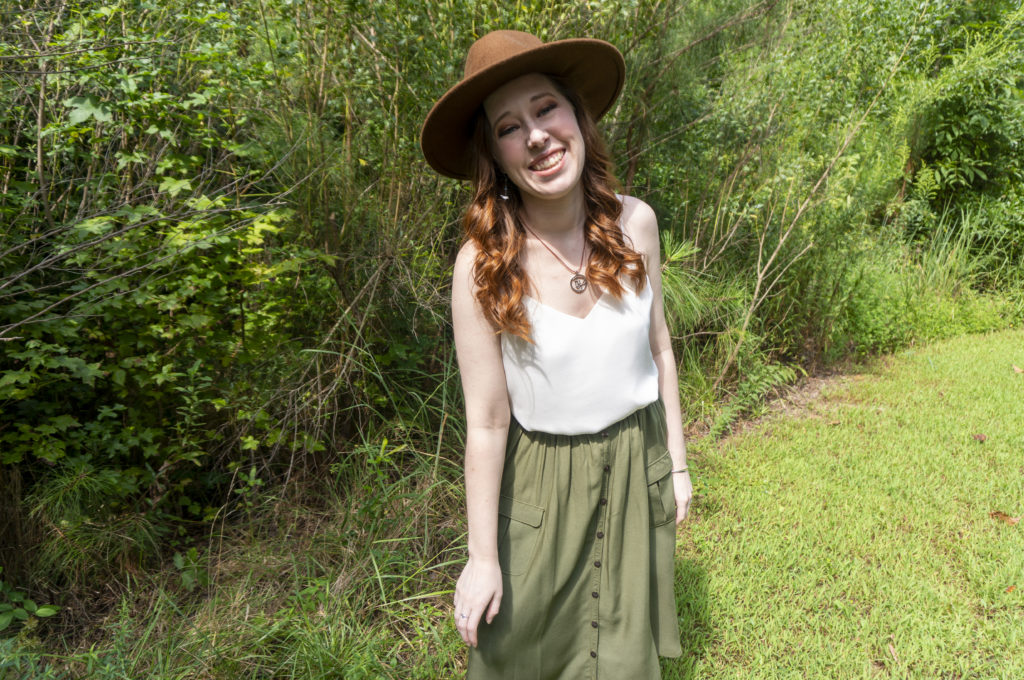
I very much wanted to use buttons from my stash on this one, since I had these cream-and-brown marbled ones harvested from somewhere that looked perfect. But they were 5/8″ instead of 1/2″ (not a huge problem) AND I didn’t have enough (*sob*). I ended up purchasing these two-hole buttons from JoAnn, which are described as brown but are really more of a dark coppery color and have a slightly reflective quality due to the ridged pattern in their surface.

Because the buttons came in packs of four, I had enough to add buttons to the pockets, but opted not to. I figure if I lose any along the way, I’ll have replacements on hand, and I won’t have to steal them off the pockets, leaving behind orphaned buttonholes.

My one regret may be not adding inseam pockets. I love the look of the patch pockets, but I really wish I had a place to put my hands. I even thought about adding some during the cutting-out stage, but decided they would be unnecessary. I have no one to blame but myself for this foolish lack of foresight.

If I were to make the Colette Zinnia again—and I feel like I will—the only thing I’d change besides the pocket situation would be to tinker with that back elastic waistband. I like it in principle, but in practice I should have cut the fabric portion longer so that it can gather/stretch more. Because I kept the original waistband length intact, it (surprise, surprise) doesn’t expand enough to allow the skirt to come on and off without unbuttoning. Because, you know, the original elastic-free skirt wasn’t intended to be taken on and off that way. Go figure. The no-roll elastic might also be a bit aggressive, and it can definitely still irritate when I’m feeling stuffed from the local food trucks.

While I don’t think I’d reach for this skirt every day, as I’m not much of an everyday skirt wearer, I love that it coordinates with a bunch of different tops already in my closet and in my sewing queue. I’m already looking forward to remixing it with other things I’ve made. Three cheers for wardrobe-boosting separates!


Outfit Details

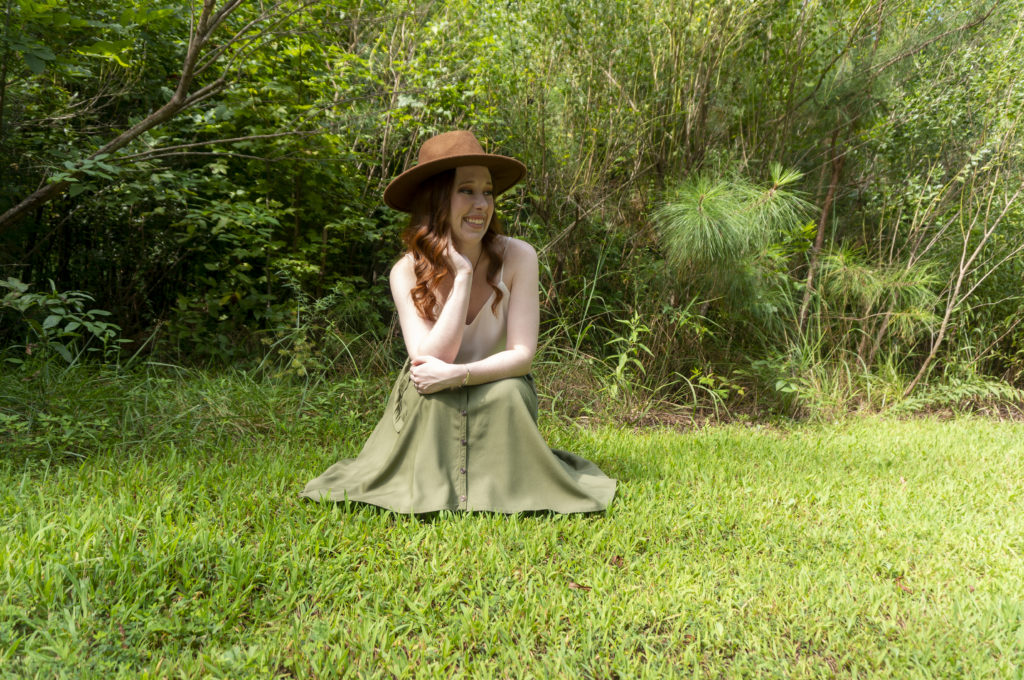
Hat: Target | Camisole: Banana Republic | Skirt: Colette Zinnia | Sandals: Aerosoles | Earrings: Vintage | Necklace: Jenuinely Jeni | Bracelet: Gift/unknown
Perfectly OK Tartan Pajama Pants

Caitlyn seated on a hearth, elbows resting on the knees of her tartan pajama pants, looking to the side and smiling

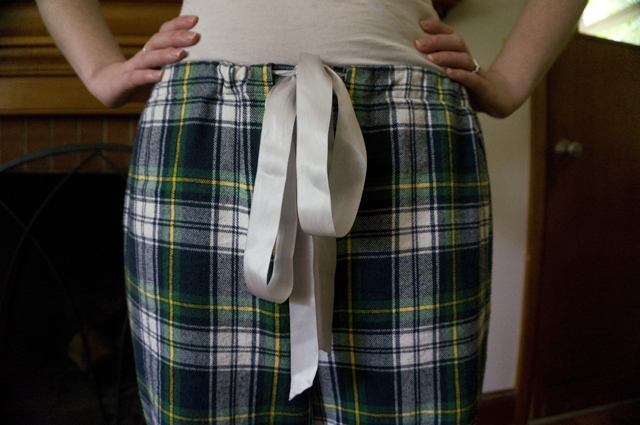
Close-up of tartan pajama pants waistband, which is held up with a silver satin ribbon tied in a bow

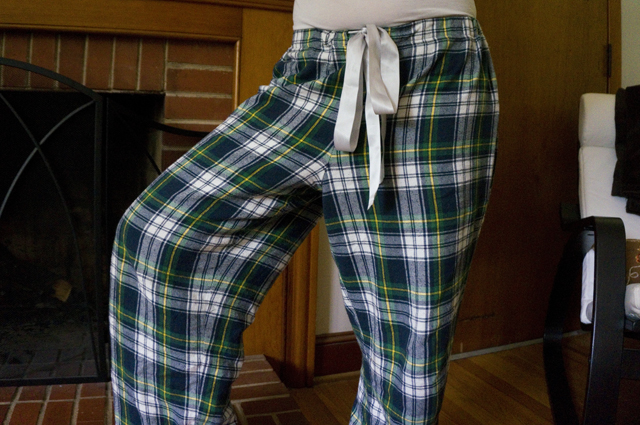
Legs akimbo, showing the fullness of the tartan pajama pants through the front of the hip and thigh

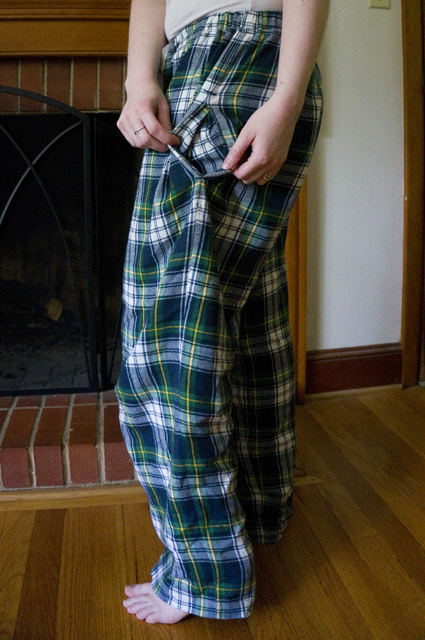
Side view of the tartan pajama pants with the pocket pulled open to reveal tartan pocket bags

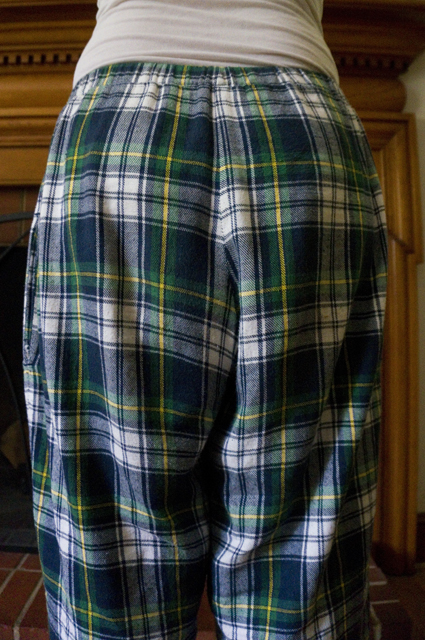
Rear view of the tartan pajama pants showing the stripe matching across the bum

While everyone else is reflecting on the end of the year, I’m scrambling to catch up on all of my 2018 projects! I had hoped to have that done before the holidays, but a combination of work deadlines and other professional obligations, as well as a few seasonal activities, meant I was busy right up until we went out of town for Christmas. I thought I might have time to write during my vacation (the longest I’ve taken since graduating college), but because we were visiting family we were far too wrapped up in eating, sleeping in, watching movies, playing games, and exchanging gifts to have much screen time. I’m not as bothered as I thought I’d be. So what if I have to put off doing any kind of wrap up until mid-January? No one was keeping score but me, and I’ve decided to misplace the scorecard.

The only trouble with being so far behind is trying to remember what I did (or didn’t do). I actually have a lovely sewing planner that my sister gave me—the pages came from this Etsy shop, and she comb-bound it with acetate covers herself to make it more durable—but I have a devilishly hard time remembering to actually write in it. These tartan pajama pants are a great example of a project that would have benefited hugely from taking notes, because they a) were intended as a wearable muslin, b) involved several modifications to a basic pattern, and c) required a significant hack job to fit correctly because of additional alterations I forgot to make.

The pattern is, I believe, Simplicity 1520. I say “believe” because I also have Simplicity 0301, a unisex pattern that was formerly available for free on Simplicity’s site but has since been removed or very well hidden. The reason I passed over the free pattern in favor of a purchased one is because the free pattern has a simple cased elastic and a very generous fit, whereas I was looking for a slimmer cut, a combination of elastic and drawstring, and preferably pockets. The joke’s on me, however, because although S1520 appears to fit that bill, it actually has none of those features—I misread the back of the envelope and ended up with effectively the same pattern.

As best as I can remember, I modified the pattern to include buttonholes at the waist to feed a drawstring through, shortened the inseam at the lengthen/shorten line to accommodate my 5’2″ frame, and marked the placement for inseam pockets using my pocket template (AKA the pockets from Simplicity 1419).

What I notably failed to do was reduce the crotch depth, both because I’m shorter than average and because I prefer to wear my pants (especially my lounge pants) on my hips. I was blissfully ignorant of this oversight until I’d already made the buttonholes (and folded and sewn down the top of the pants to make a casing for the elastic), and I was so annoyed about it that I decided to salvage what I had instead of completely reworking it. That is to say, instead of cutting off the top of the pants at the correct height, making new buttonholes, and folding down a new casing, I lopped off the “waistband” 5/8 inches below the stitching line that made the casing, removed something like 3″ of excess fabric from the crotch, and reattached the “waistband” by stitching in the ditch. My ditch-stitching wasn’t very tidy, but you can’t really tell. The bigger giveaway is that the tartan no longer lines up near near the top of the pants, but honestly far less egregious than the (lack of) stripe matching you normally see in ready-to-wear.

Shortening the crotch meant moving the pockets down as well, but that was a straightforward change, albeit a time-consuming one because I’d already serged the seams. (Ugh, why.) I moved them a little too far down, so they’re not really useful for sticking my hands in. They still work just fine for a phone, so I could not be bothered to move them a second time.

The fabric is a lightweight flannel shirting from JoAnn. To match the tartan, I cut everything on a single layer and used a walking foot to sew my seams before finishing them with a serger. I focused on making sure the horizontal stripes matched across vertical seams, and I feel I was successful; next time, I’ll pay more attention to respecting the pattern repeat and mirroring the vertical stripes as well.

The silver ribbon was a freebie that came tied to the bag of an Aerie purchase. Instead of threading both elastic and ribbon through the casing, I took a cue from Lauren’s Margot PJ Pants and cut my ribbon in half before sewing each piece to the end of a length of no-roll elastic. I thought for sure I was going to love this, but in reality I don’t. It’s a pain to try to cinch the pants and keep the slippery polyester satin bow tied. I can’t decide if I’d rather just elastic or just a drawstring, but this hybrid jobby just ain’t doin’ it for me.

Given how badly I botched the fit initially, I don’t think these are a very good muslin, but they for sure are wearable. I’ve basically been living in them this winter, especially since I switch into lounge pants as soon as I get home from work. I have more of this flannel stashed away—my first cut shrank in the wash and was just too short for pants—that I’m hoping to use for a second cozy project. And since I could use another pair of winter pajama pants, I’ll probably take a second crack at this pattern before finally cutting into a more precious fabric that I’ve been hoarding. (Yes, precious pajama fabric. You’ll understand when you see it.)

Here’s hoping that, in 2019, I can graduate to a level of sewing where I don’t mess up pajama pants. 😂