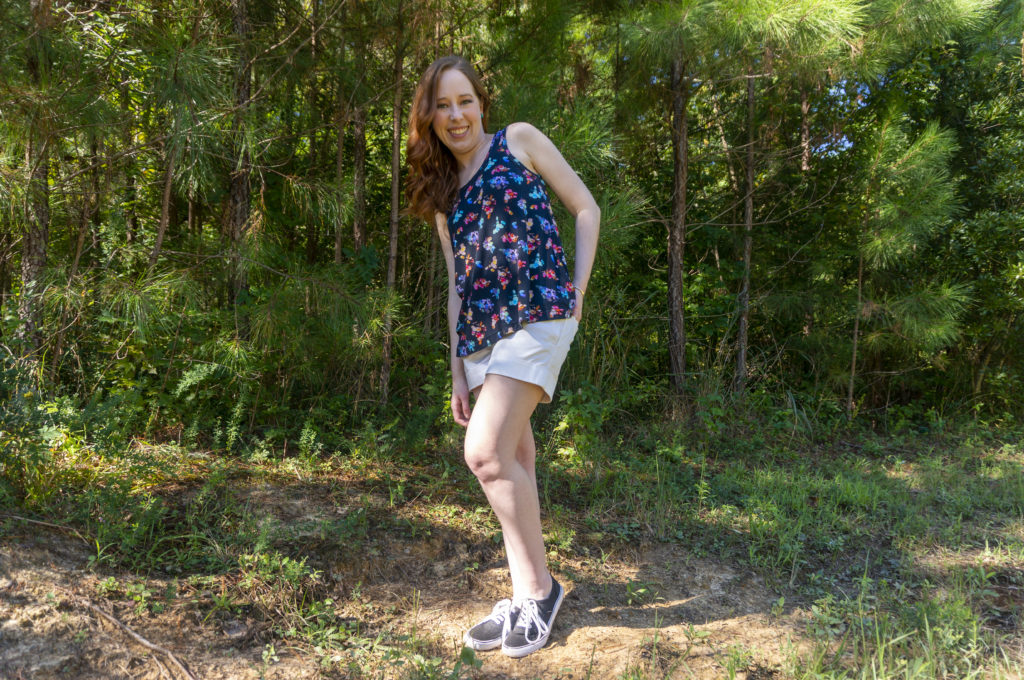
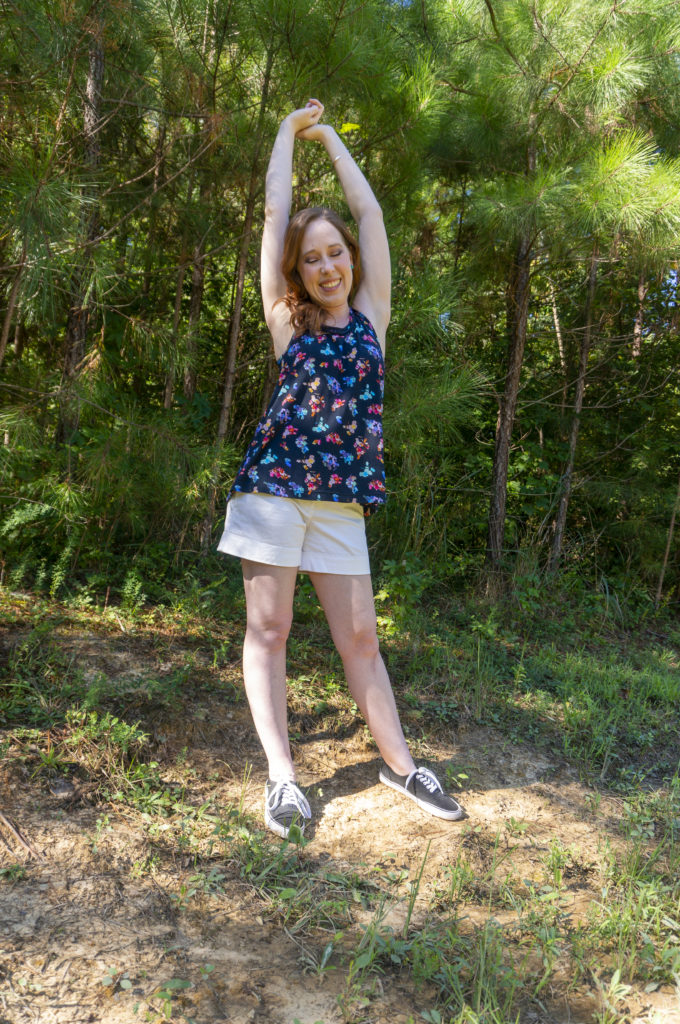
Geode Swing Tank | Modified New Look 6285

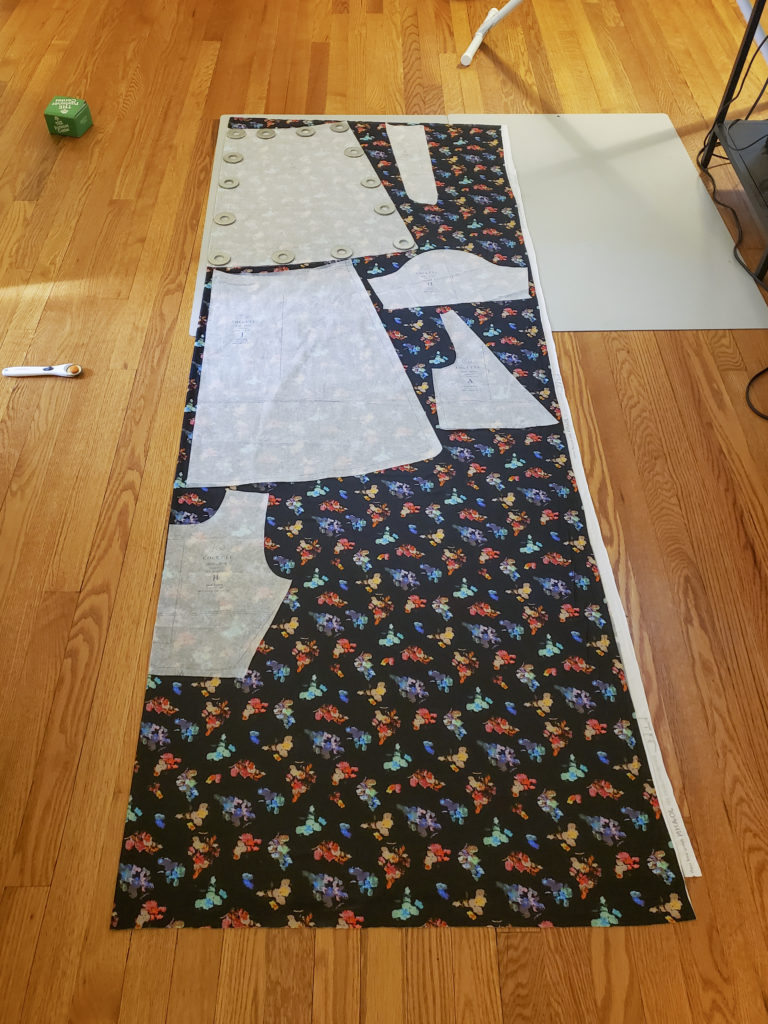
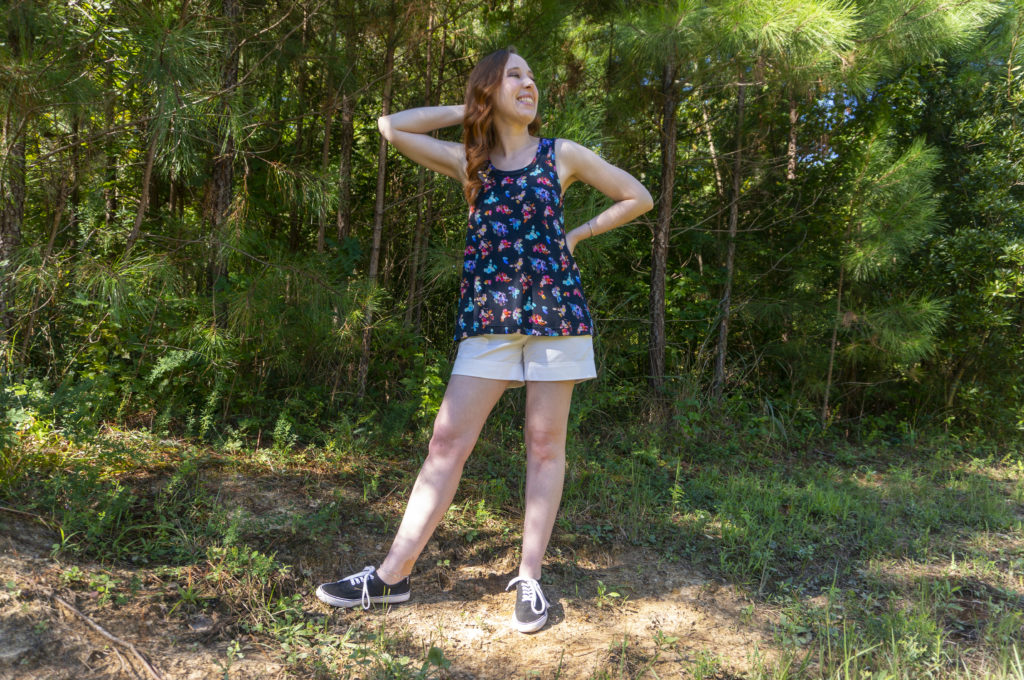
While I was laying out the pieces for my Colette Wren dress, I noticed that I was going to have around half a yard of fabric at the full width and another half yard or so of partial-width pieces. To be honest I was a little surprised by this, since I’d originally planned to turn this yardage into a maxi dress but didn’t have enough length or width to accommodate those pattern pieces. Discovering that I hadn’t had enough fabric for a long dress but did, somehow, have enough fabric for a short dress and a top goes to show that skill with video games is not directly transferable to real life despite how much Tetris I’ve played. Wanting to maximize my use of the remainder and craving another loose top to combat the hot sticky weather, I decided to hack New Look 6285 (a pattern I already own and have used here and here) to make a basic swing tank.

A quick search brought up instructions for turning any knit or woven t-shirt into a swing style on Bernina’s We All Sew blog, provided by the delightful Mary Danielson Perry of Idle Fancy. Because one of the steps is straightening the side seams, I opted to use View A of my pattern since it already has a straighter silhouette and a looser fit overall.

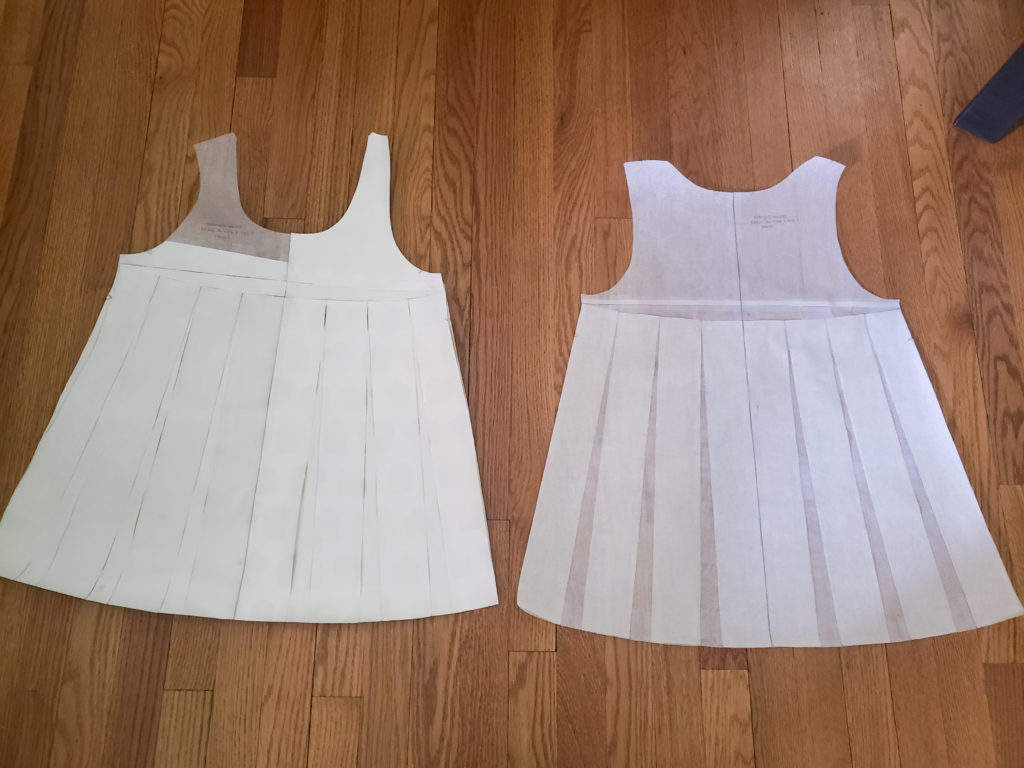
I laid out the original pieces on my fabric, measured to determine the maximum amount I could increase the hem width, and then slashed and spread per the instructions. As you can see below, I ended up making six slashes in the front and six in the back; I spread each slash 1 inch for a total circumference increase of 12 inches.

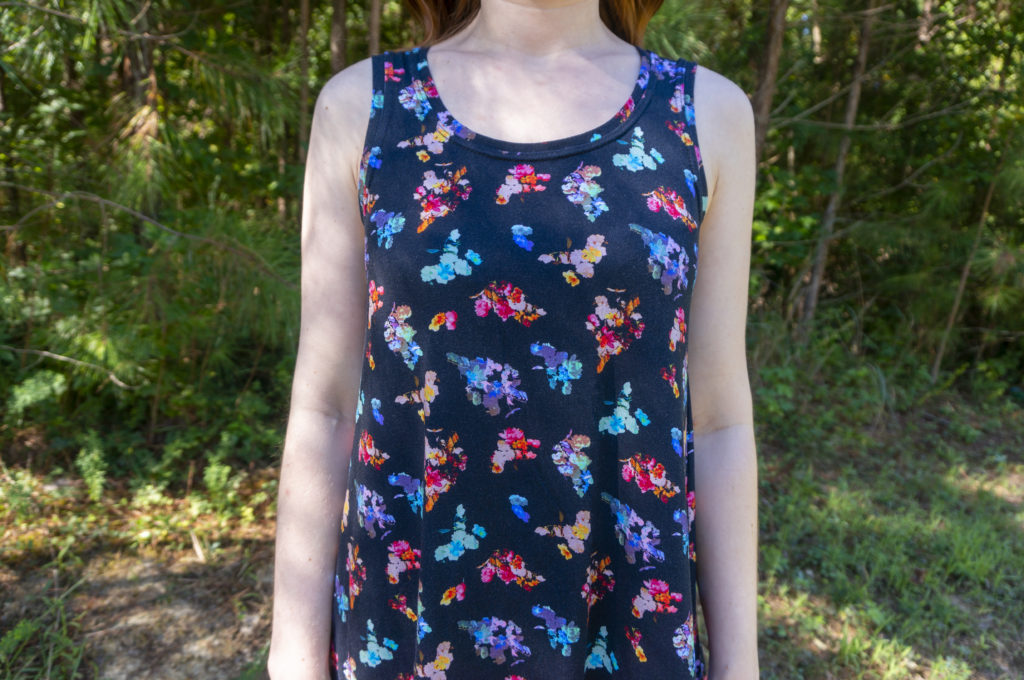
After cutting out the front and back pieces, I didn’t have enough fabric left to cut a neckband and armhole bands on the crossgrain. Luckily this rayon spandex blend has almost as much vertical stretch as it does horizontal stretch, so I cut them on the grain instead. I still ended up piecing together the neckband, but in a dark and patterned fabric it’s not noticeable at all.

As with Wren, I assembled everything on my sewing machine and finished it on my serger. I was out of clear elastic, so I topstitched down the seam allowances at the shoulders in an attempt to stabilize them; time will tell if that makes a difference or not. I also twin needle topstitched around the neck, armholes, and hem.

Not surprisingly, it took about the same of time to sew up as it did to cut the pattern, and the whole thing was completed in two easy afternoons. My only regret is not being able to make it even swingier, but with only a fistful of scraps remaining at the end, I squeezed as much out of it as I could.

This is my fourth consecutive successful sewing project. While none of the projects I’ve undertaken recently are impressive in any way, having a run of wearable garments I’m satisfied with has been a huge boost to my motivation to sew. In the past I’ve struggled with less-than-stellar fit and various sewing mishaps, and it damped my enthusiasm considerably. It’s hard for me to get excited about the process when something that should work doesn’t, and I have an uneasy relationship with the idea of practicing in a hobby where that means either buying cheap fabric to make up a garment I won’t want to wear, or sacrificing fabric I do want to wear to a garment that is ultimately ill-fitting, uncomfortable, or unflattering.

These recent victories, however mundane they may be, have finally got me looking at my stash with excitement and a desire to plan again. I look forward to sharing what I come up with in the weeks to come.


Outfit Details

Top: Modified New Look 6285 | Shorts: Express | Shoes: Mossimo Supply Co. | Bracelet: Unknown/gift

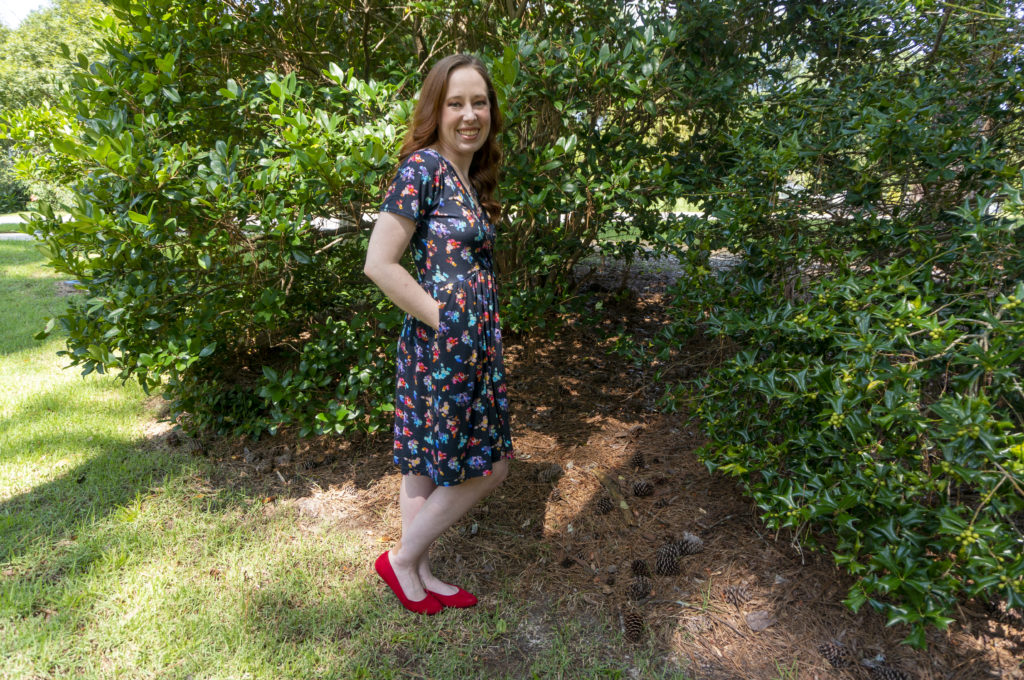
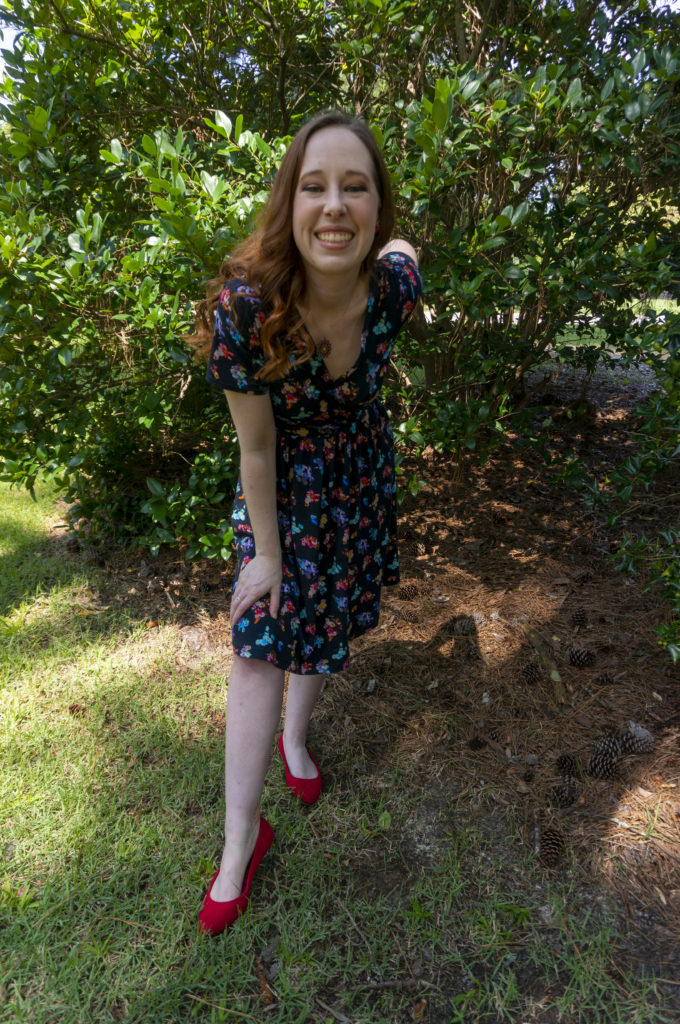
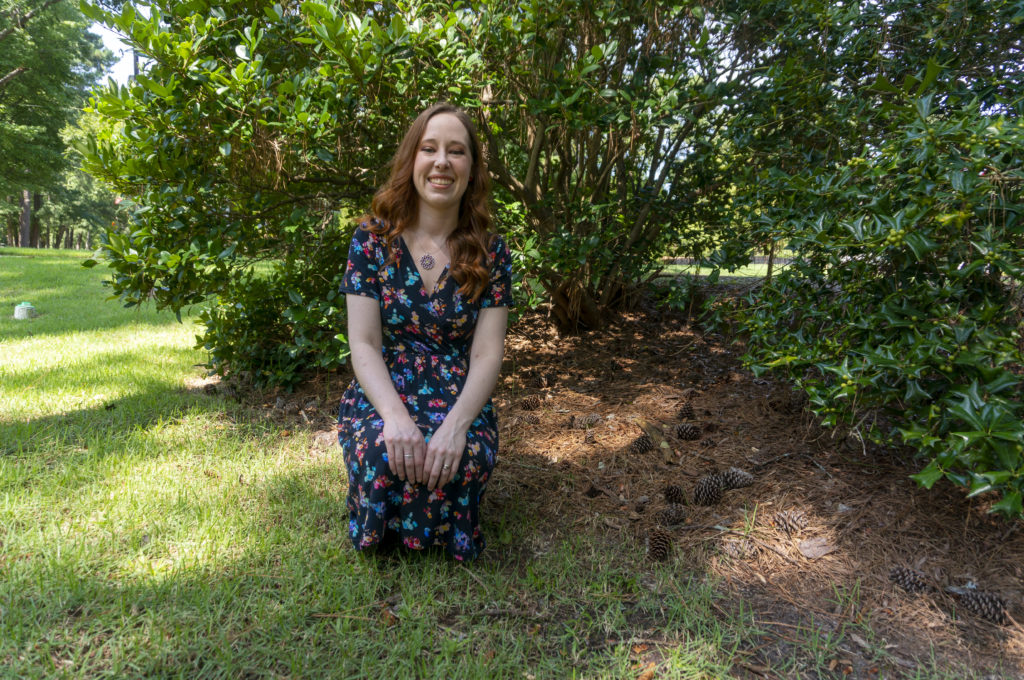
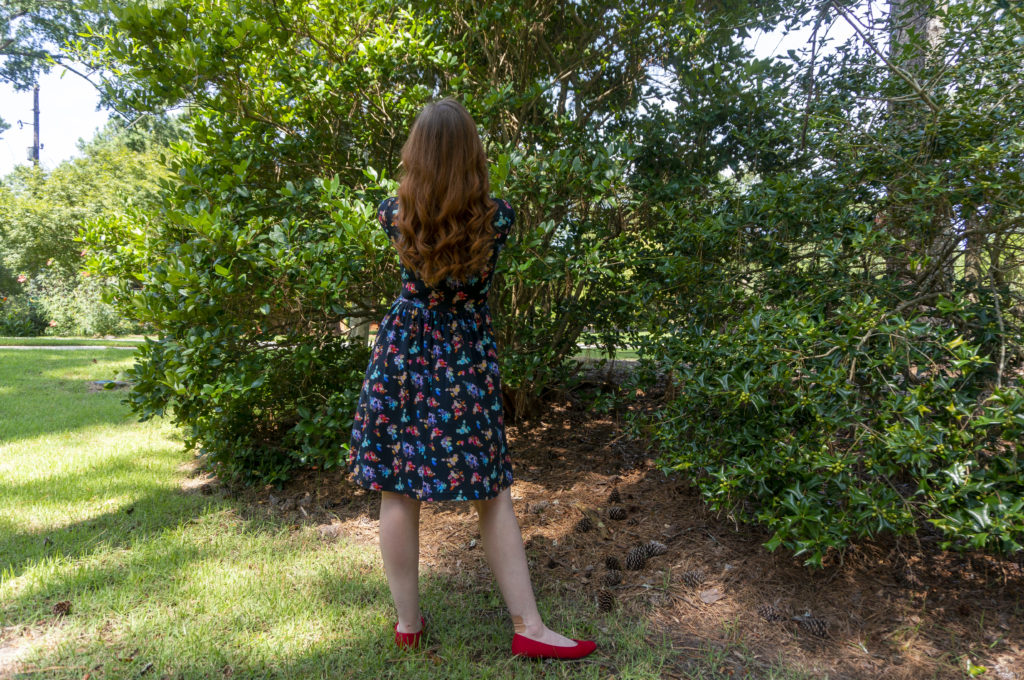
Stained Glass Dress | Colette Wren

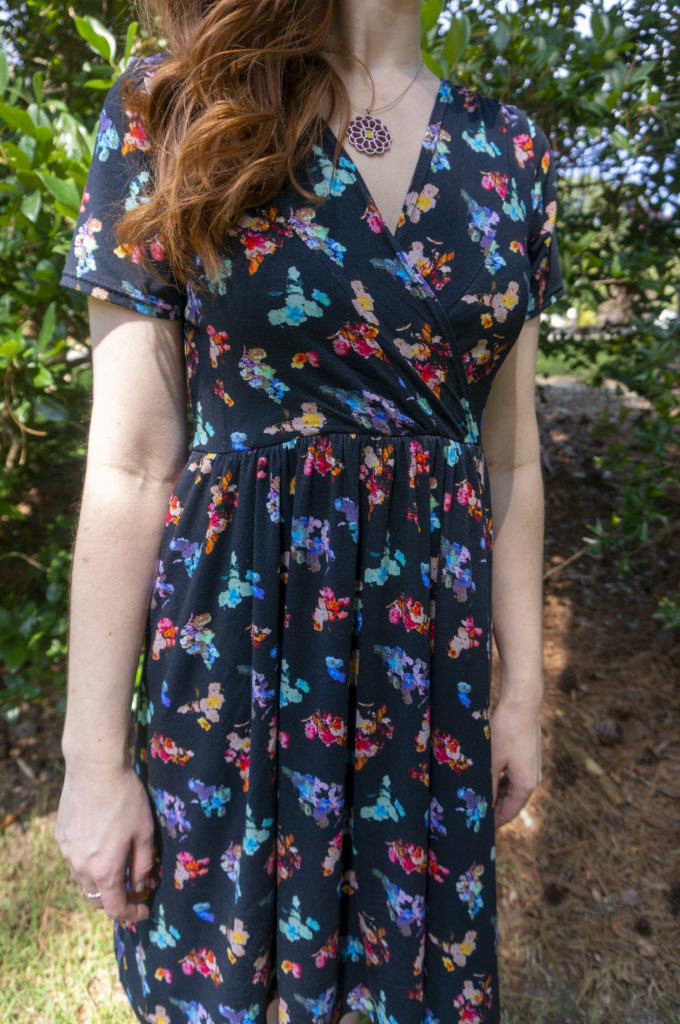
Wren might be the first Colette pattern I genuinely coveted. I’m not sure if it was the colors the samples were made up in, the more fitted silhouette at a time when everyone seemed to be turning out a skater dress pattern, or the one model’s  red hair and dark magenta lipstick (which I found a dupe for in Too Faced’s Melted Matte-tallic in shade I Dare You). Don’t ask me why I didn’t just buy it when it came out—I don’t know. I tried to assuage my desire by buying a vaguely similar Big 4 pattern (McCall’s 7116) during a $1 sale, but it wasn’t the same. When I realized Freeman’s Creative Craft Supply in Durham had a deeply discounted copy, however, I pounced on it.

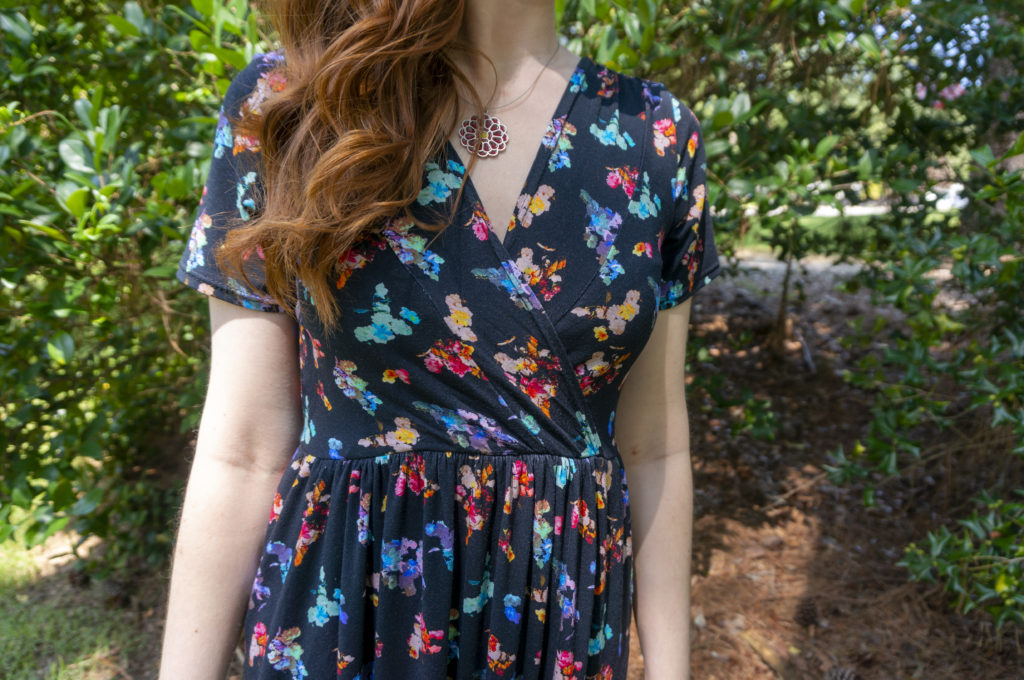
The fabric is older, purchased at least four years ago on a bit of a whim with a dress? or a top? in mind. I’m no longer sure. It’s a Nicole Miller for JoAnn design, which (no surprise) is no longer available, and I believe it’s a rayon spandex blend. The pattern reminds me of stained glass, or colored crystals, which is what seduced me into buying it even though I’d prefer to avoid black bases in favor of navy, forest, or brown now.

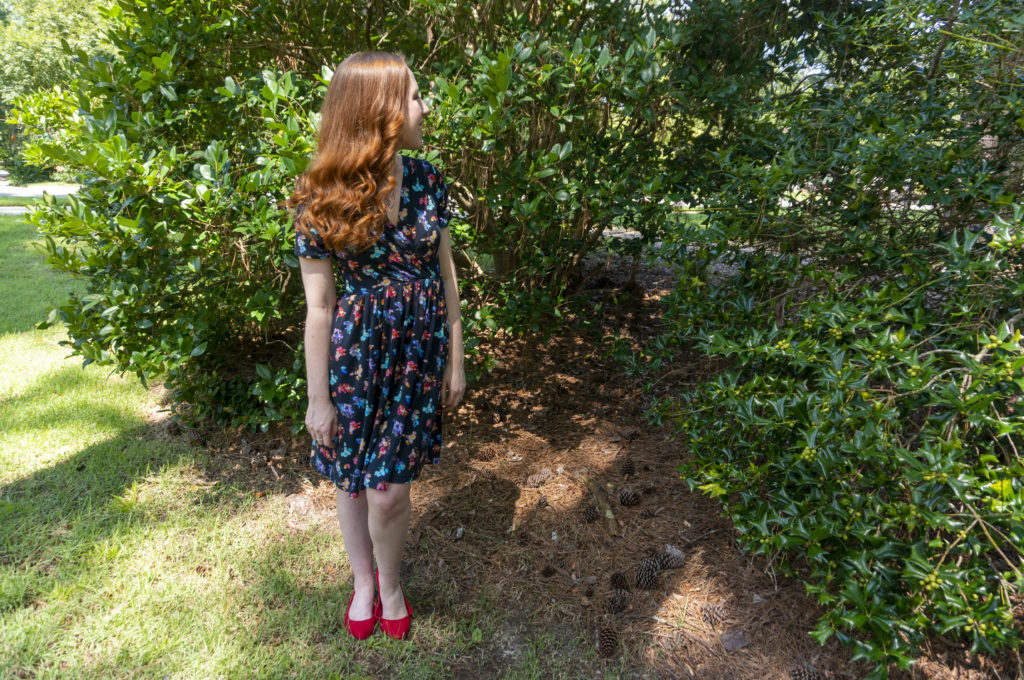
I chose View 2 with its gathered skirt and short sleeves. I cut an XS in shoulders/sleeves and bust, grading out to a small at the waist and hips. Since all of the sizes met at the same point on the crossover portion of bodice, with width added only at the side seams for the different sizes, I opted to cut out an XS neckband as well. It worked out just fine.

I assembled everything on my sewing machine and finished the seams on my serger; I continue to find that’s the best way for me to avoid catching wrinkles of fabric in the seams and thus cutting holes into the body of the garment while serging. I used WashAway Wonder Tape to stabilize the neckline, sleeve hem, and skirt hem for topstitching. It’s hands-down one of my most valuable sewing tools, and I’m sad I ran out before I finished this project. It’s on my list of things to replace, along with my ironing board cover, which I recently gashed with a pair of pinking shears.

As you no doubt noticed, I learned my lesson with Zinnia and added pockets to the side seams. Pockets aren’t included in the pattern, so I grabbed a pocket template I had lying around and tweaked it to fit. This chiefly involved adjusting the side seam extension to account for the 3/8″ seam allowance and extending the other edge to attach at the waist for a more stable pocket.

The only thing I had trouble with was gathering the waist, and the addition of pockets may have had something to do with it. Anchoring the pockets at the waist meant two more layers of fabric that had to be gathered in that area, and my thread did not want to slide in that area.

I tried shirring the skirt using clear elastic like the instructions recommended, a technique I’ve done successfully before, but because the un-gathered skirt waist is so long it was impossible for me to keep the elastic taut, lined up with the fabric edge, and moving steadily under the needle at the same time.

After that failed, I tried gathering using three rows of basting stitches, and then again with a zig zag stitch over dental floss. Neither worked perfectly, but the former performed marginally better than the latter, so I stuck with that. I found it helpful to gather the front and back separately, and ended up gathering the top of the pockets separately as well.

Once the gathered skirt was attached to the bodice, I applied clear elastic while serging. I think my serging was a little firm, because the waist doesn’t stretch as much as it could, but I can still get it on and off without issue so I’m not inclined to redo it.

After trying on the assembled dress, I cut 2″ off the bottom hem and then folded up 1″ and topstitched to get my perfect just-above-the-knee fit.

I noticed the front waist seam is slightly raised at the center while the back waist seam tends to droop. It’s not a problem per se, but it did have me scratching my head. I suppose it might be the result of the pattern being drafted for a C cup while I’m a D; if so, one of the models had the same problem. After looking at a bunch of different Wrens online, I’ve discovered the position of the waist seam varies dramatically based on overall body size, bust size, and fabric choice, and I have concluded this is just the nature of the beast and not something to fuss over.

Overall I’m pleased with the result, and glad I finally sprang for the real-deal pattern. I even got brave and made my alterations directly to the tissue, a decision I’m relieved that I didn’t come to regret. If it turns out I ever go back to having a job in an office, I’d like to make View 1. Till then, I’m happy to stick to swishy secret pajamas.


Outfit Details

Dress: Colette Wren | Shoes: Kelly & Katie | Necklace: Spark Metal Studio

Work-to-Glory Ratio

In the early, sporadic days of my knitting, when I was making the transition from wistfully reading knitting blogs to actually doing some knitting myself, I had the great good fortune to stumble upon TECHknitter. Though their identity remains (to me, at least) a mystery, they are clearly a capable and inventive knitter, because their blog, which spans more than 10 years, is really an electronic book full of improved solutions to many of knitting’s everyday challenges. From them I have learned a gap-less, jog-less way to join a piece of work in the round, three ways to bind off circular knits depending on the type of project, and ten methods for weaving in ends (though I’ve only used four or five of them to date).

Much of TECHknitter’s writing deals with the mechanics of knitting, like why a stockinette edge curls (and why adding a border doesn’t really fix the problem), and how to use that knowledge to your advantage. But sprinkled throughout are bits of knitting philosophy, such as when to choose an excellent but fiddly solution and when to settle for a pretty good one. Very occasionally—only a handful of times in a decade—TECHknitter treats the reader to a pure philosophical refection on the craft.

The one that’s stuck with me, that continues to thread itself through more and more of my thinking, is the work-to-glory ratio. Originally posited by TECHknitter’s friend Carol, the work-to-glory ratio is the relationship between the amount of effort that goes into a project and the degree to which the result is impressive or satisfying. A project that appears difficult but was in fact easy to knit has a good work-to-glory ratio, whereas a project that was tedious or hard and turns out indistinguishable from something machine-made has a bad work-to-glory ratio.

As TECHknitter is quick to point out, there are of course plenty of projects that are both challenging and gratifying: some projects are rewarding precisely because of the time and effort that went into their making. A practical project in a workhorse yarn with a familiar pattern might turn out precisely as useful as the knitter intended. For TECHknitter, the work-to-glory ratio is more an observable phenomenon than a guiding principle.

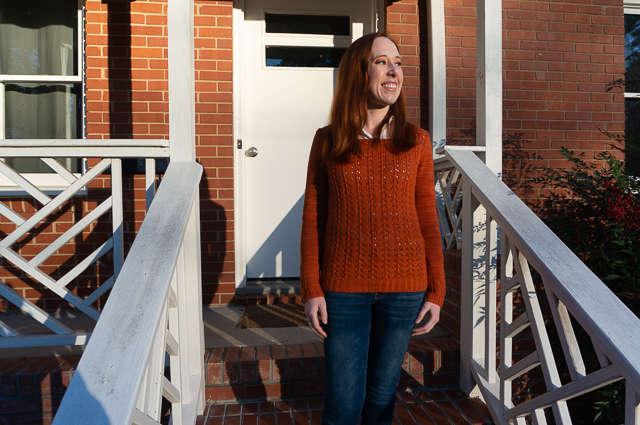
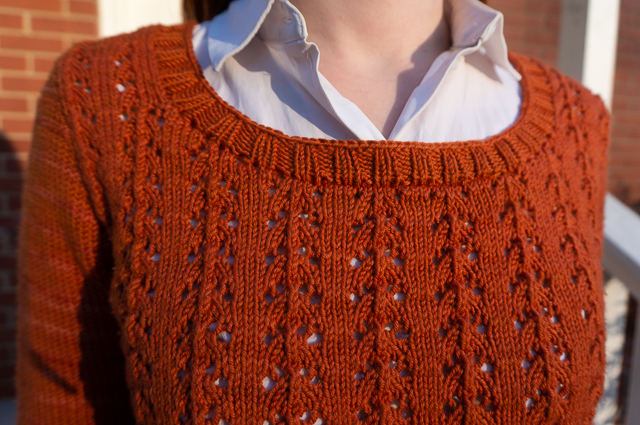
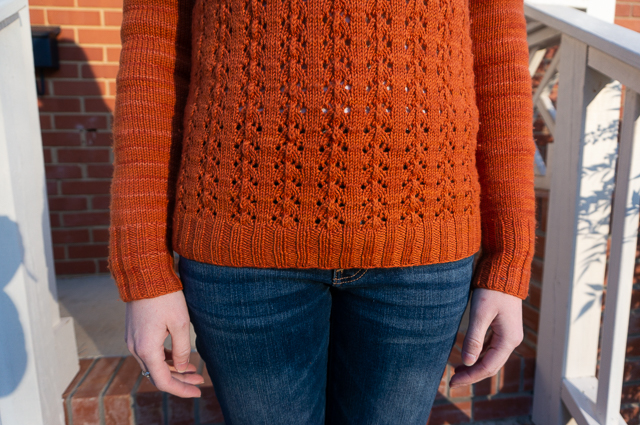
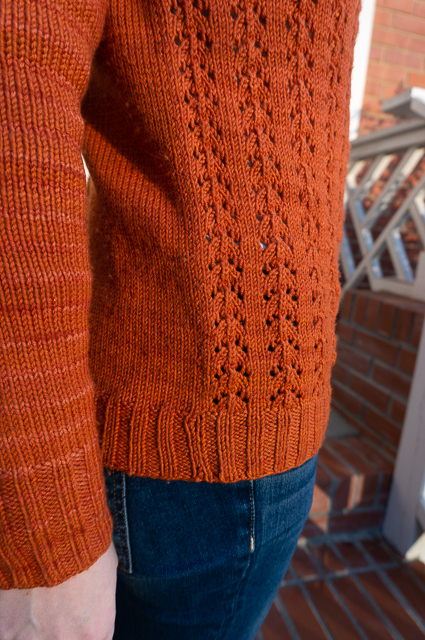
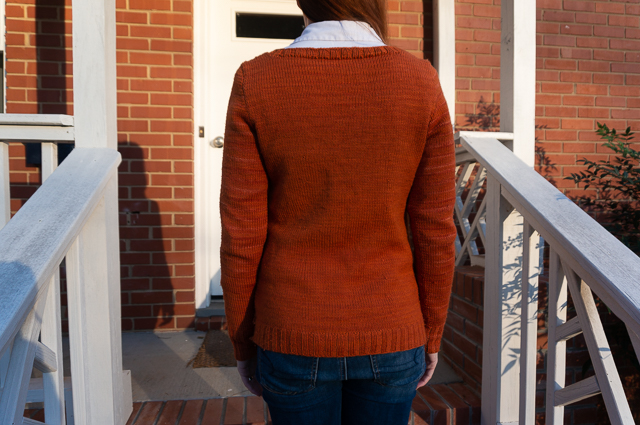
The orange sweater above, a CustomFit version of Amy Herzog’s Foyle’s Pullover, has proven to have a pretty good work-to-glory ratio. The allover lace on the front is an easy-to-read and memorize six-row repeat where the wrong-side rows are all purled, and it’s a great design to practice decreasing in pattern (though no specific instructions are given for this, and the source I was going to recommend is no longer available online). Meanwhile, the back and sleeves are simple stockinette, yet these large swaths of plain stitching somehow recede into the background so as not to draw attention to the fact that two-thirds of the sweater are mindless TV knitting.

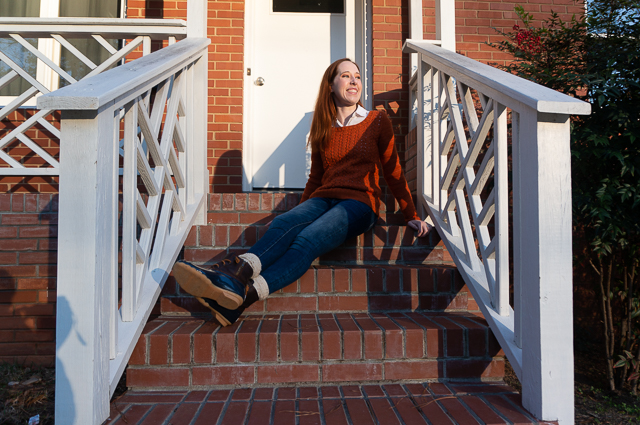
While to my eye there’s nothing really outstanding about this pullover, everyone who’s seen me wear it has been impressed by its handmade origins and convinced that it must have been quite a bit of work to produce. Oh no, I think, it wasn’t nearly as fraught re-knitting every piece of this sweater to get a mediocre fit, or as mind-meltingly tedious as dealing with the kajillion ends on this one to make it wearable. Both of those projects took far more time and mental energy, but you’d never know it by looking at them.

(In case anyone thinks I’m underwhelmed by the results here, let me assure you that I’m very happy with the outcome and feel it’s my best CustomFit sweater yet.)

The smile of someone who wears their new sweater at least once a week

The work-to-glory ratio as a framework for thinking about things that take work—even if they’re not thought of as work, as a task or a job—has slowly crept into other areas of my life. Increasingly I’ve been thinking about it in the context of friendships, and I’ve been struck by how even a healthy friendship can at times have a pretty poor work-to-glory ratio.

The daily work of being friends, of nurturing a relationship, can involve so many small acts to affirm, question, encourage, and comfort. Making time to call, remembering milestones, knowing a person’s favorite treat or pet peeves—these are all part of the skill of being a friend, a skill that must be learned and can be cultivated.

But it’s also work that can go unrewarded. A deliberate effort to ask about something a friend is working on might lead to a dead-end in conversation; a genuine desire to check up on their wellbeing might go completely unanswered or unacknowledged. Frequent small touches become shallow interactions, which can start to feel like more of a rote exercise than the practice of making a genuine human connection.

In my lowest moments, I wonder if the work isn’t worth the paltry sum of glory.

And yet TECHknitter offers another way of thinking about this too: work as product plus process. The idea that the value of a thing lies in the thing itself, and also in all of the moments that went into making the thing added up. A handknit sock is no longer just a sock: it’s an act of care, patiently created to be something functional and comfortable and beautiful that someone can use and enjoy every day. The knitter knows it, and so does the wearer, and that knowing is as much as part of the joy as the sock itself.

The time, place, and emotional space the knitter was in while they knit are also part of that sock, whether the wearer knows it or not. They become folded into the process part of the equation, bringing further dimensions to that sock’s intangible value.

But beyond even these things are the very act of making itself: the friction of yarn sliding over the tensioning finger, the clicking of needles in motion, the rhythm of forming stitches and turning the work. Watching the balance of yarn change, the unraveled cake collapsing as the yarn is raveled back into a slowly lengthening sock. Choosing to see and hear and feel the process of yarn becoming a sock when it would be far faster and simpler to buy socks at the store.

How much better to think of friendships as product plus process! To imagine each moment of connection, no matter how seemingly trivial, as another stitch in the knitting—by itself practically inconsequential, but in aggregate absolutely essential. To treat the intention behind each small act of kindness as equal to the outcome of the act in importance. The goodness of a friendship is thus measured not only in how meaningful are the conversations or how memorable the events, but also in how much love and concern motivated every effort to have those moments, even when those efforts appear to fail.

The work of friendship and the rewards of friendship are not two sides of an equation to be weighed against each other: a friendship is the sum of the work and the rewards, the product and the process added up and divided between friends.

Reciprocity

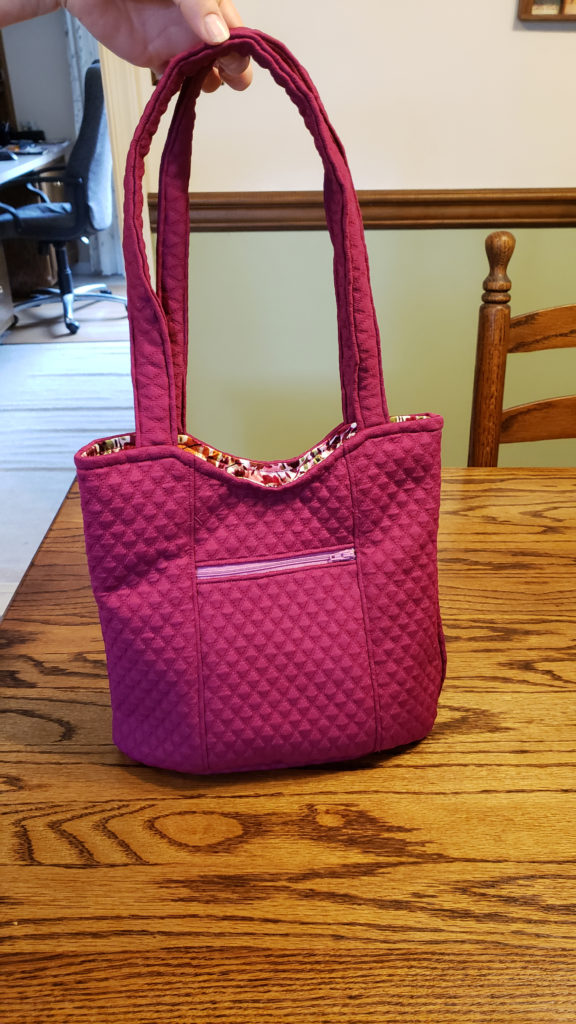
The first designer item I owned was a Vera Bradley purse I received from my parents for my high school graduation. Over the years my mom, my sister, and I each gathered a small collection of Vera Bradley bags and accessories in a smattering of colors and patterns. Despite our varying needs and tastes, we all agreed that the bucket bag was an eminently practical choice whenever you needed to carry the usual wallet, keys, phone, and personal items, but also sunglasses, two water bottles, an entire packet of tissues, a book, and maybe a snack.

My mom liked the bucket bag she owned, but wanted one in a solid color. After sweetly dropping hints both to me and to my sister to relay to me, I figured it was time I put my skills (such as they are) to use to make that wish a reality.

Fortunately, my sister had an old bag that was too worn out to carry around anymore, which she graciously sacrificed to my seam ripper. By taking the bag apart over several days and photographing each step, I was able to understand the construction and use the pieces as templates for a new bag.

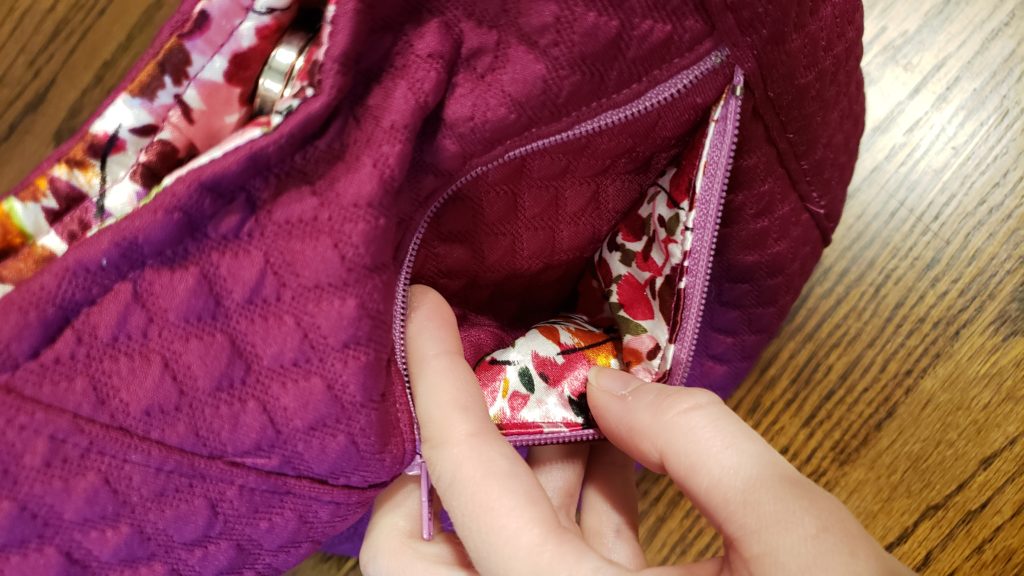
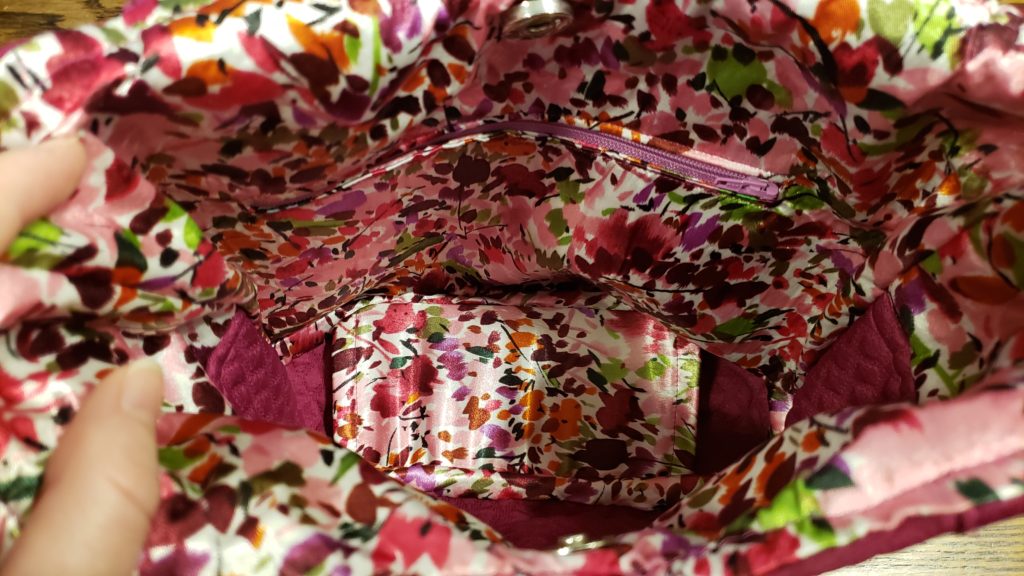
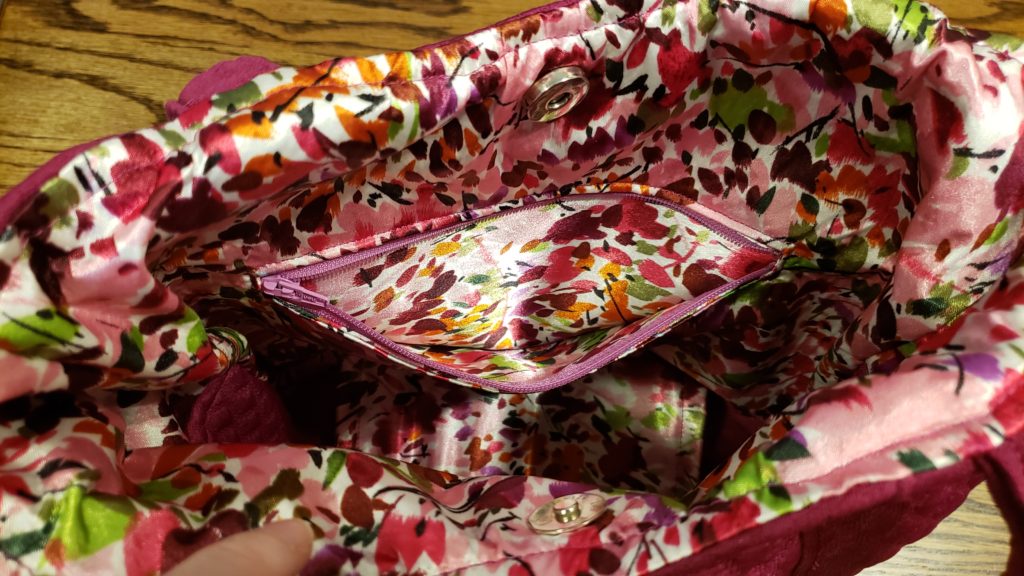
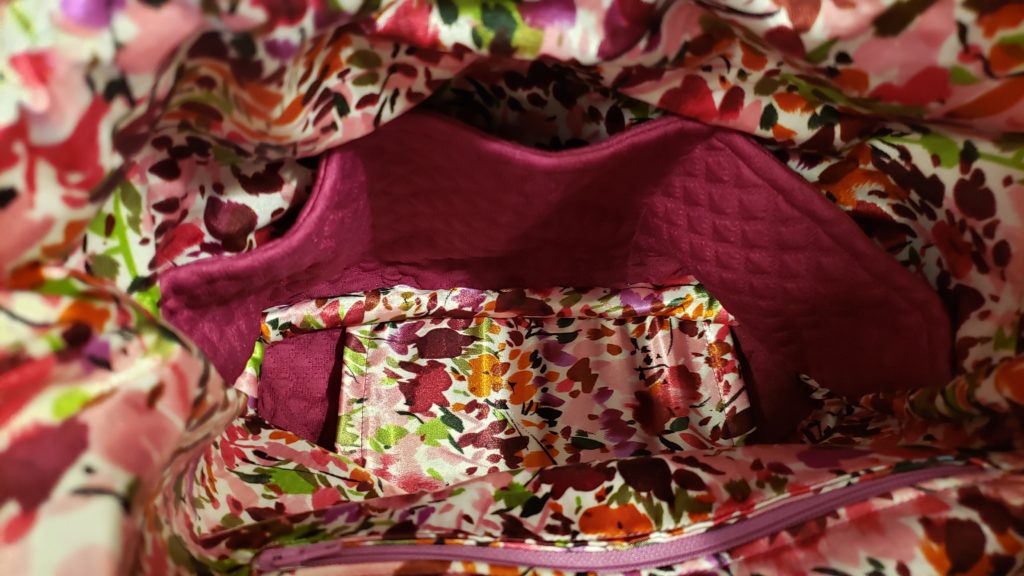
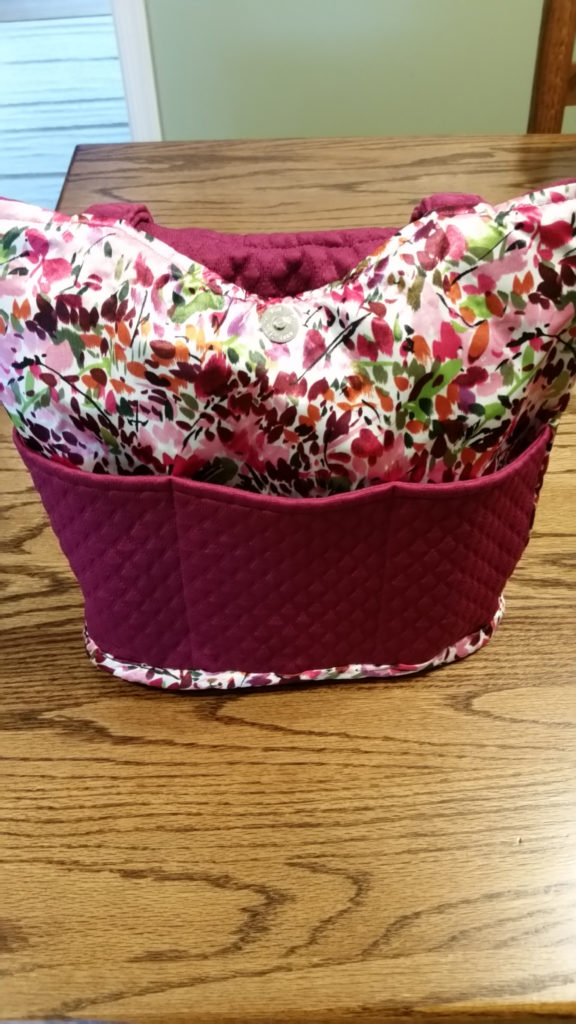
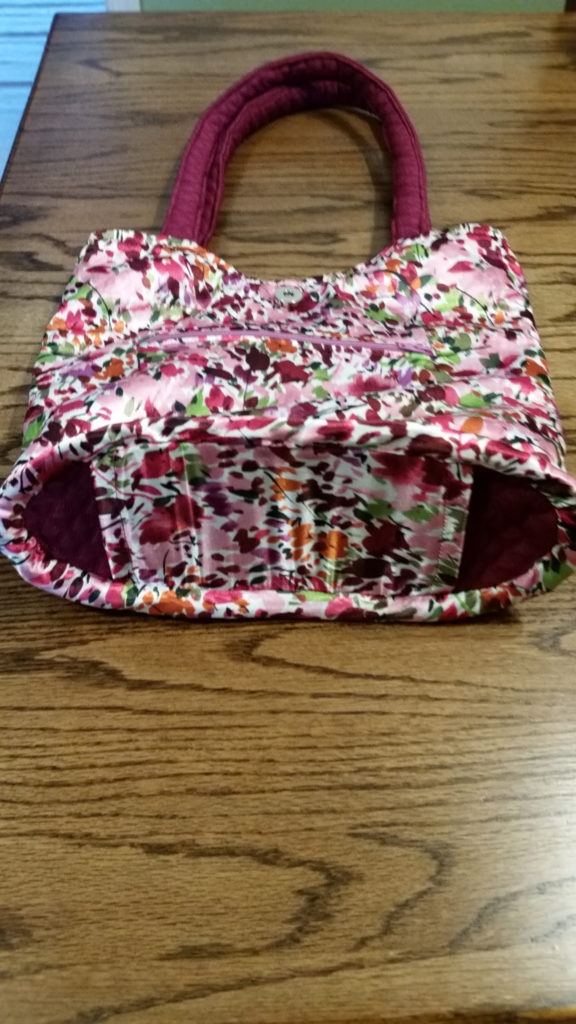
The bag has an exterior zipper pocket, an interior zipper pocket, and three interior open-top pockets. It closes with a magnetic button. The straps are fixed. There’s a sleeve in the bottom of the bag for an insert to stabilize the base so that it doesn’t sag and the bag can stand up on its own; I took the insert from the deconstructed bag, which is just a piece of mat board or heavy cardboard, for use in my re-creation.

I didn’t make any modifications to the design or size, but I did opt to use a thick stable knit with a quilt-like pattern (leftover from this cosplay) for the shell instead of quilting together plain cottons. The lining is a polyester silky solid that I’d bought several years/moves ago for an ill-fated Sorbetto top.

I definitely saved on quilting time as a result of using a a “pre-quilted” fabric, but toward the end it was a challenge to feed the many layers of thick fabric through my machine. For the straps, my attempts to sew a tube and turn it right-side-out proved disastrous. I ended up cutting new straps, sewing one edge right sides together, opening the seam out, folding under the raw edges, and topstitching them in place, then topstitching the first seam to match. I didn’t even attempt to machine-stitch the bias binding that encloses the last raw edges on the inside bottom of the bag, preferring instead to wrestle everything into submission with hand-stitching.

If I were to attempt it again—and I think I might—I’d use a thinner shell fabric, but otherwise the construction is straightforward and didn’t require any special tools or techniques.

Judging by her reaction, my mom was pretty pleased with the outcome, and this bag has joined the rotation with her other favorites. For myself, I’m glad I could reciprocate the gift of a good bag that she once gave to me.

First Foray into Lingerie

When planning my visit to the NYC Garment District last year, I knew it was important to not only narrow down the number of shops we went into but also to have a list of projects I was shopping for. As someone who is easily overwhelmed by choice on the best of days, I would have been mad to walk into a place like Mood without a plan.

My list looked something like this:

  • Spandex blend knit(s) for t-shirts, preferably at least one with navy stripes
  • A knit with a print other than a stripe for a top or dress
  • A solid rayon or bamboo knit (in a color from my palette) to make a Madalynne x Simplicity bodysuit
  • A stretch denim to make a pair of jeans
  • Lace and stretch mesh/power net to make a Madalynne x Simplicity bralette
  • Notions for the bralette and bodysuit

I struck out on the denim, but was able to bring home a lovely white stretch cotton sateen instead. I also picked up an unplanned-for white mystery fabric with alternating solid and sheer stripes. I was looking forward to making a pleated midi skirt inspired by one I’d seen at Express several seasons ago, but pre-washing the fabric completely changed the way it behaved and it may end up a total loss.

After finishing a couple of striped long- and short-sleeved t-shirts using the fabric from my haul, I decided to dive into the world of lingerie. Well, dip a toe in, anyway.
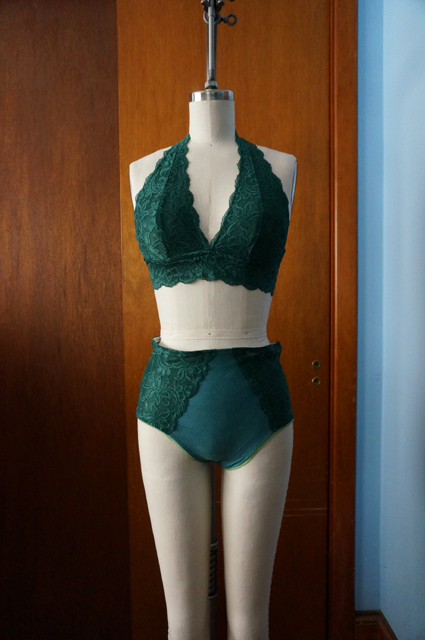
Front view of dress form displaying a lace halter bralette and high-waisted underwear with lace side panels

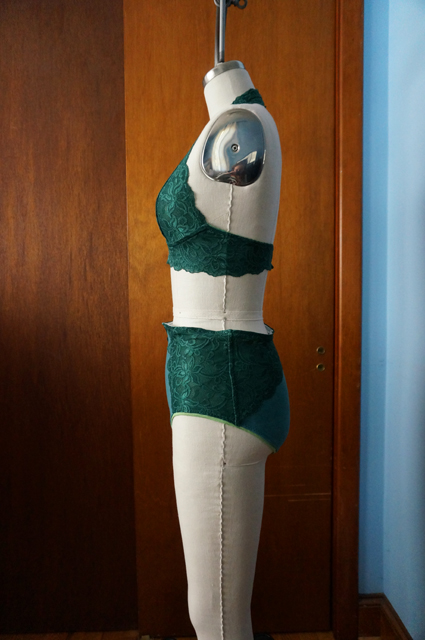
Side view of dress form displaying a lace halter bralette and high-waisted underwear with lace side panels

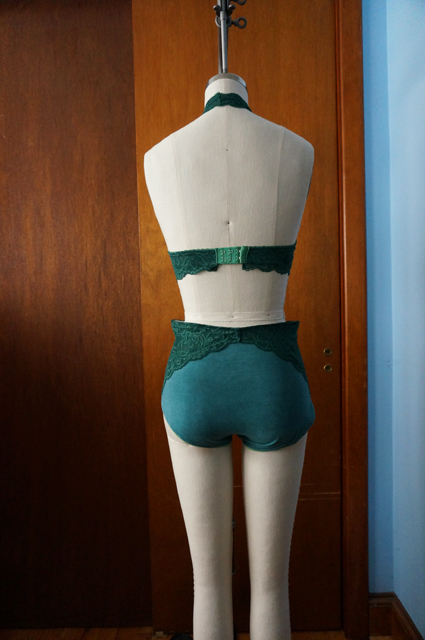
Back view of dress form displaying a lace halter bralette and high-waisted underwear with lace side panels

This is Simplicity 8228, a lace halter bralette and embellished high-waisted underwear from the Madalynne x Simplicity collaboration. I wanted to model these myself, because I think the best way to effectively judge a garment is on the body it was intended for. But the lighting inside my house is unpredictable at best, there’s nowhere private for me to take pictures outside even if it were warm enough, and—spoilers—I’m not thrilled with the fit I achieved, and I liked it even less after scrolling through the photos we took. My dress form isn’t necessarily doing the fit any favors either, as I haven’t padded it out to my actual measurements yet. (I have the kit for it, but I’ve been so focused on knitting during the tail end of winter that I haven’t gotten around to doing the work. It will probably take all of 15 minutes when I finally do, and then I’m going to feel like a real chump.)

Style & Size

For the bralette, I chose View A, the halter, which closes in the back with hook and eye tape. While View B, a pull-on racerback style, would have technically been the easier of the two designs to sew, I wanted at least a little bit of challenge, and I was concerned a bralette without closures might be annoying to get on and off (I nearly popped a seam on a similar RTW racerback bralette once). I measured as a 32D according to the instructions. That seemed reasonable, as I measure a 30D in RTW, and anyway 32 was the smallest band size available, so I didn’t have the option to size down (it seemed best not to tinker with the size on a pattern I’d never sewn, especially when I didn’t have any other lingerie experience to compare to either). For the underwear, I cut a size small.

Fabric & Notions

The stretch double galloon lace was a happy find at Spandex World; it was tucked away in the basement along with a small selection of stretch laces in other colors/patterns/widths. I had unthinkingly left my tape measure behind at the hotel and nothing was labeled, so I eyeballed this at 8 inches wide like the pattern called for. It’s actually only 7 inches at the widest point, making me sweat for a hot minute when it came time to lay out the pattern pieces. Everything just fit without needing any piecing, but the message was clear: this pattern isn’t nearly as conservative in its fabric estimates as most Big 4 offerings, so don’t chance it if you’re buying lace specifically for the project.

After being unable to find any green stretch mesh or power net at either Spandex World or Mood Fabrics, I remembered I had a plain white stretch mesh at home already, and I resolved to dye a length of it to match my lace. I thought might use mesh for the main fabric of the underwear as well as the bralette lining, but on sewing day decided to dye a remnant of cotton spandex leftover from some t-shirts instead.

For notions, I turned to Pacific Trimming. After hemming and hawing, I decided to buy white plush picot elastic and white hook and eye tape that I could also dye to match, but black channeling since it would be hidden on the inside anyway.

Dyeing

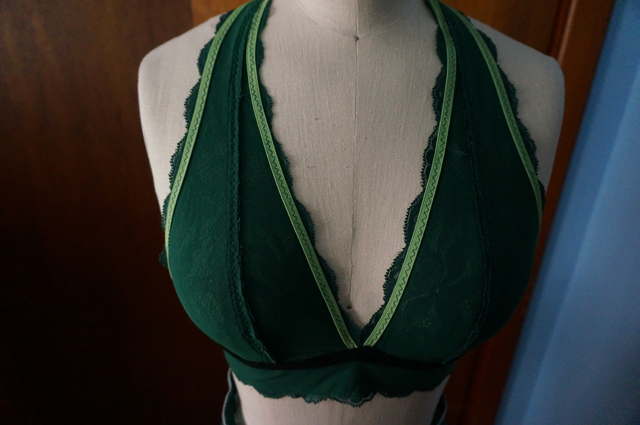
Because the stretch mesh, elastics, and hook and eye were wholly or primarily synthetic fibers, but the cotton spandex was primarily a natural fiber, I had to cook up two dye baths with Rit DyeMore and Rit All-Purpose, respectively. I was pleased with the color I got on the mesh, so-so with the cotton spandex, and disappointed by the notions. I knew different fabric compositions would take dye differently, but wasn’t expecting the closure to turn out a leafy grass green and the elastics to be neon.
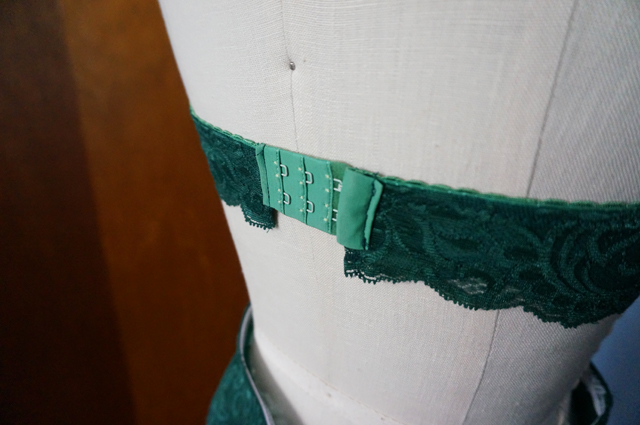
Close-up of the hook and eye closure on a lace halter bralette

Close-up on the inside of a lace halter bralette showing the seams, elastic, and channeling

While it’s not the end of the world, it makes the whole thing feel less professional and more DIY, which is a real damper to the enthusiasm for trying something new.

Cutting & Sewing

I took the pattern’s advice to use spray adhesive to baste the lace and mesh together, but I must have missed the instruction about applying the lace to the mesh, because I tried doing it the other way around and ended up painstakingly re-positioning the flimsy, slithery mesh multiple times.

I followed the (rest of the) instructions to the letter, sewing the bralette entirely on my sewing machine and alternating between sewing machine and serger for the underwear. My stitching is a little lumpy and/or wavy in places, but the busy-ness of the lace covers a multitude of sins.

Construction & Fit

For the bralette, I have two minor complaints. The first is there are a lot of raw edges, and the only ones you’re instructed to finish are the cup seams, where you’re told to sew down the seam allowance. There is a note at the beginning about minding the seam allowance size “if you use a serger,” but there aren’t any instructions on when/where to use it. I’ve seen many people talk about constructing and finishing lingerie entirely without one, but perhaps that’s true more for a conventional underwired or padded bra. Using a serger on the halter seam, for instance, would have helped to make the whole thing feel a little more finished, a little more polished:
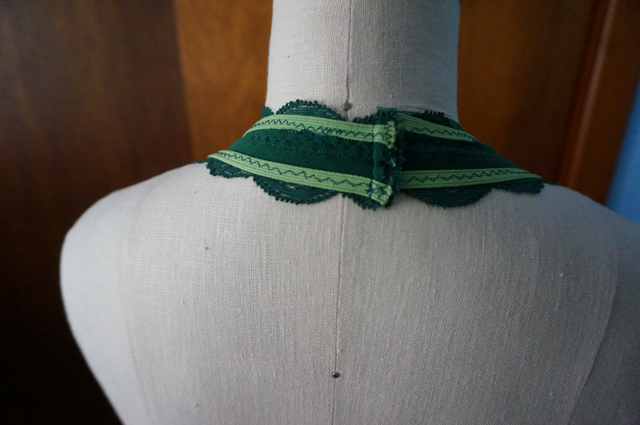
Close-up on the inside of a lace halter bralette showing a messy back neckline seam

Then again, maybe this is typical of RTW bralettes. I don’t own one, so I don’t know. Maybe it’s time to pop into a store and examine some seams?

The second minor gripe I have is the lace and mesh making up the frame aren’t sewn along the bottom. Elsewhere the lace and mesh are secured by stitching on two or more edges, but the bottom of the frame is open. For me, this means the mesh tends to wrinkle and roll at every opportunity, especially when I sit down. This might be solved by sewing a zigzag across the bottom of the frame above the scallops, although I’m concerned the stitching wouldn’t hold up to stretching.

Apart from these complaints, it does fit well enough, although ideally I’d prefer to go down a band size and up a cup size to gain a little more cup projection and prevent the band from sliding up or down.

For the underwear, I knew I was taking a gamble since I don’t normally wear a high-waisted style, but I thought it might be worth revisiting my preference, and there was always the option to wear it under dresses since it wouldn’t work with my pants.

I could not get the elastic to lie flat around the waist, even after removing and re-sewing it. I assume I stretched the fabric, the elastic, or both while sewing, even though I was trying not to. It’s definitely more pronounced on my form than my body, but the effect is the same: rippling and buckling.
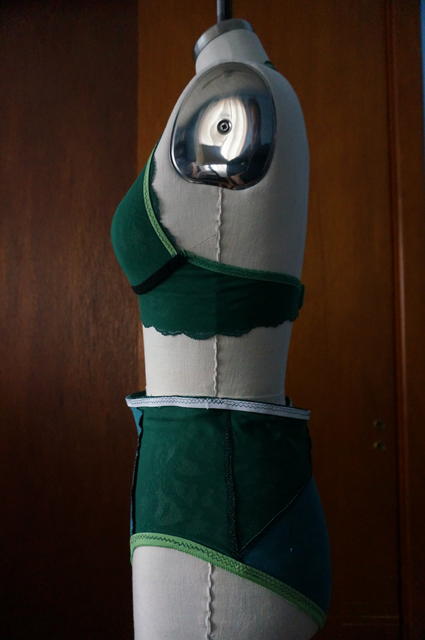
Side view of dress form displaying a lace halter bralette and high-waisted underwear turned inside-out

Final Thoughts

After wearing the bralette a couple of times I realized I’m pretty attached to underwire. Sure, I don’t necessarily need it, but I like it and feel more comfortable with it than without it. Given that the pattern is designed to use channeling to shape and support the cups, it might be worth it to try making another version in a (hacked) 30D and adding underwires.

I thought about cutting the panties down to a mid-rise style, but the truth is that the cotton spandex I used is just too thick for comfort. They ended up feeling sort of like shapewear without any of the benefits. It was not a good call for underwear; I’d used the fabric for for fitted t-shirts and leggings—what was I thinking here? So even if I managed to nail the fit, I know I wouldn’t wear them.

On the whole, I’m more than a little bummed about the experience. I’ve mostly let go of the feeling I’ve wasted precious fabric—it’s not exactly one of a kind, and there’s always more fabric—but I’d hoped to get bitten by the lingerie bug and embark on a spree of replacing all of my tired old things with fresh, perfectly fitting handmade undergarments.

I’d sort of scoffed at the idea of kits, because in the trade-off between money and time I can afford to source materials myself, and as someone who prefers self-directed learning and doing things on my own, paying someone to figure things out for me doesn’t come naturally. But I’ve started to see how a kit is a good way to break into new territory of a hobby. And it’s hard to argue with how pretty they are!