My favorite summer top is, without a doubt, Express’s sleeveless Portofino shirt. It’s 100% polyester, but it’s semi-sheer, floaty, and relaxed enough through the waist and hip that it lightly skims the body, which is good news when it’s in the 90s Fahrenheit (30s Celsius). The polyester doesn’t make me sweat, the heat and humidity do, and if I’m going to be soggy anyway I’d rather not feel the cling of spandex or the weight of cotton.
I think I’ve mentioned before that I work in a pretty casual office—despite a nominally business casual dress code, jeans, leggings, and all manner of fashion and athletic shoes have taken over swaths of the company without any pushback from management—so I can wear my sleeveless Portofinos at work with or without a coverup (though I usually throw on a cardigan to stave off the summer AC). Since they transition so easily from office to home for me, they were a logical jumping off point to expand my summer top options.
During a trip to JoAnn last summer, I picked up four top patterns that shared some similarity with my beloved Portofinos:
- McCall’s 7324, a sleeveless popover top/tunic pattern with a (buttonless) half placket
- New Look 6345, a sleeveless v-neck tunic with a relaxed fit around the hips (but a more defined waist)
- New Look 6414, another A-line, v-neck top/tunic, with the option for a keyhole neckline and sleeve variations
- New Look 6450, an A-line top that sort of looks like a pillowcase dress, but with fixed neckband and more sharply cutaway armholes
I decided to tackle the McCall’s pattern first because I was relatively fresh from the Archer making class with Lladybird and wanted to take advantage of the things I’d learned and lock those tips into my mind. I hadn’t made any woven shirt patterns from McCall’s, just a dress with a very different fit, so I thought it wise to make a muslin before cutting into a more precious fabric I already had in my stash.
The fabric is this 57″ White Dots on Navy from JoAnn. It’s listed as a cotton shirting, but after washing and drying it didn’t soften up much, and the crispness makes it feel more like a quilting cotton than a shirting to me. I wouldn’t use it again for a shirt.
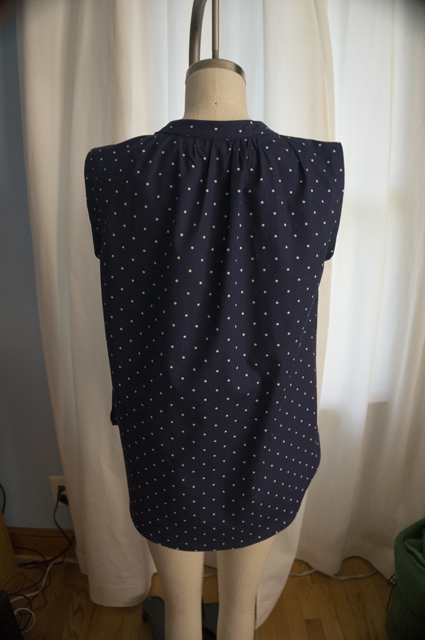
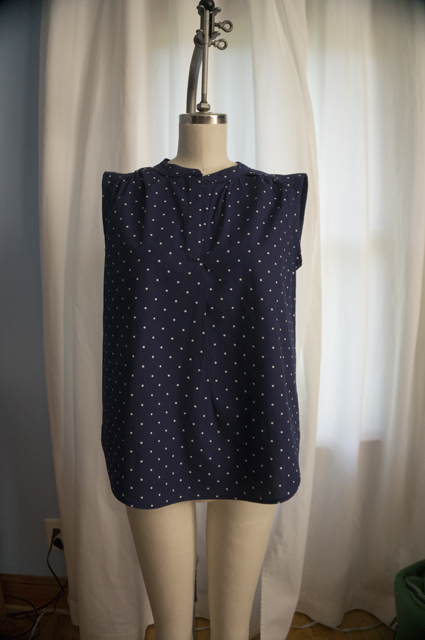
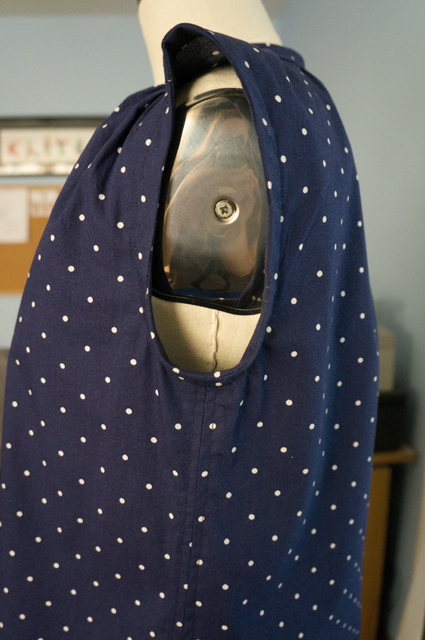
As you can probably guess from these dress form photos, this muslin didn’t turn out wearable. I chose View A and cut out a size 6 based on the finished garment measurements and the width of one of my sleeveless Portofinos at the bust. The key difference between the McCall’s pattern and my ready-to-wear garment is that the latter has bust darts. Looking at the pattern, I had reasoned that the gathers at the shoulder were just bust darts that had been rotated into the shoulder and then converted to gathers. I further assumed that most of the room in the bust came from the gathers, and not from the width of the garment. I was incorrect about this, and the whole thing ended up too snug in the shoulders and bust, and not exactly relaxed in the hip either. I also found the shoulders too wide and the armholes too high for my frame; I made a note of those things for the next incarnation, but didn’t fret over them, since they’re easy to fix on a sleeveless garment.
I made one other mistake, a completely brainless one that I should have been able to avoid. While tracing off the pattern, I felt the high-low hem was a little too pronounced, so I decided to shorten it to prevent walking around with a ridiculous butt flap. I did this by shortening just the back pattern piece by two inches—at the lengthen/shorten line. Cue my surprise when I go to sew up the side seams and realize that, surprise! the side seams don’t line up any more, and I have an accidental split hem:
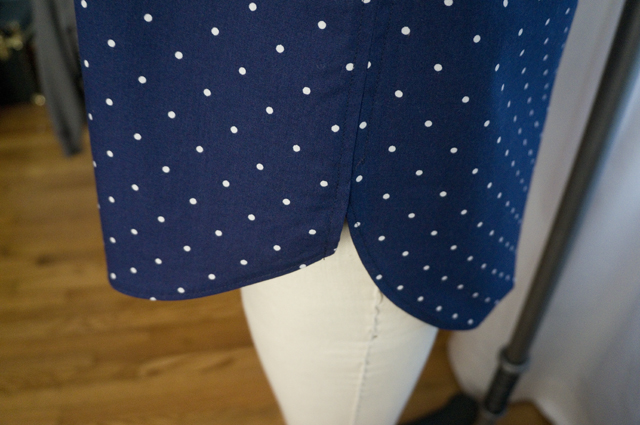
I don’t remember now whether I sewed up the side seams first or sewed the hem first. At some point in the process I decided I wanted to finish the side seams by turning under the seam allowance and then stitching it down, rather than serging, so that made fixing the issue more annoying (and then the fitting failure made it irrelevant).
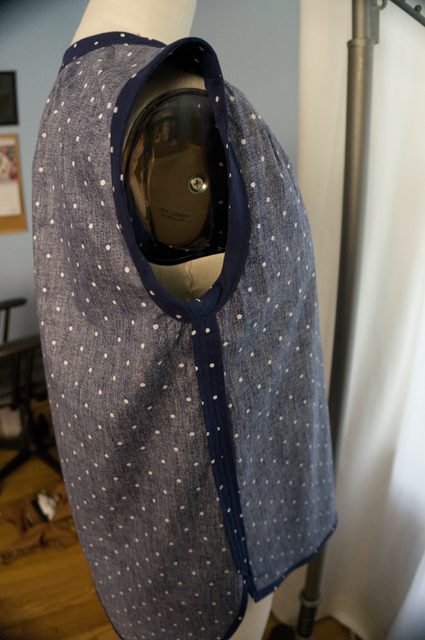
I did, however, serge the shoulder seams (though why I dragged the machine out for just that, I don’t know) and then stitch then down as well for a mock flat felled seam.
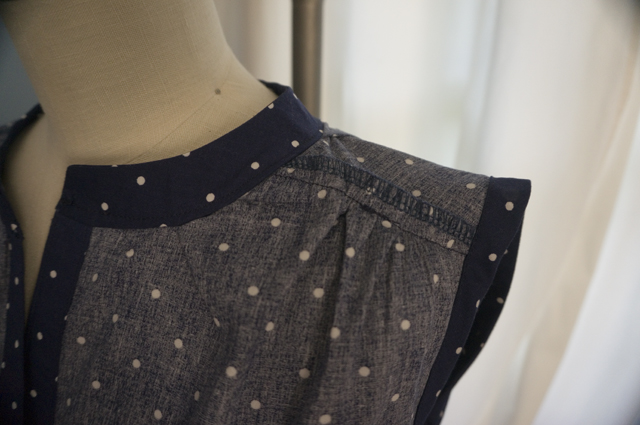
With all of those little details covered, let’s get to my real gripes: the intersection of design choices, construction, and instructions.
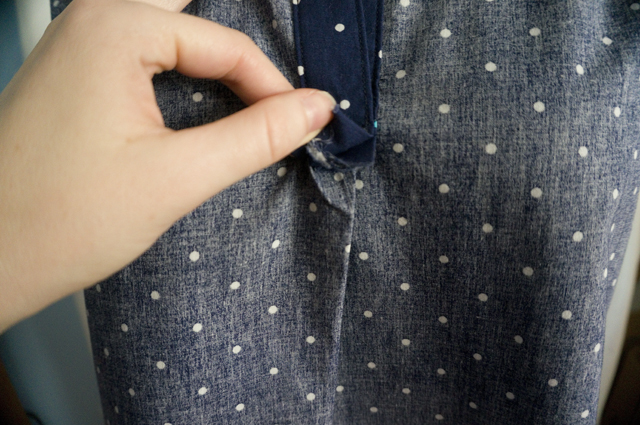
What I didn’t notice when I bought the pattern, and what you almost certainly can’t see because the fabric is so dark, is the vertical pleat coming off the bottom of the placket. On the pattern piece, the placket opening is double the necessary width so that you can hot-dog fold the front of the blouse to create that pleat. It’s unnecessary from a construction standpoint, it doesn’t add anything to the look of the garment, and I hate it. Is that an irrationally strong feeling? Yes. Did I resolve to move heaven and earth to engineer that pleat out on my next version? Also yes.
Constructing the placket was way more challenging than it needed to be, though it’s probably fair to say that’s partially my fault. After preparing and applying the bands for the placket, I could not make sense at all of this instruction: “On inside, lap left front band over right. Stitch lower edge of bands to end of opening.” Or more precisely, I understood that it was supposed to look like this…
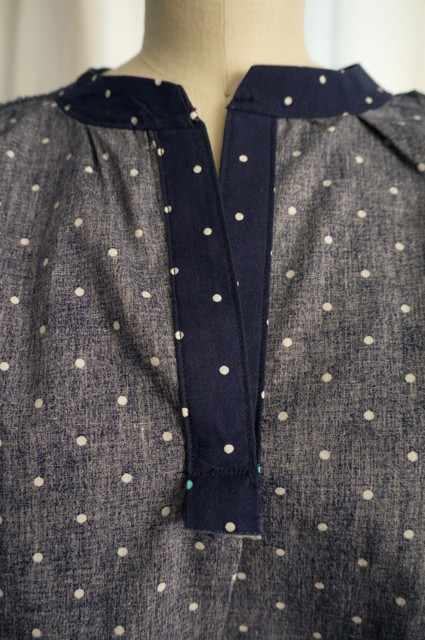
…but I could not get the bands and the opening to cooperate. After reading through Allie’s clearly written and photographed tutorial on sewing partial plackets, I finally figured out I hadn’t made the angled cuts into the corners of the opening. This step should definitely be in bold type, because if you don’t do this correctly (or at all), the origami WILL NOT work.
While we’re staring at the inside of the placket, I’d like to take a moment to complain about the unfinished ends (is this normal in RTW? I don’t have any partial placket shirts I can check) and the weird fold that results where the placket meets that stupid pleat.
On to the gathers! There are gathers around the curve of the neckline between the placket and the shoulder seam, along the shoulder seam between the neck and armhole, and around the back neck.
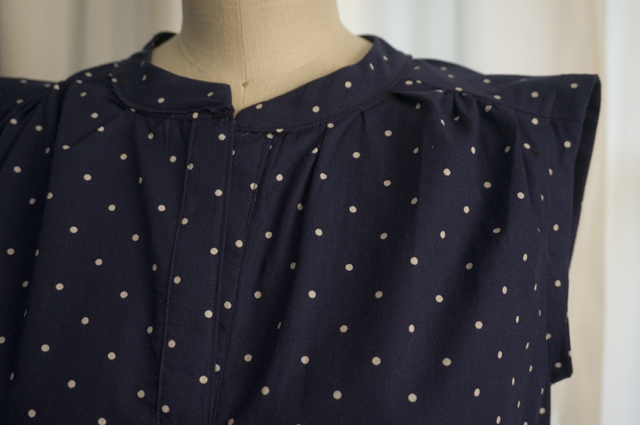
As near as I can tell, the gathers between the placket and the shoulder exist solely to pull the V of the placket open, otherwise the bands would neatly overlap each other like a normal (hidden) button placket. The area to gather is quite small, which made it difficult for me to gather evenly and ended up looking like unintentional puckers. In addition, since these gathers are at a roughly 45 degree angle to the ones coming off the shoulder seam, it results in a weird, bunchy, wrinkly mess in that area. Ugh. As with the pleat, I resolved to eliminate the gathers around the front neckline on the next iteration.
The gathering on the back neckline is fine design-wise, although I didn’t execute it well.
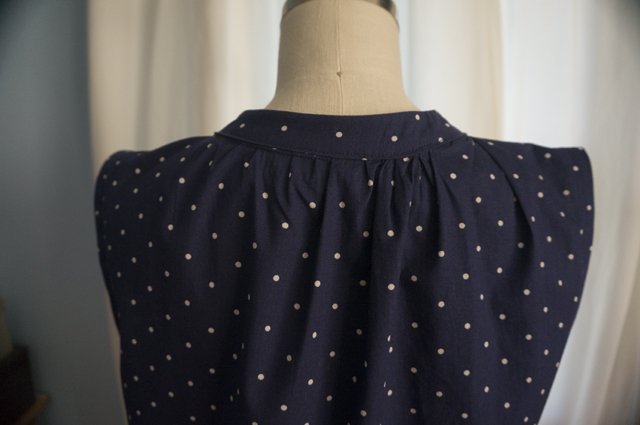
It’s a shame that everything about this was a flop, but I really am glad that I figured out all of my the pattern’s issues before I cut into the fabric I really wanted to use, especially since my real-deal fabric was thin and slithery. It certainly didn’t hurt to practice a few techniques, either: my topstitching remains dodgy, but I’d like to think it’s just improving in very small increments.

