Making Gingerbread

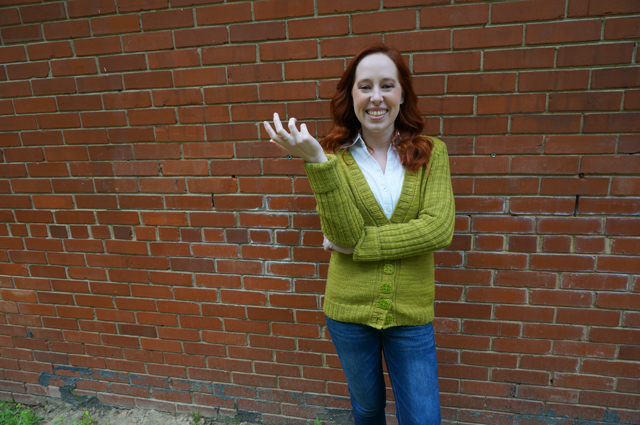
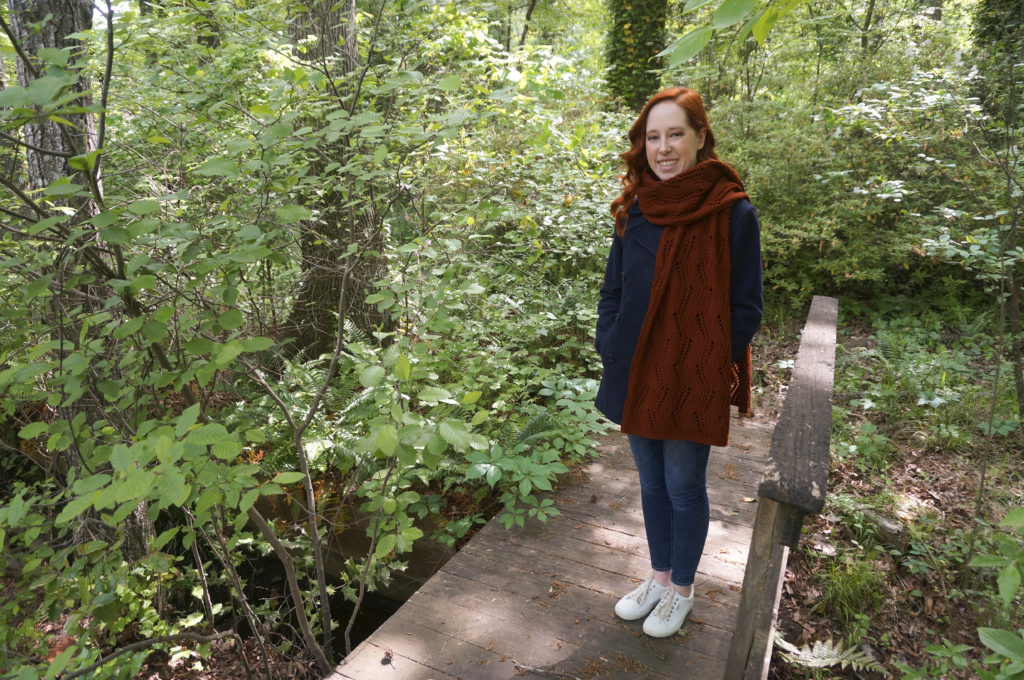
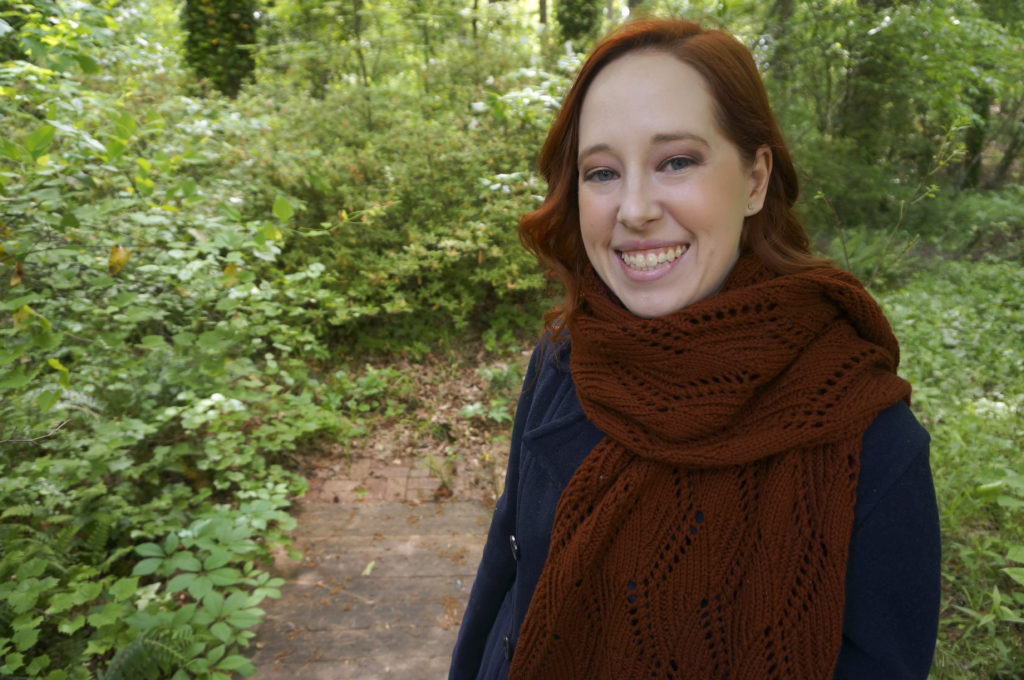
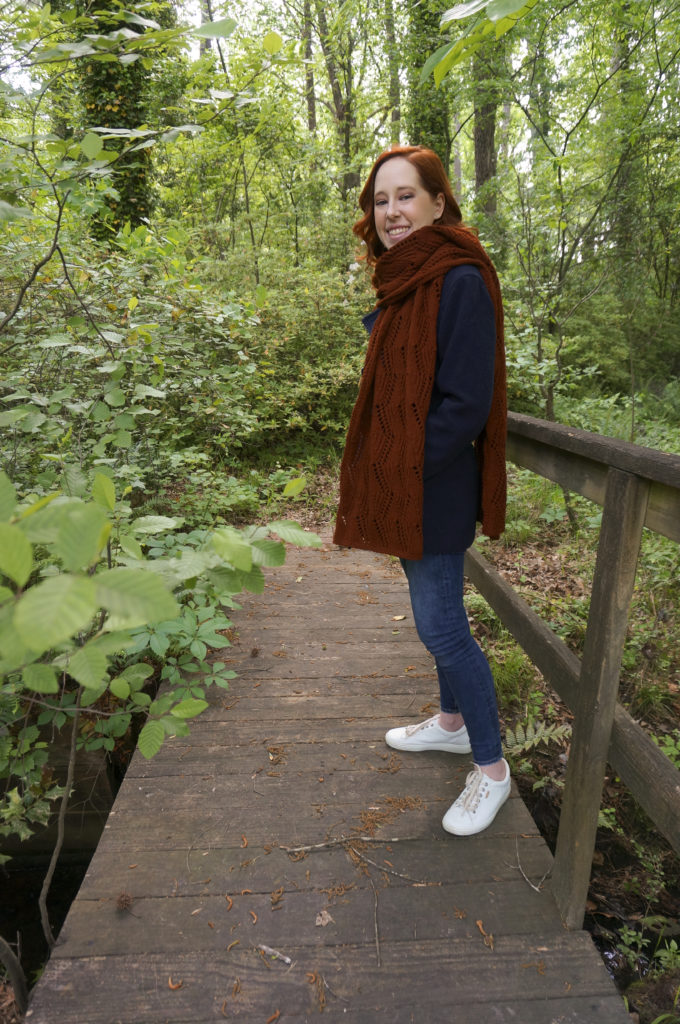
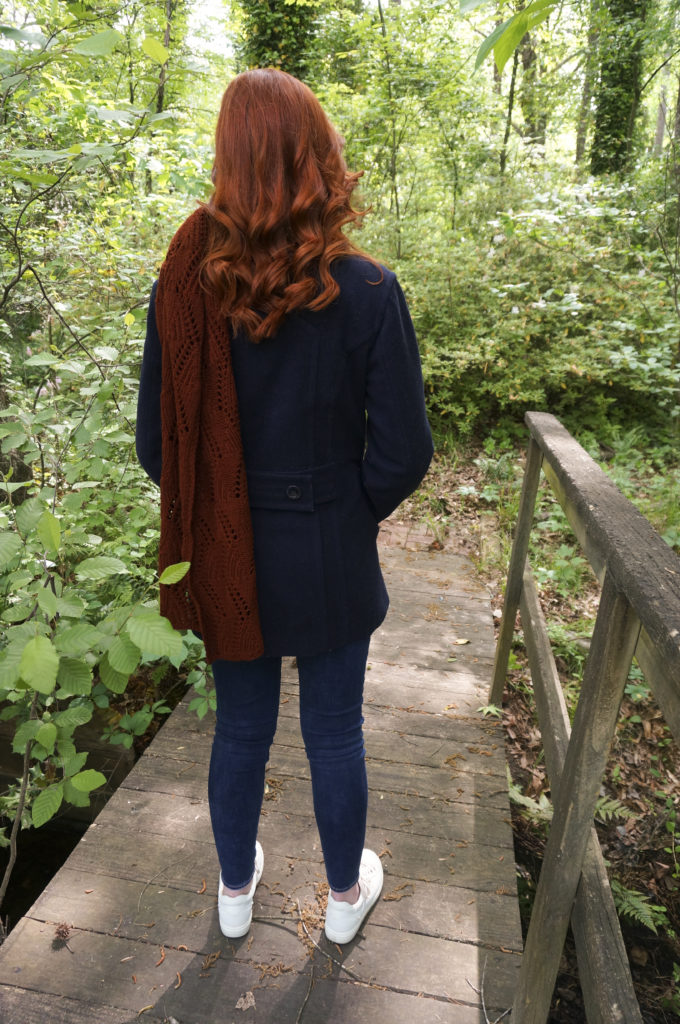
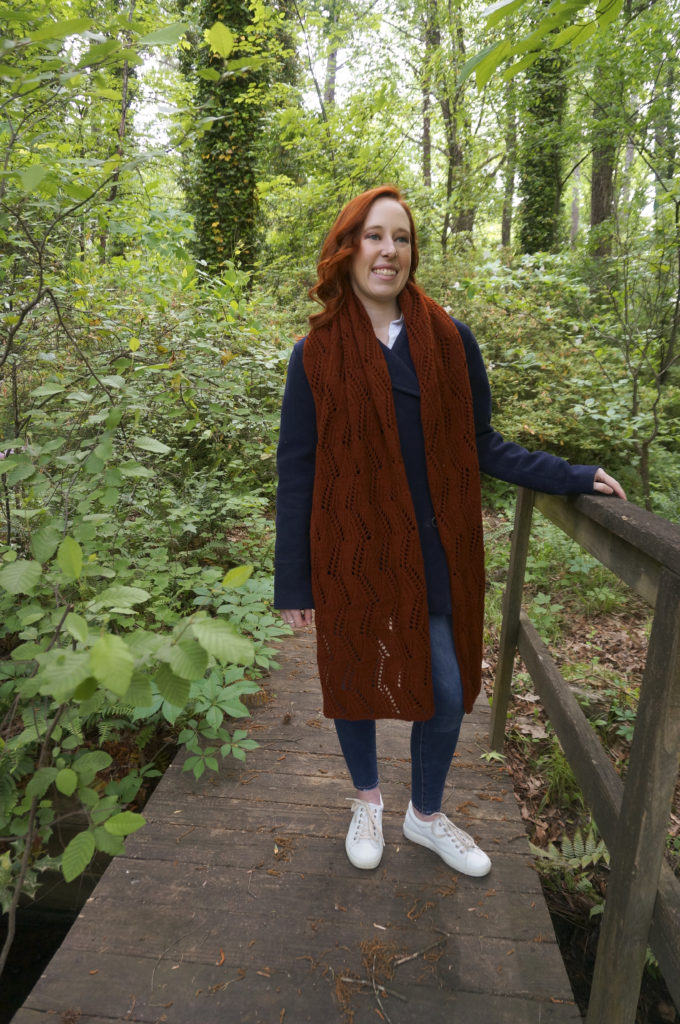
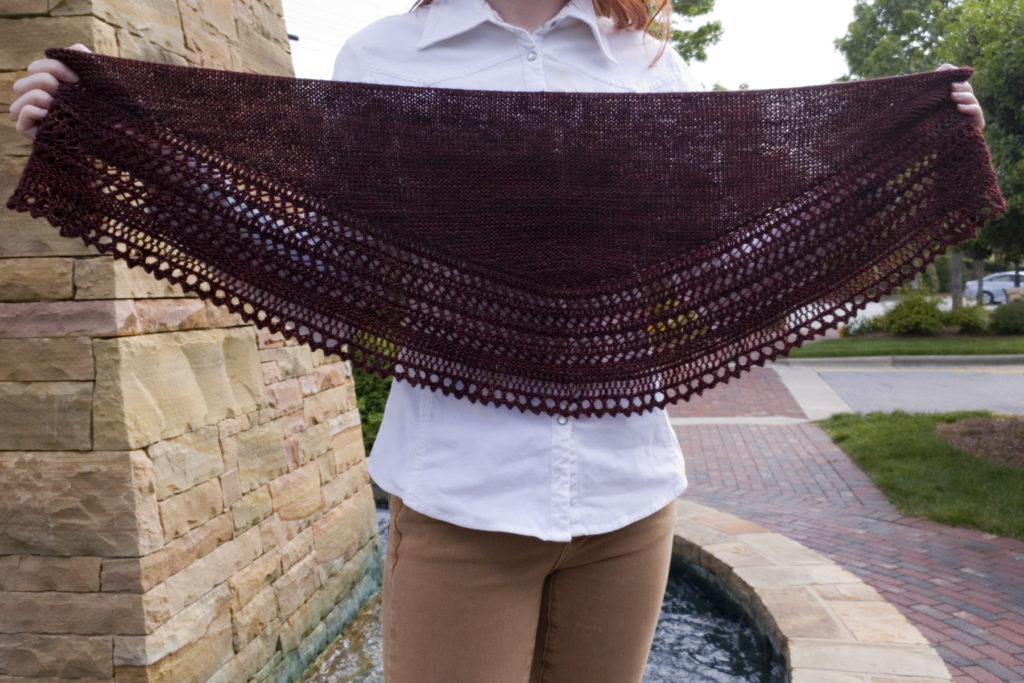
Although these photos look more or less seasonable—heavy coat, thick scarf, let’s just ignore those exposed ankles—they were taken on the last cold day of spring in 2019. In fact, by the time we were finished shooting, I was starting to get a little steamy under all that wool.

If you think roughly nine months between cast off and debut is a long time, you’ll be positively boggled to know that this pattern, Gateway by Glenna C., is the oldest surviving entry in my Ravelry favorites. Ravelry very helpfully notes that I added it on March 24, 2012, meaning it had been marinating in the back of my brain for almost 7 years by the time I finally committed yarn and needles to it.

It would be rather convenient if I could chalk up that long wait to the difficulty of the pattern or the cost of the yarn, but the lace is easy to read and Quince & Co.’s 100% wool Lark is quite economically priced.

This was my first time knitting with a Quince & Co. yarn, which is another head-scratcher, since it was the first small-scale (at the time, anyway) yarn company I learned about as I was starting to branch out beyond craft store offerings and widely available commercial brands like Cascade and Berroco. While Lark isn’t as snuggly as a superwash merino, it’s smooth and plump and not at all unpleasant to knit with. (I’ve got nearly 1,000 yards of it under my fingers to prove it.)

The color, Gingerbread, continues my simmering love affair with dark orange and orange-y brown yarns (Andraste, Oxidation, More of a Bourbon Girl, and an as-yet-unblogged sweater). What can I say—I’m enchanted by the idea of having knits in the same color family as my hair. I’m a simple creature like that. (In every other way, however…)

If you’re interested in the rest of the specs, you can find them on my Ravelry project page.

On the subject of seasonally appropriate and thematically related things, I made gingerbread from scratch yesterday and it is amazing.

Firstly, it’s proper gingerbread, not ginger cookie of the sort used to make gingerbread folk or gingerbread houses—though to be very clear, I also love soft gingerbread cookies and crisp gingersnaps. A lot.

Secondly, it’s dark and molasses-y and not overly sweet, with the added benefit of filling the house with the sweet and spicy smell of gingery delight for the hour-long bake time. I’ve already had it as both dessert and breakfast, and there’s at least half a pan left to enjoy before the festive season is over. I highly recommend it.

On that note, I’m off to soak up a little more holiday cheer before I have return to my usual routine. Merry Christmas all!

Pomme

A quick entry on an exceedingly quick project. How quick? More than a weekend but less than a month. I know that I started it after I finished my Stone’s Throw cardigan, but before I started my next project at the beginning of February.

Normally I print out patterns to take notes on, but this is such a simple design that I downloaded the pattern to my phone and referenced it only a handful of times to make sure I got the proportions of ribbing and body correct and decreased the crown in a pleasing manner.

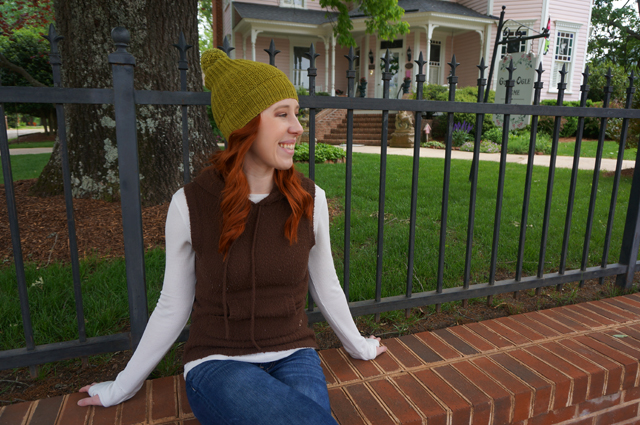
The pattern is Rocky Ridge Hat by Knox Mountain Knit Co., and it’s available as a free Ravelry download. The yarn is
Swans Island Washable Wool Collection DK, the leftovers from my cardigan. You can view my Ravelry notes here, but there’s precious little to say about it. I knit the adult medium size as written, including the length.

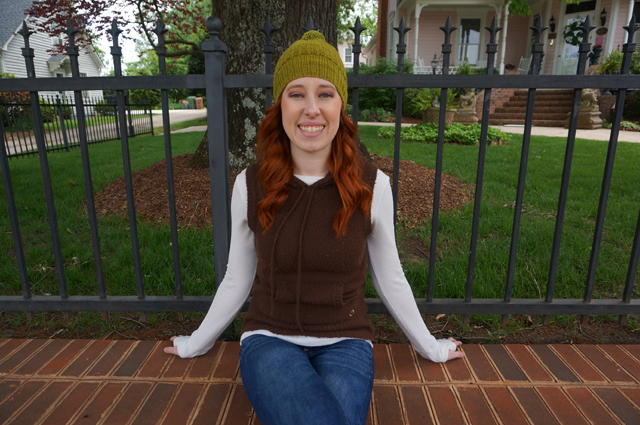
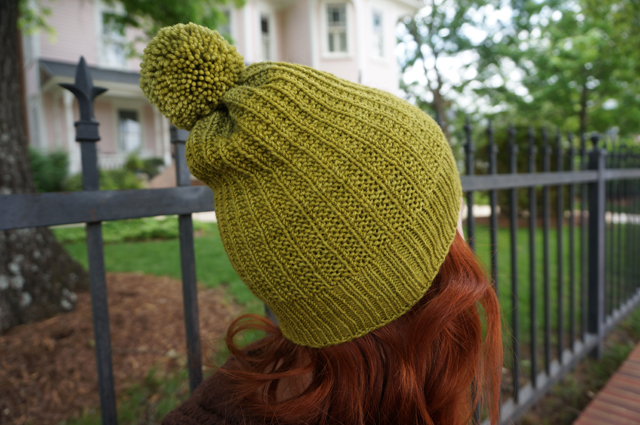
Can you believe this is my eleventh hat, but the first one with a pom pom? I know, me neither! When it comes to hats, I’m a fan of the whole genre, and I have no qualms about poms. In fact, I’m rather fond of them, and encourage them for others. But somehow none of my many beanies ended up with a dapper topper. Really, it was long overdue, and I’m glad the shortcoming was rectified.

This is also the first hat I’ve made that could be described as even remotely slouchy. Between you and me, I think it could have been slouchier, but the extra ease would have come at the expense of the pom pom, and that was a sacrifice I just wasn’t willing to make.

I foresee many more slouchy and/or be-pommed hats in my future. Until then, enjoy this ridiculous picture of my pom pom hype.

Stone’s Throw

For someone who waxes poetic about autumn at the slightest provocation, I am woefully unprepared for my favorite season. While I have a handful of rather dressy blazers and a quantity of hoodies that my husband loves to side-eye, all of my cardigans are lightweight and too close-fitting to wear with anything other than a camisole, meaning they function more like long-sleeved t-shirts than true layering pieces. Add to that the fact that all my button-ups save one are v-necks rather than a more traditional crew neck, making them unsuited for pairing with the basic cardigans you find at most retailers this time of year, and you can see how days with a 20-degree swing in temperature prove challenging.

Enter CustomFit, specifically the built-in design Stonington. V-neck? Check. Originally designed with a thicker yarn in mind? Check. Lots of stockinette for a classic look and a quick and relatively mindless knit? Check and check.
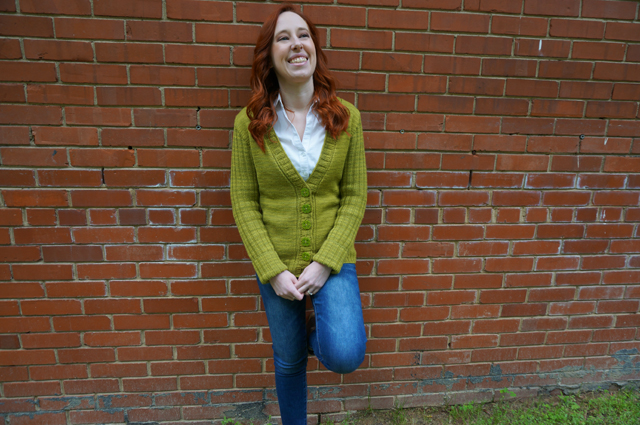
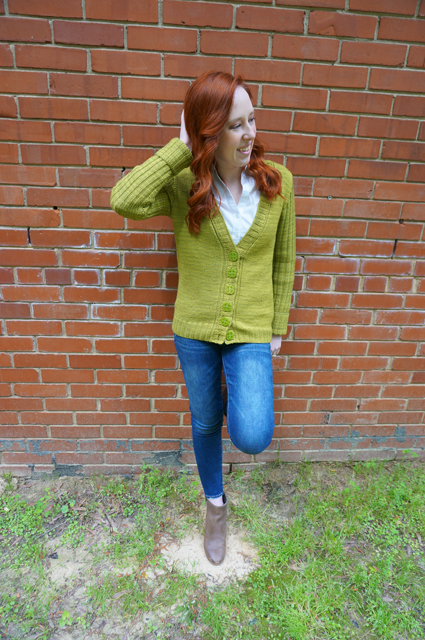
Caitlyn is leaning against a brick wall and wearing her CustomFit Stonington cardigan by Amy Herzog

The green of Caitlyn's CustomFit Stonington contrasts with the orange-red brick behind her

The yarn is Swans Island Washable Wool Collection DK in color Pesto. I got it from my beloved Warm ‘n Fuzzy during their summer sale in 2017. Although there were only eight skeins, it looked like they were in the original bag from the wholesaler, so I assumed they were all the same dye lot. They were not, but I did not immediately discover this fact, in part because I didn’t even wind the yarn to start knitting until April 2018.

By sheer coincidence, all of the skeins I grabbed for the back of the sweater were the same lot. It wasn’t until I was partway through the first front that I discovered I had six skeins of one lot (of a bluer hue) and two skeins of another lot (of a yellower hue).

I ripped back and decided to alternate skeins on the fronts and sleeves. There are noticeable stripes, but I think they’re softened somewhat by the semi-solid dye, producing an overall effect that resembles a tonal yarn to my eye. The difference in lots is obvious at the side seam, where the solid back meets the two-tone stripes.
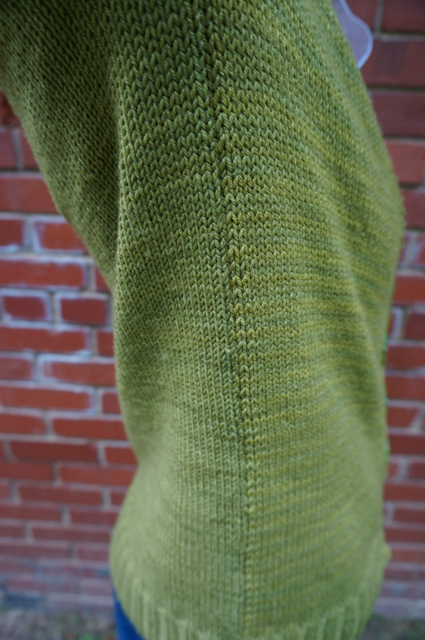
A close-up up of the side seam of Caitlyn's CustomFit Stonington, showing how the yarn's dye lots differ on the front and back

A bigger issue than the dye lots, however, was coming up short on yarn to complete the sleeves. I searched online for more of the dye lot I needed, but the couple of shops I contacted either didn’t have the correct one or didn’t respond to my inquiry. At least one shop sold out of the Pesto color entirely while I was waiting for responses, increasing the pressure to find something before the yarn was no longer available.

I decided to gamble on a mystery skein from WEBS, which turned out to be a third dye lot. While certainly not ideal, it was close enough to one of the two I was using that I thought I’d go with it.

Unfortunately, even with a ninth skein, I was going to be a little short. (Well, slightly less than nine, as I’d failed to account for the yarn already eaten up by my swatch, lying forgotten in a knitting bag somewhere.)

At this point, you might well be wondering how I could have miscalculated the amount of yarn I’d need this badly, and why I didn’t choose a different pattern if I wouldn’t have enough. The truth is that CustomFit will estimate the yardage you need based on your swatch size and weight. I just…chose not to trust it. My experience with yardage estimates, much like fabric cutting layouts, is that they’re more than generous. I figured I’d squeak in just under the estimate with my nine skeins.

It’s at this point, in a bit a panic because many shops no longer listed this yarn at all, that I realized I should have turned to the Ravelry community from the beginning. After searching through other users’ stashes, I was able to find not one but two users with the dye lot I needed. About a week later, I had a tenth skein in hand. I ended up using less than one-tenth of that tenth skein, leaving almost a whole skein. Naturally, it became a matching hat—more on that another day!

Even after accounting for the time spent ripping, acquiring two extra skeins, and re-knitting, it’s hard to say why it took so long to finish this cardigan—long enough to cross the threshold into a new year. I could gesture vaguely toward blocking, seaming, knitting the band, and facing each side with grosgrain ribbon, but I’m not sure that was the reason? My notes, as usual, provide no clues.

I did spend some time trying to find worthy buttons. I came very close with one-of-a-kind marbled glass buttons at local knitting and sewing store Downtown Knits, but they didn’t have enough for my cardigan and weren’t able to source more. I looked around at a few other places, and ended up settling for plastic ones from JoAnn that I stitched on by hand. They’re an interesting shape, but I may yet switch them out if I find something else I like better.
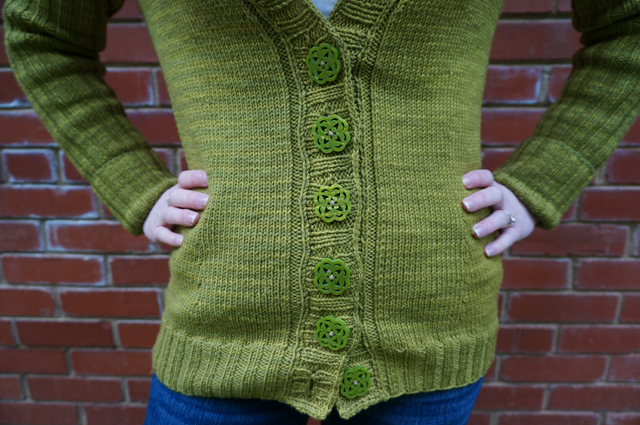
The buttons on Caitlyn's CustomFit Stonington are green plastic and shaped like stylized dogwood flowers

Overall the fit is good but not really what I was aiming for. Amy’s original Stonington was designed to hit at the low hip, but I’d been chosen a slightly higher (but not high hip) hem; I definitely ended up with the same low hip fit she got anyway.

The sleeves also ended up a lot longer than I’d planned. I tend to shoot for about one inch past the wrist; these cover my palms and most of my fingers. I wear them cuffed, which looks okay but isn’t ideal.

These length issues are probably a result of the superwash yarn as much as my measurement set. I wet-blocked my swatch but laid it flat to dry. Instead, I should have hung it to dry with clothespins clipped to the bottom edge to simulate the weight of the sweater pulling on itself.

In terms of ease, I chose an average rather than close fit because that’s what CustomFit recommends when you plan to wear your sweater over a long-sleeved button-up or t-shirt. That ended up being more than enough ease for comfort, and I’d personally prefer a slimmer fit, especially through the back. Looking at the pictures, I could probably stand to narrow the shoulders a smidge too.
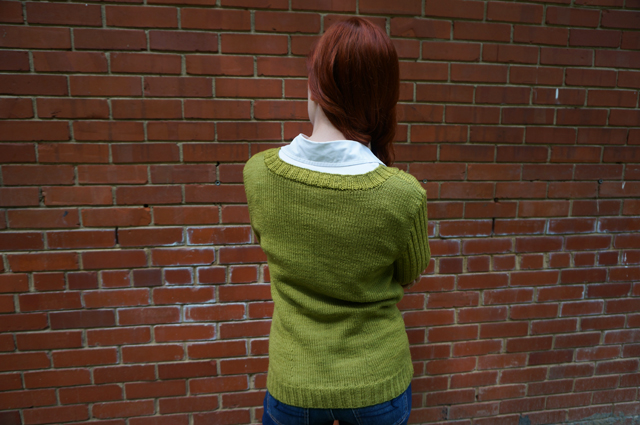
The back view of Caitlyn's CustomFit Stonington, showing wrinkles around the lower back

The less-than-perfect silhouette hasn’t once stopped me from wearing this sweater, and I really thought it might. I had a hard time choosing pictures because so many of them revealed how the whole thing is a little too long, a little too loose, and a little too straight for my taste. But when it’s on, so long as I don’t linger in front of a mirror, I really don’t notice. It’s warm, soft, and comfortable over the shirts I live in during the work week through the fall and early winter. It’s a fine alternative to a jacket when it’s chilly in the morning but temperate by lunch time.

The pattern is one I could easily see becoming a staple knit up in a bunch of colors. Not for me, mind you—I enjoy variety in my knitting if not my knitwear (I own an embarrassing number of identical v-neck pullovers in different colors), so I doubt I’ll make another one. But the idea of getting more mileage out of a knitting pattern is a nice thought. Right? Right.

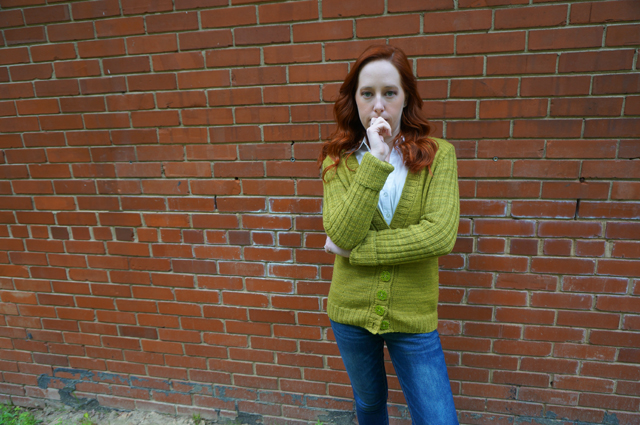
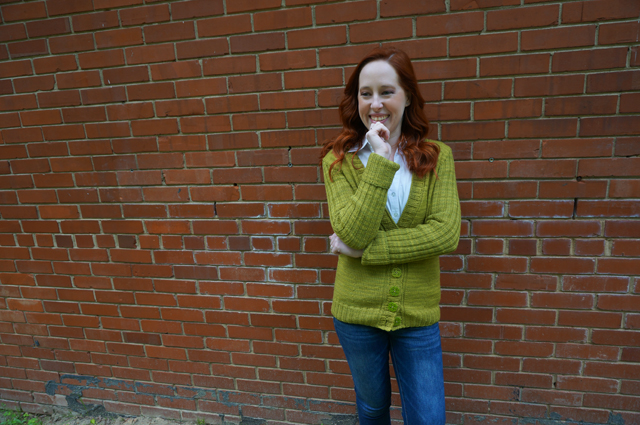
Here are three more pictures that don’t show any useful details of the cardigan itself, but I like them too much not to share them.
More of a Bourbon Girl

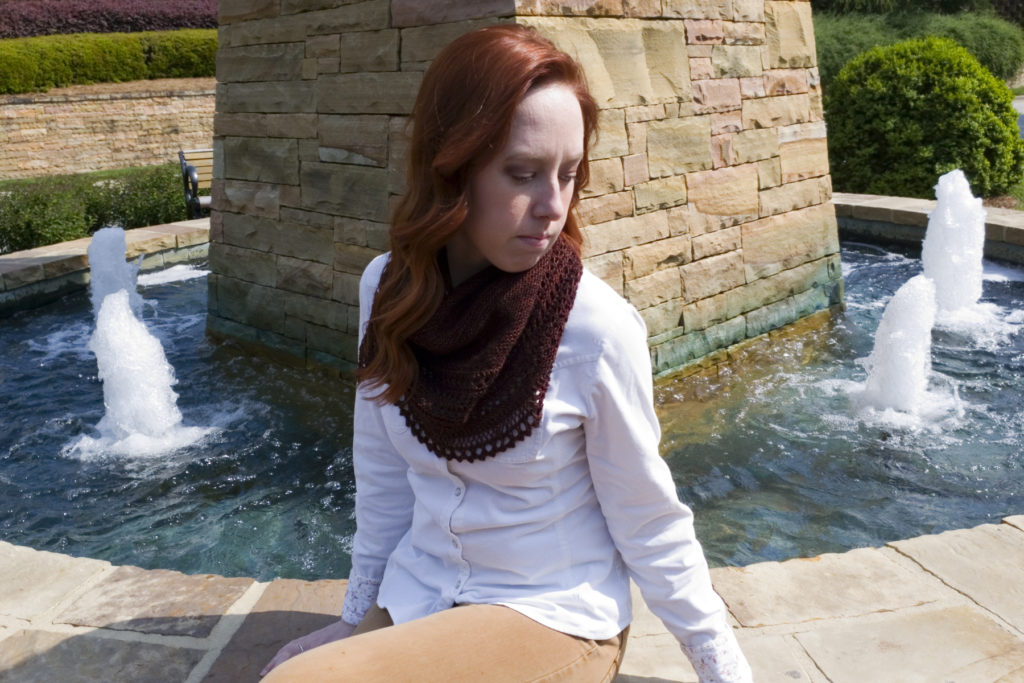
Caitlyn is sitting on a stone ledge around a fountain. She is wearing her Henslowe shawl wrapped around her neck like a bandana.

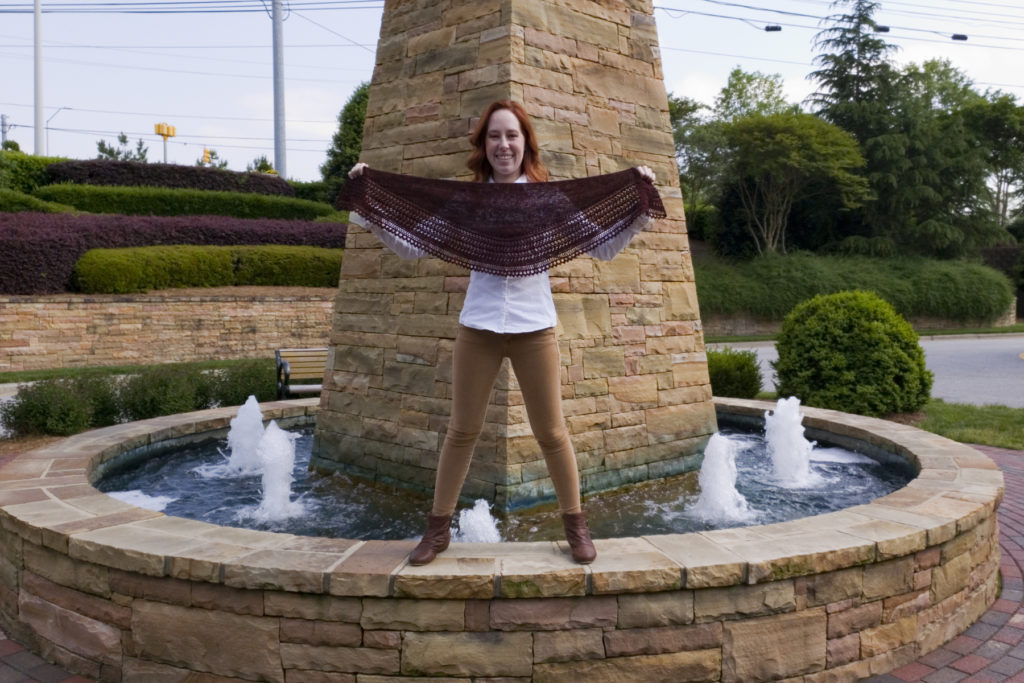
Caitlyn is holding up her Henslowe shawl to show it has a wingspan of about 4 feet and a depth of about 1 foot.

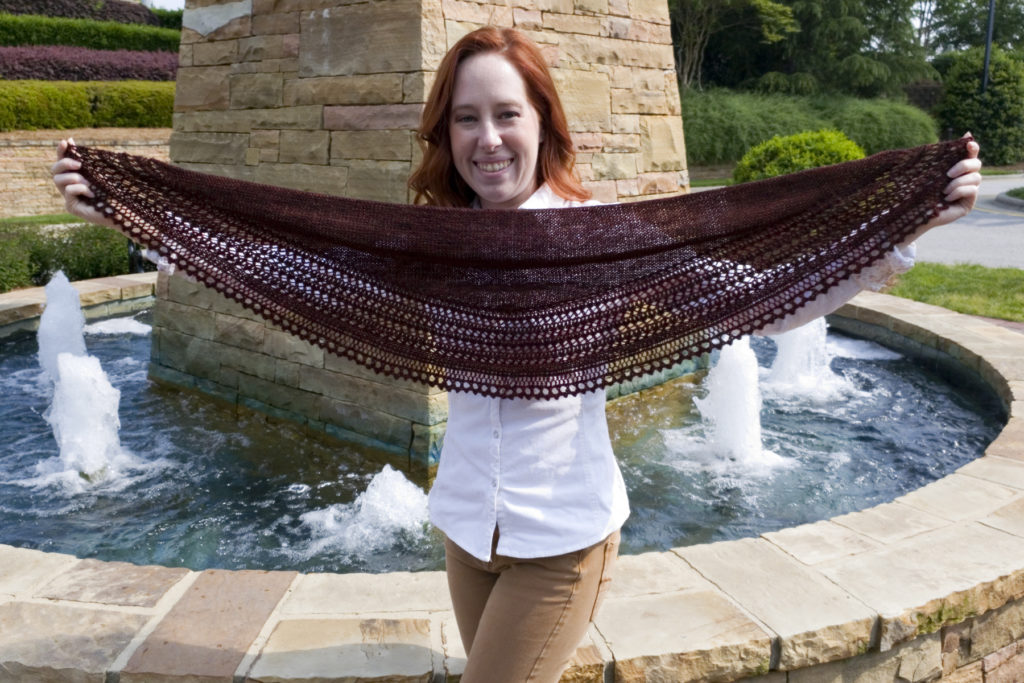
A close-up of Caitlyn holding the Henslowe shawl to show the shape is a shallow, rounded triangle

This is the Henslowe shawl by Beth Kling. The yarn is a delicious fingering-weight merino single from Neighborhood Fiber Co. called Rustic Fingering. The color is Ramblewood, a warm reddish-purplish brown semi-solid. If my notes are any indication, there’s very little to say about knitting up the pattern: it’s neatly written and easy to follow, with helpful designer’s notes sprinkled throughout and a clear construction diagram. No head-scratchers here, just a soothing knit from beginning to end that yields plush garter stitch and an interesting lace.

Of course, I’m not sure my notes ought to regarded as an authority, since they completely neglect to mention when I started or finished my Henslowe. (Fortunately, I seemed to have had the presence of mind to create a Ravelry project at the outset.)

Why do I (usually) remember to write down the date I start a knitting project, but never the date I finish? It hasn’t been that hard to train myself to print off a new pattern and jot the date in the upper right corner of the first page. Is it so much harder to bind off the last stitch, breathe a sigh of relief, and then pause to scribble a second date under the first before putting everything away?

I mean, I guess I don’t consider a knit really finished until the ends have been woven in and it’s been blocked (unless it’s a hat; I don’t bother to block those), so I’d have to wait until that’s done for it to count. But if I can take the time to painstakingly set all those pins in place, then pluck them out again, how much longer would it take to pull out the pattern again? Especially since I’m going to have to pull out the pattern again anyway to transcribe my on-the-fly hard copy notes in Ravelry.

If I can set aside the time to pick an outfit, do my hair and makeup, shoot photos, transfer said photos from camera to computer for editing, and write a blog post, then why oh why can’t I write down a mere six digits (four if I’m feeling truly lazy)?

Sure, calendar days aren’t a great proxy for time commitment: I don’t knit every day, and even on days when I do knit, I seldom knit for the same amount of time. And that doesn’t begin to touch the amount of time spent eyeing a project up and down, admitting something’s wrong, succumbing to weeping and/or gnashing of teeth, tinking, and re-knitting.

In truth, tracking the dates is barely helpful to me, and useless to anyone else—so why do I even care?

The best answer I can come up with is that I like seeing the ebb and flow of this hobby. I like knowing how many things I knit in a year. I like being able to see when I’ve focused on a single project and when I’ve juggled two or even three projects (as was the case here; I knit this shawl from start to finish in the middle of knitting a cardigan). I don’t need to have something to knit all of time, but I definitely get restless and cranky if I go too long without a project. “Why do I feel out of sorts when nothing is really wrong?” has on more than one occasion proved easy to diagnose by checking the finish date on my most recent project.

Filling out every field in Ravelry also satisfies my inner completionist. And what knitting project is complete without an  overwrought explanation for its made-up and irrelevant name? The pattern moniker, Henslowe, and the color of the yarn reminded me of Hennessy, a cognac. I do enjoy cognac in cooking, but I’m not one to drink it straight—when it comes to liquor, well, I’m more of a bourbon girl.

Another Handmade Christmas

This is it, folks! This is the final post documenting things I made last year. After this, I can move on…to catching up from the first quarter of 2019…

I admire anyone whose holiday traditions—whatever holiday it may be—involves making gifts for their loved ones or community members. My gift-making ambitions have always grossly exceeded my available time, resources, and common sense, but in 2018 I managed to make a few little things for some of my favorite people.

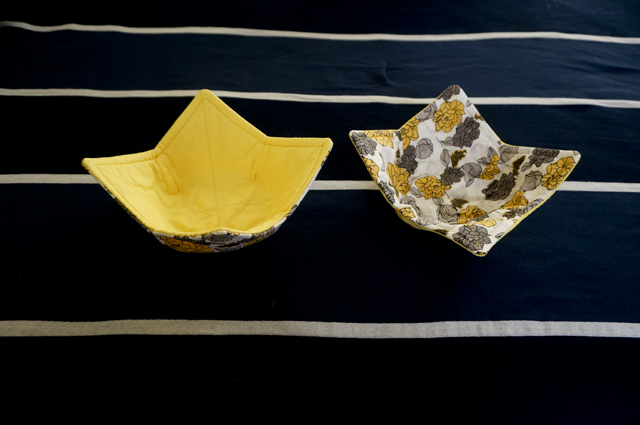
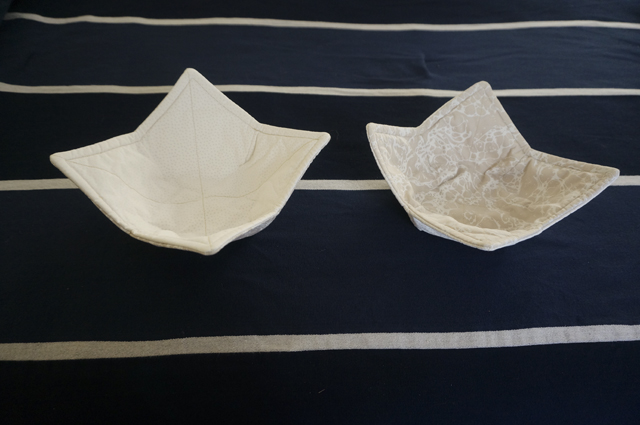
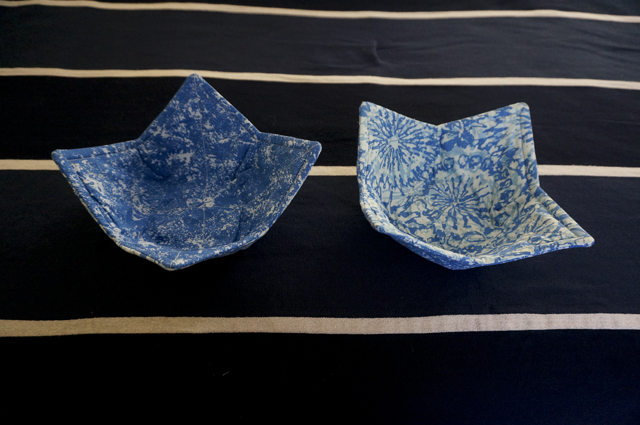
Up first, and by request, bowl cozies! From top to bottom, these went to my sister, my mom, and my sister-in-law Heather and her wife Elaina.

Two bowl cozies with a yellow and grey floral exterior fabric and a solid yellow interior fabric

Two bowl cozies with a taupe and cream abstract patterned exterior fabric and taupe and cream dotted interior fabric

Two bowl cozies with light and medium blue tie-dye patterned interior and exterior fabrics

My mom saw these at a craft fair but didn’t see any in a fabric she liked, so she sent me a text suggesting they might be an easy and well-received gift. I used instructions from Happy Hour Stitches, but you can find the details on any number of sites—in fact, Helen’s Closet just posted a tutorial a little over a week ago in a new series on scrap-busting.

My sister’s bowl cozies were made with leftover fabric (you may recognize it from her casserole carrier from the previous Christmas); the others were made with fat quarters from JoAnn. I already had 100% cotton batting on hand, but I needed to purchase 100% cotton thread to stitch everything up, as polyester could melt or scorch in the microwave.

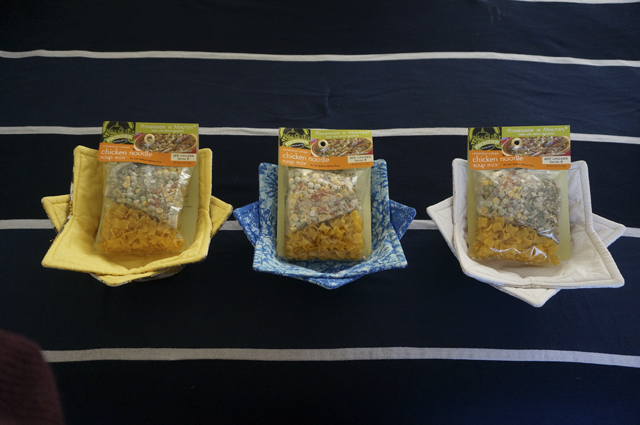
Each recipient’s bowl pair of bowl cozies was served up with a bag of soup mix.

Three pairs of nested bowl cozies, each holding a bag of pre-packaged soup mix

The other gift was for a secret Santa exchange among the members of my D&D group. By sheer coincidence I paired with Jorren, the amazing illustrator from the art exchange. He had been working hard on multiple projects leading up to December, including prints for a holiday pop-up shop and several commissions. I wanted to show my appreciation for his work, so I picked a couple of art-themed gifts: a graphic novel called Junji Ito’s Cat Diary: Yon & Mu and a set of Pentel Arts Aquash brushes.

I needed something to round the package out, and Jorren had just debuted his freelance graphic design business, Mind Fuzz, so I got it in my head that I needed to put his logo on something. Trouble was, he wasn’t using the logo as his profile image, and I couldn’t very well ask him for a copy of it without tipping him off to my plan.

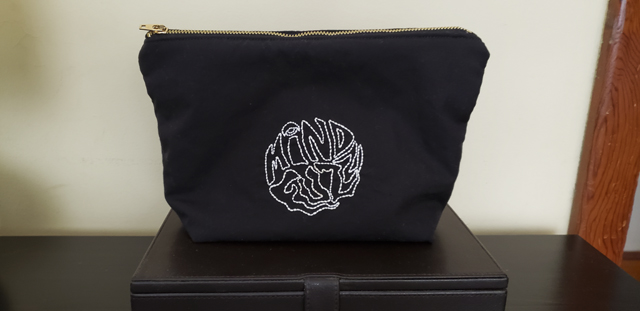
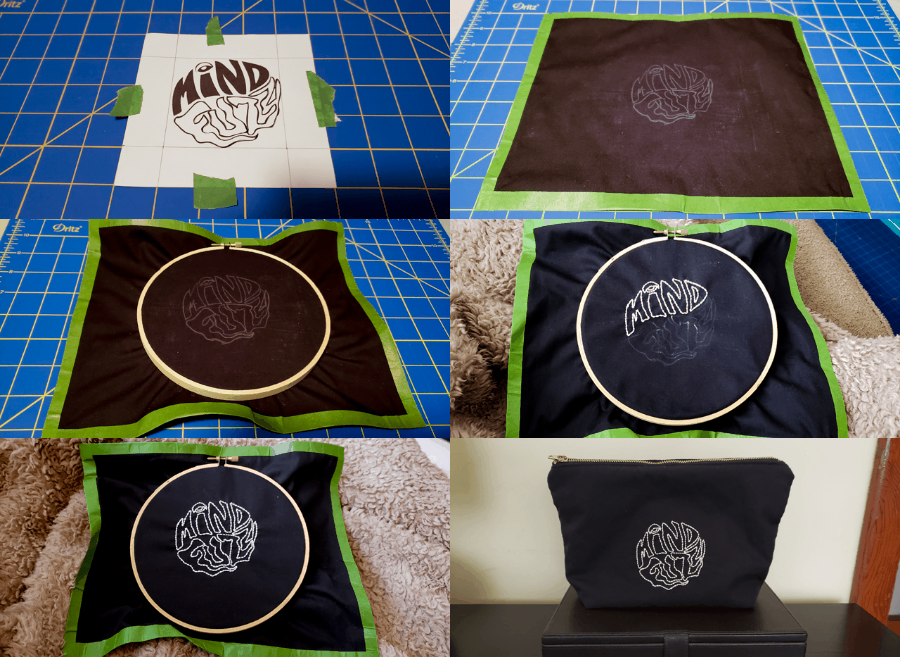
In ninja-hacker fashion, I found a photo that he shared of a t-shirt screen-printed with his logo and proceeded to manipulate it in Photoshop and Illustrator until I had a black-and-white vector image that I could scale and print as a template. I transferred the template to a remnant of black poly cotton blend, embroidered the outlines of the letterforms, and then sewed up the embroidered fabric into a sturdy pouch with a brass zipper. Ta-da!

A black zippered pouch with outline of the words "Mind Fuzz" embroidered in white in a circle in the center of the pouch

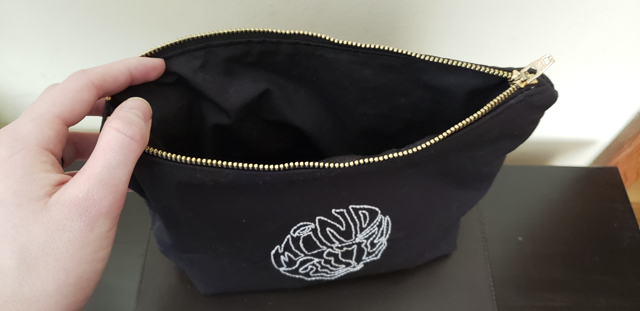
I followed instructions provided by Jedi Craft Girl, but as with the bowl cozies, there are countless examples of this and similar pouches online. My pouch is lined with the same black fabric as the shell and interlined with 100% cotton batting to hold its shape. The embroidery is regular old DMC floss in white, stitched up using a hoop and a crewel needle.

A black zippered pouch with the zipper opened to reveal a cleanly finished interior lined in the same black fabric

I ignored the dimensions in the instructions; they were too small for my purposes. My pouch is slightly smaller than I intended at 9 inches tall by 11 inches wide (at the top), but is large enough to fit Jorren’s preferred style of travel notebook, along with a handful of pencils or pens.

Just for fun, I had Justin put together a GIF of the progress shots:

No last-minute sewing, I didn’t drive myself crazy, and everyone loved their gifts—success!