Assignment #6: A Better Kitchen by Sunday Evening

Cleaning the kitchen is easily my least favorite deep-cleaning chore.¹ Cleaning just about any other room of the apartment consists mostly of tidying, with dusting and vacuuming to finish it off. Cleaning the bathrooms, although I’ll drag my feet on it, usually doesn’t take as long or use as much energy as I dread it will. Cleaning the kitchen is always a serious undertaking, filled with scrubbing and fumes and rearranging everything in sight in order to clean under and around it. Even with a small galley kitchen the prospect is daunting, and I always feel wiped afterward, so trying to throw it in amidst other chores will guarantee that nothing else gets done.

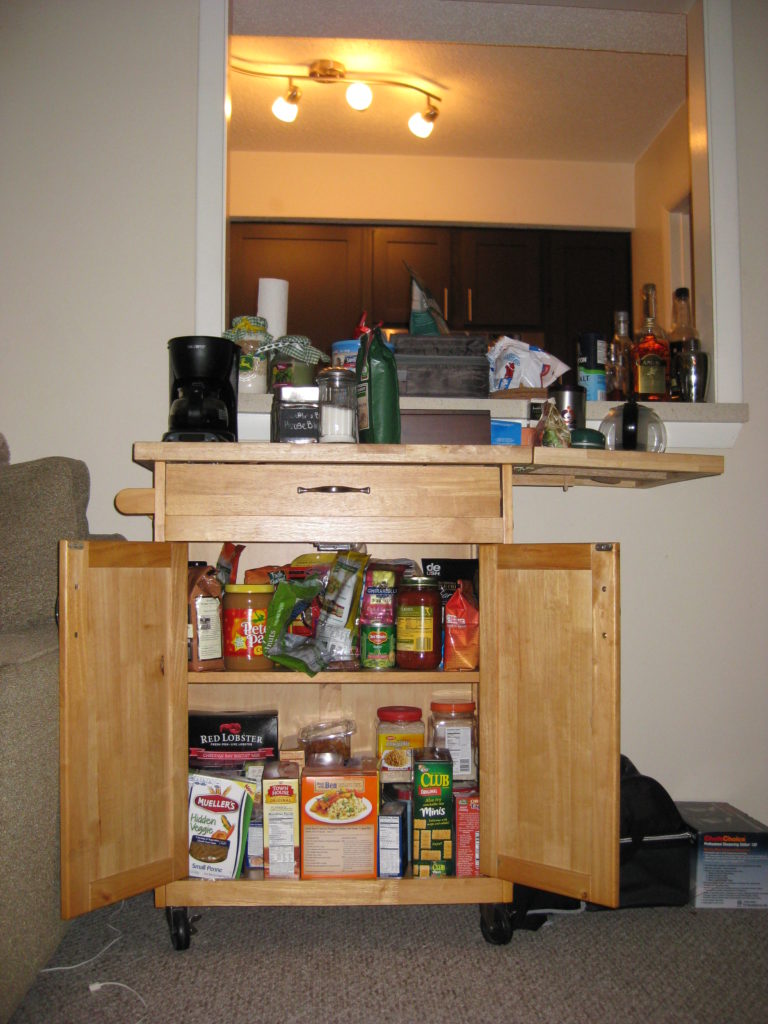
The assignment instructions emphasize improvement over perfection, so I decided to tackle only two of the three big chores they recommend—I cleaned out the fridge/freezer and cleaned all surfaces but postponed the cabinets because I think they’ll need a whole day of their own—and instead added in a couple of chores that I should probably do more regularly but often overlook:

  • Clean the range hood. Although this isn’t particularly difficult, I’ve usually avoided it on the grounds that I don’t have a cleaner that can cut through the greasy, gummy, dusty grime that accumulates up there. This time I tackled it by thoroughly soaking it with multi-purpose surface cleaner and then letting it sit (and drip, because there’s no way around it) for 15–20 minutes. That seemed to do the trick. And if I can remind myself and Justin to wipe it down more frequently, the extra-long soak shouldn’t be necessary in the future.
  • Oil wood cutting boards. We have a trio of bamboo cutting boards that have served us well since we first got married five years ago, and I’m ashamed to admit that although I’d bought mineral oil to treat them with, I’d never actually used it. (Not for that, anyway. It has oodles of other household uses.) I’m afraid at this point there are some early signs of splitting that can’t be repaired, but at least I’ve staved off worse damage. I need to write down a reminder in my planner to do this once a month.
  • Sharpen knives. Last year for Christmas my parents gifted us an electric knife sharpener, which is a huge boon because I’ve been completely unable to learn how to effectively use a sharpening steel despite my best efforts. We try to sharpen the knives as we notice them becoming dull, but since I was in the kitchen anyway it seemed like a great opportunity to do all of them at once, including the steak knives and paring knife.

Other chores that I didn’t need to do today but that are easy to put off or forget are cleaning the coffee maker, changing the water pitcher filter, and rinsing out the utensil canister that sits on the counter.

What are smaller household tasks that you find easy to skip but make a huge difference when you do them? What about chores you can’t stand—how do you motivate yourself to tackle them?


¹ My least favorite daily chore is doing the dishes. My childhood home and my first apartment with Justin didn’t have a dishwasher, and I loathed dishes. Working in food service for three years just reinforced my hatred. Having a dishwasher now certainly helps, but I’d sooner find two other chores to do than load it, or hand-wash anything. Justin gets dish duty a lot.

Assignment #5: Meditate and Pick a Project

Since I’d already decided that my goal project for the month is creating a pantry in the laundry room, the idea of sitting still for ten minutes reflecting on the problem areas of the apartment didn’t seem like a productive use of time. Instead, I decided to begin researching shelving options so that I could plan to purchase something in advance of the day dedicated to working on my goal project.

First, I took stock of the space. Looking into our laundry room, the washer and dryer are on the left, and the laundry room door swings into the room to the right, which leaves a space on the right past the door and opposite the dryer for a shelf system. The space can accommodate something 27 inches wide and 17 inches deep to avoid interfering with both the laundry room door and the dryer door. The ceilings are about one inch shy of eight feet—I blame the ugly popcorn texture for the lost inch—and give us plenty of vertical space to work with.

Next, I started looking around at places that offer organization solutions. Raleigh is home to a Container Store, which is mostly a blessing but occasionally a curse for someone as obsessed with putting things inside other things as I am. If you go in without a clear idea of what you want, or at least an idea of what kind of gap you’re trying to fill, it’s very easy to get completely overwhelmed by your options. I find myself picking up first this box and then that basket, muttering “This could work” over and over before slinking out of the store and feeling disappointed with myself for leaving empty-handed.

This time, however, I decided to start with their website, and I had a very specific goal in mind: explore the wall-mounted and freestanding elfa system options, which are currently on sale for 30% off through February 11, 2015. (I’d like to point out that though they’re freely advertising the discount on both the materials and the installation, the sale end date only seems to be listed in tiny, tiny print on the back of their sale flyer and nowhere else. Sneaky.)

Since both the wall-mounted and freestanding units use the same shelves, brackets, and pins/screws to secure the shelves to the brackets, I focused on comparing the prices of the top track and hanging standards (for the wall-mounted system) against the feet, uprights, and stabilization kit (for the freestanding system). It quickly became clear that the freestanding system has much more expensive components, which was a distinct drawback. The benefit, however, is that once the freestanding unit is assembled, we could easily move/remove it if our circumstances were to change. The wall-mounted system would need to be unscrewed and the holes patched before we’d be back to a blank slate.

With that in mind, I popped over to the IKEA website to see what they have on offer. Although there’s no store in Raleigh, there is one in Charlotte, and I have no issues making a (long) day trip if I know what I want. I remembered the IVAR system from a previous trip, but quickly discovered that its standard dimensions aren’t really compatible with our space: the shorter shelves are a scant 17 inches wide, while the longer shelves are 33 inches wide. The OMAR system offers width options similar to those of the IVAR system, and I’m not a fan of wire shelving anyway. (Our apartment came with wire shelving in all of the closets, and in a few places it’s just barely holding up, even though it’s screwed directly into the walls.)

The GORM system only comes in one width, and at 30.75 inches it’s just a bit too wide. The ALGOT system is similar to the elfa system in terms of design, but I couldn’t find any information about how much weight the shelves can hold and it seems to be intended for clothing closets rather than pantry or utility spaces, which makes me skeptical that it can bear the load. I even took a quick look at the budget-priced HYLLIS shelf, which is metal, 23 5/8 inches wide, and only $14.99, but since the shelves aren’t adjustable I don’t think it will allow us to make the best use of the space.

While I was perusing these options, Justin did some research on Home Depot’s website. He figured we might be able to find something comparable to the elfa system from a less-well-known brand, which he guessed might save us about $50. He did find a comparable system, but the price didn’t offer significant savings over the currently discounted prices at the Container Store. If we were shopping at any other time of the year it might benefit us to go with a hardware store brand, but since our project conveniently coincides with the sale, the most economical choice seems to be the elfa system.

In terms of ease of moving/removing the system, Justin pointed out that the elfa wall-mounted option that we’re looking at is held in place with only 4 anchors, and we’re thinking of going with the independent shelf pins instead of the wire connectors or the shelf screws, which means that the shelves can be popped into or out of the brackets without resorting to a screwdriver or drill. And since taking it off the wall already involves disassembling it, it would be a smaller, easier to transport package, whereas a freestanding system could be picked up and moved as a unit, but would take up a lot more space during transport.

Finally, all we have to do is decide what color combination we want. Justin is leaning toward platinum mountings and medium or dark shelves. I was too at first, although the picture of the white mountings with light shelves is pretty persuasive considering our laundry room gets no natural light, even when the door is open. I’ll probably continue to change my mind right up until we’re in the checkout line. Or, let’s be honest, I’ll be second-guessing myself right up until they’re successfully mounted on the wall and the first jar of tomato sauce is put in place. In any case, I can hardly wait until I’m no longer storing non-perishables in my living room.

Assignment #4: Purge the Pantry

Today’s assignment is best summed up with before and after photos:

2015-01-07_Pantry_Before2015-01-07_Pantry_After


The difference isn’t dramatic, but the exercise did teach me three things:

  1. The food we’re most likely to buy and then not finish is crackers. We like variety when we do meat-and-cheese plates, but there are only two of us, so it’s easy to end up with several partially or nearly empty boxes in varying stages of staleness. From here on out, we should probably look at buying some kind of variety pack to avoid food waste.
  2. I like having a “caffeination station” so that tea and coffee and their accoutrements are readily available, especially in the winter, but I think it would more successful if we had something closer to a traditional bar cart with an open front and sides. Then we could spread things out on the lower shelves instead of crowding them on top, and also store our mugs here.
  3. This represents most but not all of our dry goods. Cereal and bread are currently stored on the counter and spices are in one of the upper cabinets. Although we have a healthy supply of grains here, we haven’t had a big grocery trip since before Christmas. If we were fully stocked on pasta sauces, canned vegetables, and crunchy snacks, this cart would be packed to the hilt, which is why we end up with multiple open boxes of crackers or two nearly full boxes of barley. Not being able to see what we have leads to overbuying and food waste.

This exercise reinforced to me that I’d like to put in wall-mounted or free-standing shelves in our laundry room to create a pantry. It would allow us to spread things out so that they’re easy to see and access and to make a real home for things like lunch boxes and the electric knife sharpener, which tend to float from kitchen to dining room to where you see them in the bottom right. It would also allow us to move or get rid of this cart, which is currently sitting in our living room and, along with a few other things, is discouraging us from trying a different furniture arrangement.

In fact, typing it out has convinced me that I’m going to commit to making “create a pantry” my goal project for this month. Since my next step will be researching my options and their costs, does anyone have any suggestions for pantry organization? Anything from a preferred shelving system or containers to tips for arranging things so that nothing gets forgotten is welcome!

Assignment #3: Set Up an Outbox

If the outbox is a halfway house for things to occupy while you decide to do with them, then I might be running some bizarre social services system for clutter:

2015-01-06_My_Outboxes

That’s right, I don’t have an outbox, I have outboxes. Plural. The worst part is that I had to move the bins of Christmas decorations out of the way to take this picture. As I was putting them into the closet and rather smugly enjoying the fact that we now have proper, protective containers for our ornaments and wreaths, I looked up and realized that the closet is nearly packed with boxes, bins, and bags of other stuff.

Sure, some of it is useful stuff that’s used infrequently, like our luggage and an air mattress for when guests visit. Some of it is decor that hasn’t been hung up yet. Some of it is stuff that I’ve clung to through moves for sentimental reasons, like old school papers, or because it might be useful eventually, like extra power strips and cords. And some of it…is a complete mystery. I don’t actually know the full extent of the items in our office closet. We’ve only lived here a little over a year, so it’s not as though it’s stuff that’s drifted into the corners and then accumulated over a decade. I put all of these boxes into the closet myself when we moved in. It makes me a little ill to think about how much is in there right now.

Don’t get me wrong, I definitely don’t aspire to minimalism. I respect and sometimes even admire people who choose that path, but after much thought I’ve realized that it’s not my path, at least not right now. As a maker, there are tools and materials that are necessary to making, and there are compelling reasons to have multiples of the same tool, or to (thoughtfully) build a stash of fabric or yarn. But having things in boxes in the closet, where I can’t readily use or enjoy them, isn’t benefiting me. One of my goals, therefore, is to work on getting things that I use out of the closet and into more accessible spaces so that they’re actually to hand when I need them. If there are things in there that I don’t want out on a shelf or in a bookcase, I need to assess whether I’ll ever actually use them, or if I’ve only convinced myself that I might.

Of course, the idea of moving things out of boxes in the closet to boxes in the corner of the room seems a little silly, but that’s probably only because my biggest hurdle with using an outbox is actually emptying it. It’s easy for me to let it become just another form of storage, rather than a holding tank for things I need to re-evaluate and potentially purge. Luckily, there’s a dedicated day toward the end of the January Cure for emptying the Outbox, so I’m going to force myself to stick to it. It will likely involve trips to multiple locations, since we have clothes, shoes, housewares, and collectibles in varying states of repair. One of the things I plan to look into is textile recycling, since not all of the clothes can be salvaged for thrifting. I’ll report back on any options I can find.

On the sewing front, I went ahead and printed off the free Simplicity pajama pants pattern and started assembling it. (I haven’t finished taping, since I was having trouble getting the pattern lines to match up.) I think it might be a little large:

2015-01-06_Easy_Pajama_Pants_Pattern

The smallest size is a 38″ hip, which is drafted with 6-7″ of ease. I get that they’re supposed to be baggy, but wow!

Since the pattern is free and already mostly assembled, I think I’m going to use this as an opportunity to practice shortening the the legs and rise. But when I do finally pick up Love at First Stitch, I’ll probably make the Margot pajamas too, just to compare. And because once I get home from work I live in comfy pants, so it never hurts to have multiple pairs. In fact, my entire lounge wardrobe could probably use an overhaul. Better get to work!

Assignment #2: Make a List of Projects

Now here’s an assignment that’s right up my alley. I make lists all the time. For work, for home, for shopping, and for packing, lists are my go-to way to keep organized and stay motivated. I am without a doubt one of those people that takes deep satisfaction from crossing tasks off a list of to-dos.

Unfortunately, I’m also one of those people prone to putting far too many things on my list and then feeling frustrated or guilty when I can’t cross everything off in a day, or a weekend. It’s like when you buy your first skein of yarn to start knitting and naively, blissfully assume that it will be enough for whatever project you choose, then realize too late that you don’t have close to enough to make (or worse, finish) whatever project you had in mind. When you consider it rationally you realize that there was no conceivable way a single skein was going to get you through a six-foot-long scarf, but somehow that perfectly reasonable thought never crossed your mind when you were standing in the store. Likewise, when I make a list of things I’d like to do around our apartment, it’s easy to trick myself into thinking I could knock out a whole room in a dedicated weekend. And that might be true, if I wanted to give up sleeping and eating and had no concern for being smothered in paint fumes while stitching yards of curtains and weaving a rug with my toes.

So I’m trying to take to heart Apartment Therapy’s advice to “resist the temptation to jump in and start cleaning or moving things around” and to keep in mind that not everything on the list is intended to be completed this month. In fact, this list is supposed to be for the whole year; January is just an opportunity to focus on the most pressing needs.

Since home improvements are going to be one of the main topics of this blog, I went ahead and created a page with my list rather than put it in this post. Confession time: as much as I love to make lists, this one isn’t actually new. I created it at the beginning of 2014, and then promptly failed to follow through on it. The desire to work on it stuck with me through the year, though—it was one of the reasons I wanted to start a blog, so that I’d have a place to record my progress and the impetus to see some of the less glamorous projects through (like removing the tape marks on the dining room walls or getting maintenance to replace our broken screen door). So I’m going to keep that list as my starting point and update it if we decide to tackle new projects. And instead of crossing things off, I’m going to add links as projects are completed to the post with project details. Anything that proves unfeasible or boring will probably be removed stealthily. Cool? Cool.

In sewing news, I was the very lucky recipient of 2.6 meters of Alexander Henry’s Christmas Pin-Up Boys from a giveaway over at Did You Make That? Unfortunately it arrived just after I went to visit family for the holidays, so I couldn’t shock them with a pair of pajama pants sporting scantily clad Santa Boys. Now that the holiday excitement has died down, I’m actually really looking forward to making some new bottoms to sleep in, since my favorite pair are too holey to wear in front of anyone other than Justin, and even he’s started giving me a hard time about them. I’m off to take a look at the free Simplicity pattern that Karen recommended, although I’m sorely tempted to use this as an excuse to order Tilly Walnes’ Love at First Stitch. Decisions, decisions.