
Another dress ahoy! It’s that long-time love of sewing-blog-land, the Lady Skater dress from Kitschy Coo. I actually completed this before my Garden Party dress. I was in the midst of forsaking the original pattern in search of a better fit for the fabric and in dire need of a faster, easier project that would inject my sewing with more confidence. Basically, I needed something that would prove concretely that I could, in fact, sew clothes that fit and that I would actually wear without driving me up one wall and down the other in the process. A knit dress seemed like just the ticket.
I actually picked up the pattern in October 2014, but my first attempt didn’t go very well. I made two mistakes. My first mistake was choosing a very light, very slinky cotton blend jersey. It felt great to the touch and featured a lovely pointillist print in purple, black, and white, but it was an absolute beast to handle and cut, which resulted in some pretty wonky pieces. My second mistake was cutting the wrong size in defiance of the very explicit instructions about how to choose the correct size: instead of picking a size based on my high bust measurement, I picked a size based my full bust measurement, and then rounded up just to be safe. The result was a huge, saggy sad dress that I instantly didn’t want to wear. (Don’t despair, I didn’t get rid of it—I’m thinking of cutting it up to make underwear.) Although I had plenty of fabric leftover to cut another dress, I decided to set the pattern aside and return when emotions weren’t so high.
When I pulled out the pattern this time around, I re-read the instructions and had a pretty good idea of what I had done wrong, so I felt more confident tackling it as a feel-good project. I started by choosing a 100% cotton interlock, which is heavier and more stable than a jersey and much easier work with. Still, I was really concerned about cutting every piece precisely on-grain, so I scoured the internet to find the best tip for marking the grain. Advice ranged from Tasia’s meticulous approach of pinning the entire length of the yardage to Gillian’s self-proclaimed “lazy” approach that involves identifying the grain, folding the yardage, and having done with it. Neither was really working for me, however, because both methods ended up with distortion and gave me fits of anxiety.
Then, in a thread on the Sewing Pattern Review forums, I saw this most excellent tip from user Emelle:
To keep track of where the grain is, I use a trick I learned here from Nancy K….take painter’s or masking tape, find the grainline and mark it all the way across the fabric with the tape (since you can’t pull a thread on knits….This works well on the shifting knit material.)
Since the tape is (relatively) wide with a straight edge, once you line up the first inch or two with the edge of a column of knit stitches, you can lightly lay down the rest of the tape without having to carefully position it all the way down, because it doesn’t have a tendency to curve or twist. And if you don’t get it exactly right the first time, you can always re-position it. (Disclaimer: Check a small patch of your fabric first to make sure that lifting and re-positioning the the tape doesn’t stretch out your fabric or leave any residue. I didn’t have any issues, but a more delicate fabric might. Basically, your mileage may vary.)
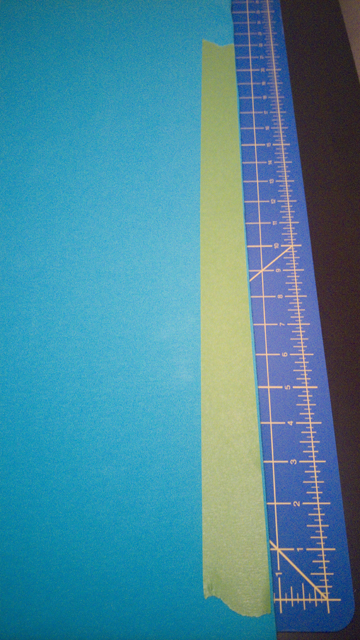
You don’t even have to put tape down the entire length of the yardage, just enough so that when you go to fold the fabric the tape acts as a guide and encourages the fabric to stay straight down the length of the fold.
Thank you, Emelle and Nancy K—you saved my sanity.
I cut a size 2 at the shoulder/bust and graded out to a size 3 at the waist and hips. I shortened the bodice a scant 1/8″ based on measurements I had taken sweater knitting. When I tried on the dress for the first time, I felt the waist was a little too low; since I had washed and dried the fabric prior to cutting, I assumed it had shrunk as much as it was going to, so I guessed I would probably need to raise the waist of future dresses by about an inch. But after washing and drying the completed dress, it seems it’s shrunk a little more, so raising the waist may not be necessary. Could be a different story with a drapier fabric, though.
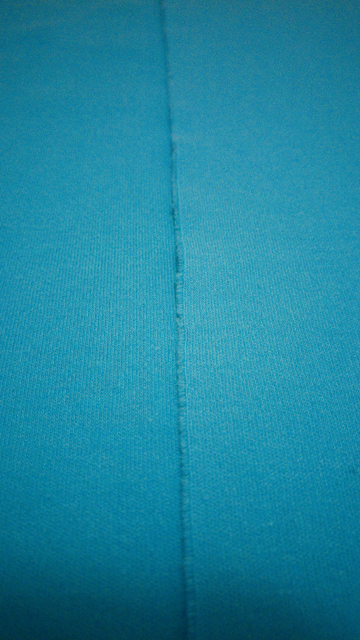
I did all of the construction on my serger and all of the finishing (twin-needled hems and tacking down bands) on my sewing machine. Rather than buy four cones of sky-blue serger thread that I may or may not use again, I opted to borrow a trick that I’ve seen many people use and bought medium grey serger thread instead. While it certainly won’t fool anyone into thinking it’s blue, it’s a lot more subtle than a stark white thread would be, and it’s a lot more versatile for future projects.
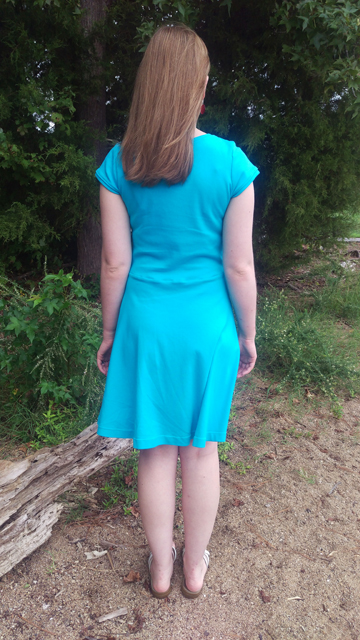
Per the instructions, I stabilized the shoulders and waist with clear elastic, which I can apply at the same time as I’m serging. It’s not noticeable at all on the shoulders, but I’ve noticed some rippling around the waist.
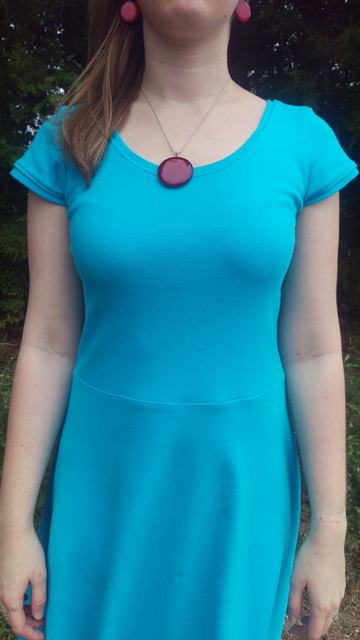
Ironing reduced the problem on the front, but it’s still pretty pronounced on the back.
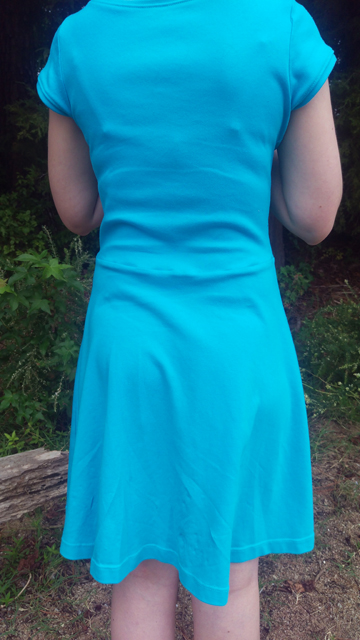

Did I stretch the clear elastic too much? Is this just par for the course?
Looking at these photos, it seems like I might need a swayback adjustment, which is crazy because I’ve got good standing posture. (But let’s not talk about my sitting posture.) Then again, I think the back bodice piece is longer than the front bodice piece, so it might be a simple matter removing some of the unneeded excess length.
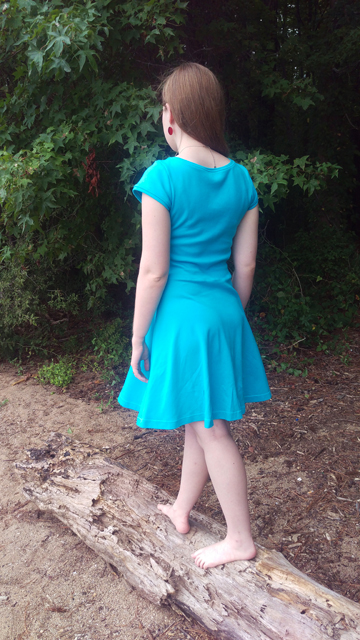
Speaking of excess length, the skirt is definitely on the longish side on my 5’2″ frame.
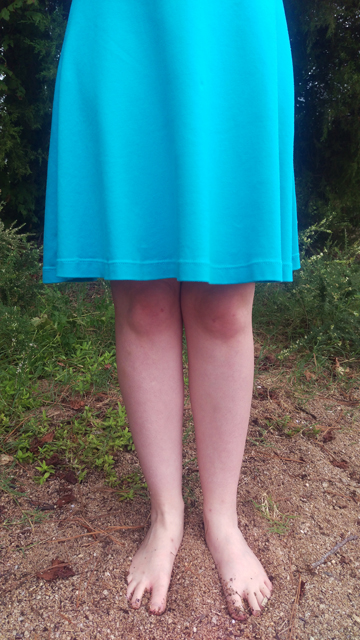
On the one hand, it’s nice, because I can tuck my knees up into it and have no fear of a stiff breeze causing problems. On the other hand, in this fabric, it’s a little heavy, especially for a summer dress in a notoriously humid climate. You could make the argument that the 100% cotton interlock is more of a problem than the length, and you would probably be right. In any case, it’s something I’m definitely going to think about for future iterations.

I have no idea why I look pissed off in this photo, but I’m including it anyway because it shows that the armholes came out a good size. Initially I thought they were too loose, but as with the waist position, I feel like things improved after a trip through the washer and drier. My plan to raise the entire dress from the shoulders by an inch shouldn’t be necessary now—a good thing, since I’m not sure how to translate that change to the height of the sleeve cap.
For these photos, I tried experimenting with a few serious faces, since I feel like I can do big smiles just fine but look pouty or just plain weird when I try to do a neutral/non-smiling face. (Don’t even get me started on “sexy” faces. Talk about derp city.) This one is the only one that came out looking pretty okay.

Taking photos out and about will only get better as the weather starts to cool, and I’m looking forward to having a new permanent backdrop during the winter months this year. I’ll be sharing more about that soon. 🙂
Your dress looks lovely! I made my first (and only) Lady Skater in a really similar colour… but yours fits much better than mine did! 😛 I gave it away pretty quickly…
I’m glad you found a method of finding the grain that works for you! It’s nice to have so many different ways to do things while sewing – whatever works!! 🙂 For your waistband, it looks a little stretched out to me – which would mean next time you’d want to stretch the elastic more. I don’t love clear elastic though – it isn’t stretchy or resiliant enough for me. I prefer fold over elastic, picot linger elastic, or 1/4″ elastic for knit dress waistbands. A strong elastic holds the waist in snug and holds the skirt up well through the day!
Thanks for the tip about the elastic! I had only ever used regular elastic threaded through a casing (not stitched down), so I was willing to give the clear elastic a try. I can see now that you’re right, something stronger would be better, especially considering how heavy interlock is. Now, if you’ll excuse me, I think I’m going to go lurk all of your knit dress posts for tips/inspiration. 🙂