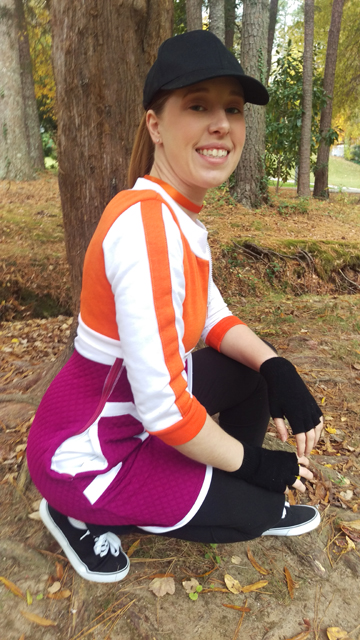
Knowing that Halloween in central North Carolina is usually chilly, especially after the sun goes down, I opted not to play the shorts-and-crop-top-clad Misty opposite Justin’s Ash Ketchum, and instead chose to be a trainer from the Pokémon GO mobile game. Specifically, my own avatar from the game:
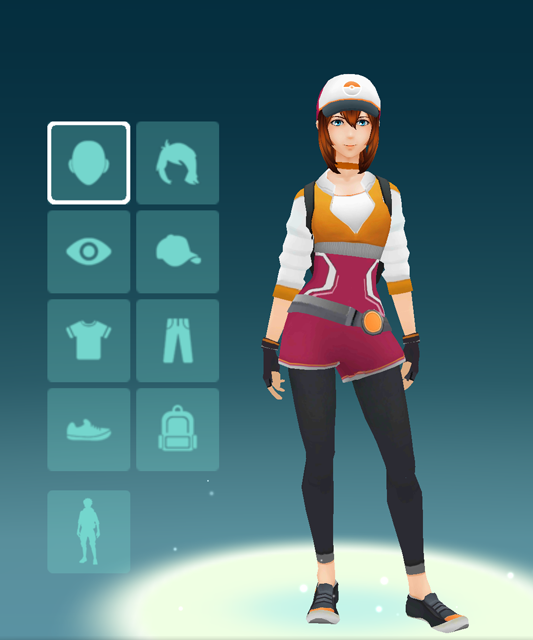
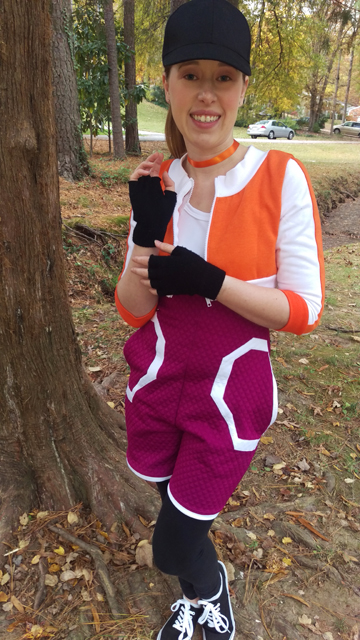
Cute, no? And here’s my interpretation:
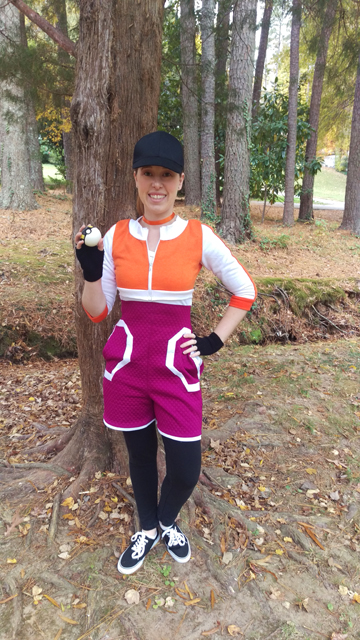
There are a lot of pieces to this outfit, and despite my best intentions, I wasn’t able to finish all of them before Halloween was upon us. So I consider my version more of a first draft than a completed cosplay. (Whether I ever go back to finish it remains to be seen.) But what I did accomplish is definitely recognizable, and might offer a few hints to anyone looking to do something similar, so let’s go with it.
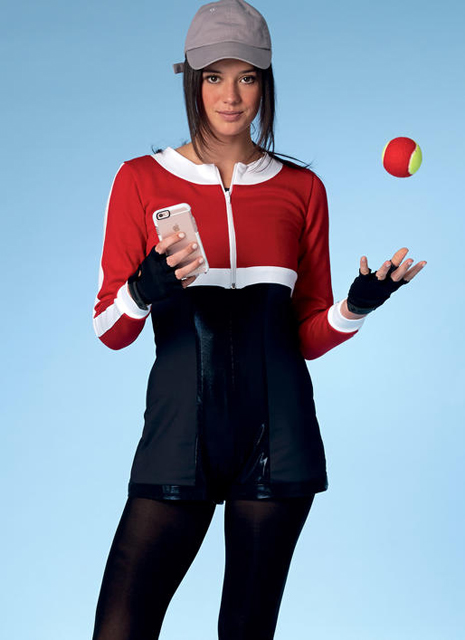
When I looked for inspiration from other cosplayers and bloggers, I found that most had created their costumes shortly after the game had come out, and so they had largely assembled their looks from ready-to-wear or easy-to-sew separates. By the time I was getting on board, McCall’s had released M7556, a romper and cropped jacket pattern aimed at Pokémon GO players.
I snapped up the pattern, but quickly decided that while I would use the jacket, I just wasn’t interested in the romper. I understand that it was most likely designed with accessible sewing and forgiving fit in mind, but it just doesn’t look enough like the source to me. I briefly toyed with the idea of eliminating the princess seams to make it work, but I couldn’t get my head around it and wasn’t sure it was such a good idea anyway—seams and darts exist for a reason, after all—so I embarked on a journey of hacking and slashing to create my own design.
From what I can see in the screenshot, the trainer’s outfit is a kind of romper where the top part looks like a t-shirt and the bottom half is shorts; the seam between the two is directly under the bust. So for the top or “shirt” half, I turned to my copy of the Kitschy Coo Lady Skater Dress and a very stretchy medium-weight white polyester/spandex dancewear fabric that’s beefy enough to be opaque. For the bottom or “shorts” half, I grabbed Simplicity 1072 View A, a pair of straight-legged knit pants with crotch and side seams, and a heavy-weight quilted scuba knit in the perfect shade of boysenberry. (Thank you, Camille, for explaining the difference between scuba and neoprene!)
My approach—and it may not have been the best one, but it’s the one that made the most sense to me at the time—was to blend the two patterns together at the waist and then cut them apart again below the bust. It went something like this:
- Ditch the waistband from the pants.
- Determine how long to make the inseam of the shorts and cut off the excess (doing this now makes the piece easier to deal with).
- Take the top, which is designed to be cut on the fold, and add a seam allowance to the foldline equal to the seam allowance at the crotch.
- Blend the top and bottom together at the waist to create one piece. The CF is straight and parallel to the grain; the side seams have a pronounced curve.
- Cut the piece apart under the bust and add seam allowances at the new seam line.
- Eliminate the CF seam allowance from the top, allowing it to be cut on the fold as originally intended.
I figured that by doing it this way, I ensured that all of the seam lines would meet where they needed to, and I achieved the look I wanted, which was to have a CF/CB seams on the shorts but not the shirt.
I repeated this process on both the front and back pieces. To get what I hoped would be a dramatic curve from the natural waist out to the hips, I blended from my actual waist size out to the largest hip size. Despite adding about 5 inches of positive ease, the romper pulls across the hips. I suspect it’s the result of the shape and depth of the crotch curve and the fact that the CF and CB seams are straight, even though like most humans my profile is more kidney bean-shaped than rectangular.

The M7556 pattern is designed with a back zipper, but since my romper’s CB seam doesn’t go all the way to neck, I had to move the zipper to the side seam. I chose to put it on the right side instead of the left, even though custom dictates that it belongs on the left, because I don’t think it’s practical or comfortable to try to reach around my own body to do up a zip, and I refuse to slavishly follow a tradition that ceased making sense at least 100 years ago. My clothes, my way.
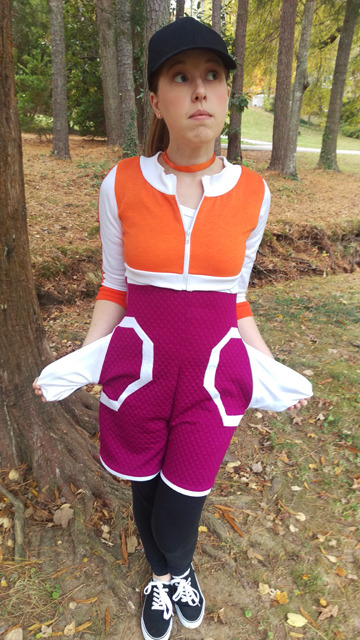
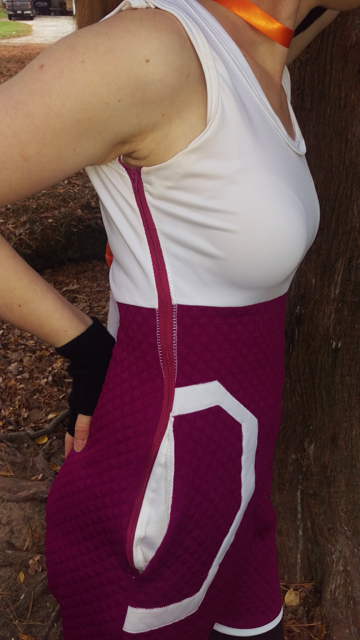
The decision to add pockets was a no-brainer—where else would I put my phone while in costume and on the hunt for rare Pokémon? I borrowed the pocket pieces from some dress pattern or other. I’d never worked with both an invisible side zipper and pockets before, and I relied on a StyleArc tutorial for assembly instructions.
Sadly, when I tried on the romper after the zipper insertion, I couldn’t actually get the slider past my waist, no matter how much I sucked in and pulled. Eventually I admitted that an invisible zipper was not sturdy enough for such a heavy fabric, and I ripped it out and replaced it with an all-purpose (i.e. polyester, non-separating, non-invisible) zipper. Fortunately, it’s a pretty good color match, because there’s really no good way to insert a regular zipper into a side seam, especially not when you throw a pocket into the mix, and my wobbly seam stitching means that the serging I did to finish the raw edges is visible above the pocket.
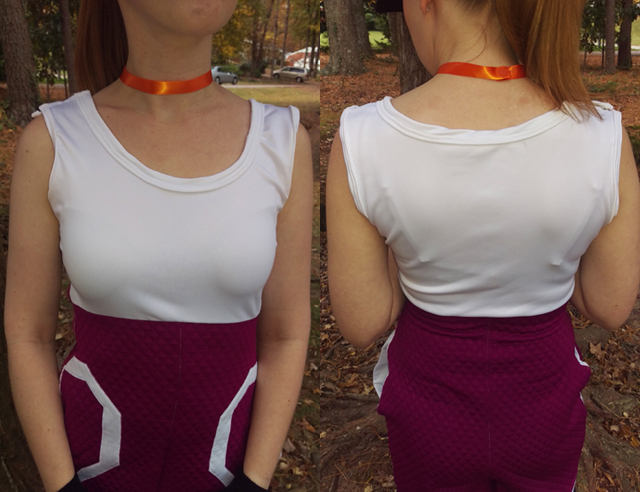
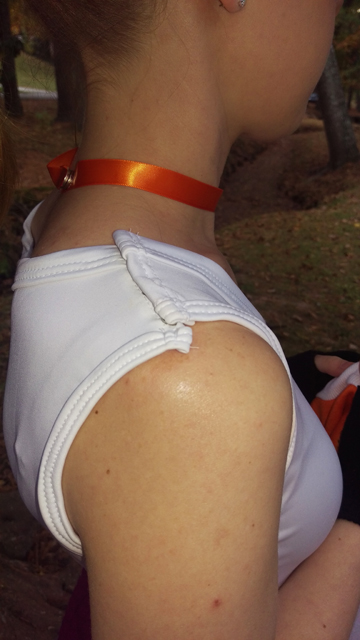
In order to make the side zipper more functional, I also left the right shoulder seam open, finished the edges by turning them under once and stitching down, and adding four sew-in snaps. I normally sew knit bands in the round for a cleaner finish, and that’s what I did on the neck and the left armhole, but because the right armhole was broken up by both the zipper and the snaps, I split the band into equal two pieces and sewed them in flat. All of the bands were attached on the inside, turned completely to the outside, folded under, and topstitched down with a twin needle—I used Sewaholic’s Dunbar Top knit binding tutorial for reference, though my binding is nowhere near as neatly done.
For the decorative appliqué on the front of the shorts, I drew the shape I wanted on tracing paper, then cut it out of the same the material as the top. Because of the complex shape and narrowness of the pieces, as well as the fact that the fabric is a knit, I didn’t bother with finishing the edges once cut. Instead I positioned them on the front romper pieces (before I sewed up the side seams) using Steam-A-Seam 2, pressed them with a steamy iron and a press cloth to fuse them on, and then stitched over the edges all the way around using a short, wide zig-zag.
For the trim on the legs of the shorts, I cut rectangular bands 10% shorter than the circumference of the opening, applied them in the round, and then topstitched the seams down using a twin needle so the bands wouldn’t flip up and the seams wouldn’t flip out.
The jacket was much, much more straight forward to construct. I chose View A, which has a neckband instead of a hood. I used a plain sweatshirt fleece for the body, sleeves, and sleeve accents, and a cotton/spandex rib knit for the cuffs and bands. To match the color between the body and bands, I dyed a portion of each fabric using Rit DyeMore in Apricot Orange, following the instructions printed on the bottle. Although the sweatshirt knit has a much higher synthetic content than the rib knit, I dyed them in the same pot for the same length of time, and I’m pleased with how closely they match. I will warn you, though, that even after washing and drying both pieces of fabric separately before assembling and wearing the costume, the body of the jacket transferred dye to the white part of the romper. It seems to have happened primarily under the arms and around the neckline, two areas where there was probably a bit more friction and moisture.
I made the jacket in size 10, and the only alteration I made was to shorten the sleeves from full-length to three-quarter-length. I should have sized up to a 12, because I forgot that even though sweatshirt fleece is technically a knit it doesn’t really stretch. As a result the jacket is quite snug in the bust, and it’s difficult to bend my arms, but it’s not unwearable.
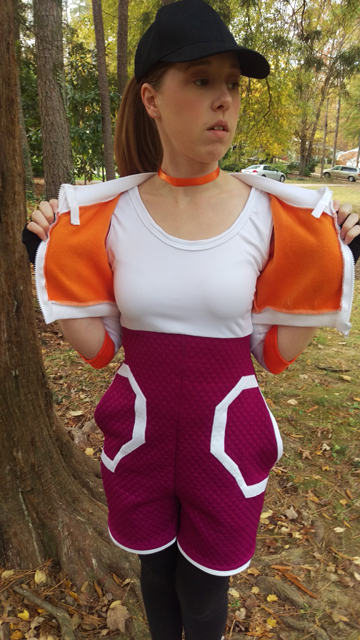
The one thins I really don’t like is the zipper treatment. The pattern calls for a 12″ separating zipper, which is the shortest I could find at my local JoAnn’s, but the front opening on at least the smallest two sizes is shorter than that, even with the bands. You’re instructed to handle the excess by folding it over and tacking it down, with a strict admonition not to cut through the teeth to shorten it. Afraid that I’d ruin the zipper and therefore the jacket, I followed these instructions as well as I could without putting in any stitches that can be seen from the outside, and (somewhat predictably, in hindsight) the ends don’t stay put and want to peek out at the top, especially since I was wearing the jacket partially unzipped.
I’ve since learned that you absolutely can shorten a separating zipper, so don’t be afraid to do that! Also, plan to interface the front edges where the zipper attaches. It’s on oft-omitted step that keeps the edges from buckling/rippling, particularly when there’s a bit of strain. I didn’t do that on either the jacket or the romper, and now wish that I had.
To wrap up, let’s quickly touch on the accessories. The leggings are me-made but unblogged, because black cotton/spandex one-pattern-piece leggings are *the* most boring thing. The shoes are plain canvas sneakers that I intended to embellish with orange ribbon. My gloves, like Justin’s, are a cheap, plain pair that I cut the fingers off of and then melted the openings of to prevent fraying, also destined to have some ribbon trim. The choker is an orange ribbon with rare earth magnets Gorilla-glued to the ends; I would have folded the ends over and stitched the magnets into little pockets, but the ribbon wasn’t wide enough and I ran out of time to find a better solution.
The hat is a plain black ball cap that had red and white Pokéball pieces cut from craft foam attached to it with double-sided tape, but by the time of this photo shoot they would no longer stay stuck. In my fantasies I’d cut pieces from the remaining scuba knit I used for the romper and sew them to the sides and back of the hat, appliqué or embroider a Pokéball to a white fabric and stitch that to the front, then trim the whole thing in more orange ribbon.
I guess what I’m saying here is that ribbon expectations > ribbon execution. I also had plans for a belt and buckle that completely failed to materialize. Still, I think the spirit of the costume shines through clearly, even if a lot of the details are unfinished, missing, or don’t hold up to close inspection. In the end, Justin and all of our trick-or-treaters loved the Pokémon theme, so I’d say that it was worth it.
If anyone has any specific questions about the design or construction, I’d be happy to answer them!
