A Pocket Full of Posies | Colette Zinnia

Over the years, my interest in Colette Patterns has waxed and waned. Initially enchanted by the idea of a small, independent sewing pattern company with a cohesive aesthetic, I quickly came crashing back to reality when I remembered that I don’t actually wear close-fitting woven dresses with a vintage vibe. My interest piqued again a few years later when they started offering knit patterns, and again when Seamwork launched, but I never quite loved anything enough to take the plunge. (Although I must say, Leah’s enthusiasm for Seamwork has very nearly convinced me to get a subscription!) I’d already stashed a bunch of Big 4 patterns that I hadn’t cut into yet, so it was hard to justify buying more—and more expensive—patterns.

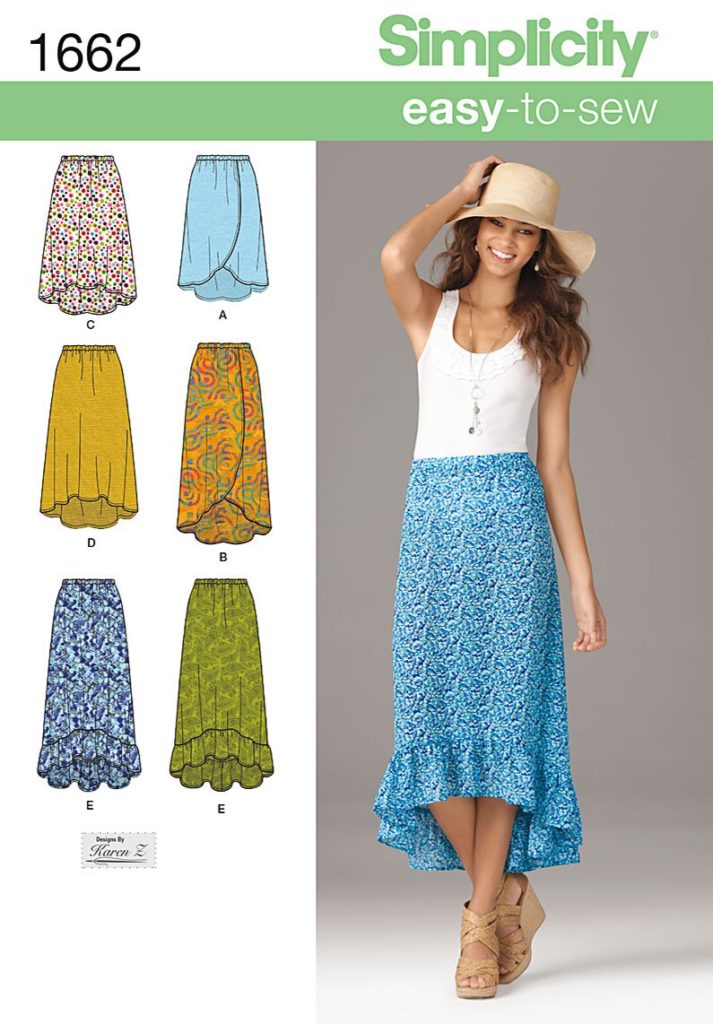
So what changed? It’s embarrassingly simple, really: I was checking out Freeman’s Creative Craft Supply in Durham for the first time and they had a handful of Colette patterns on sale, a result of Colette announcing they were discontinuing paper pattern production. Unable to resist the combination of a vanishing product + a deep discount + a sense of duty to support the small craft businesses of the world, I scooped up several patterns I’d eyed over the years, including the Colette Zinnia.

I doubt there’s much to say about the pattern that hasn’t been said before by much more accomplished sewists than me, so rather than a review I’ll stick to what I did.

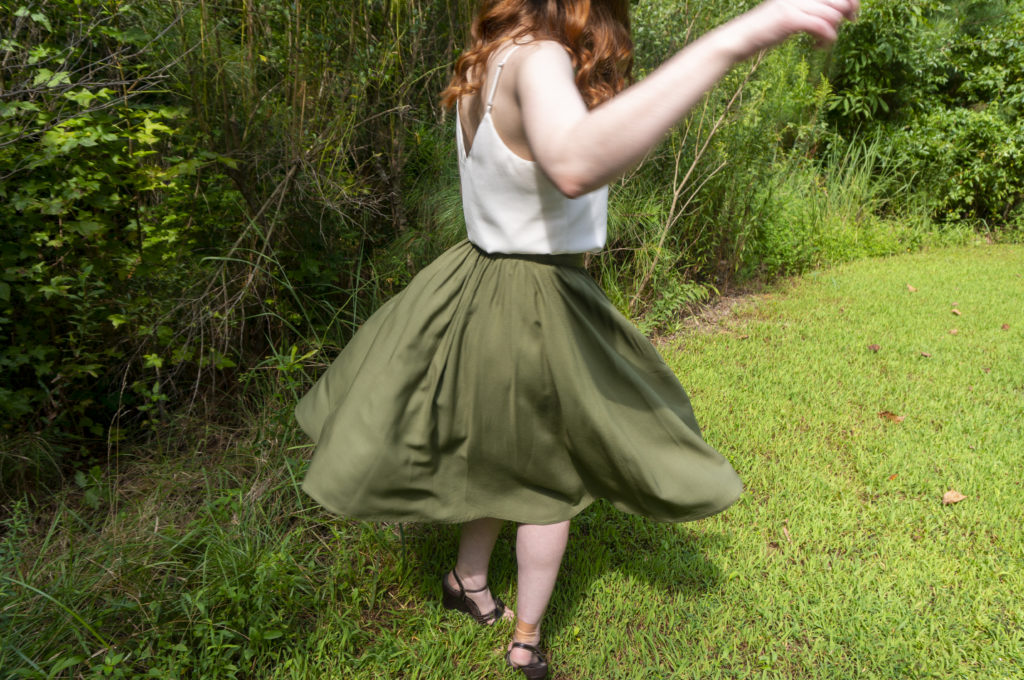
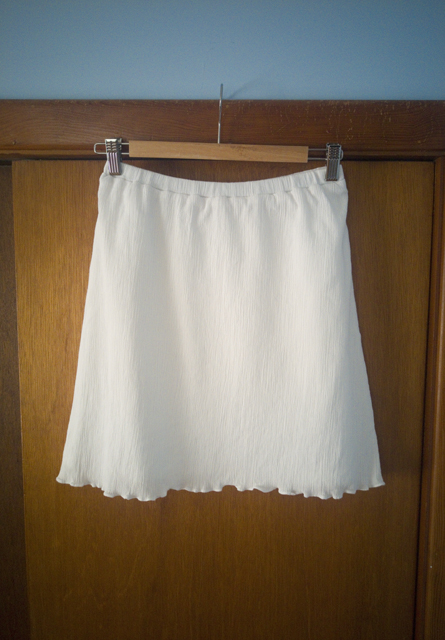
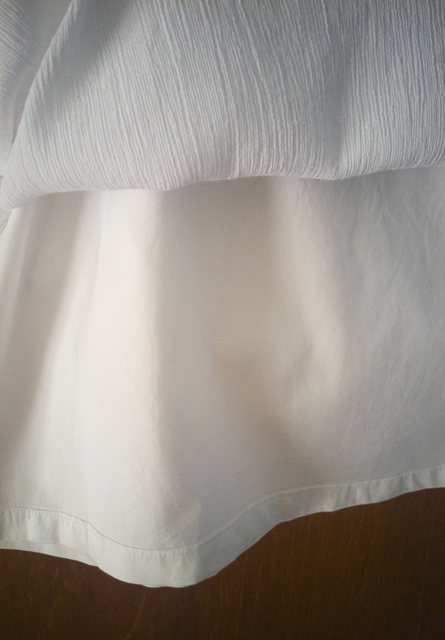
The fabric is something of a mystery, a lightweight plain weave made from natural fiber(s) that both wrinkles and presses easily with heat and humidity; it’s the same fabric as this top. It’s wonderfully pleasant to wear and I wish I had ten more yards of it, but sadly it was a hand-me-down from my mom and I have no idea where or even when she got it. I think she intended to use it for window valances.

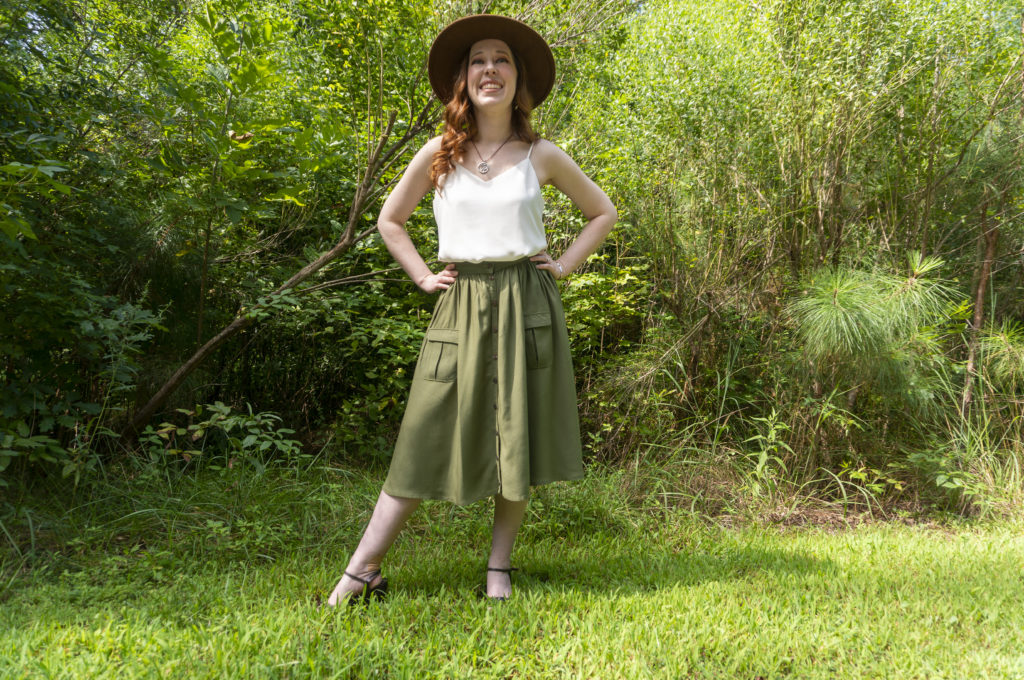
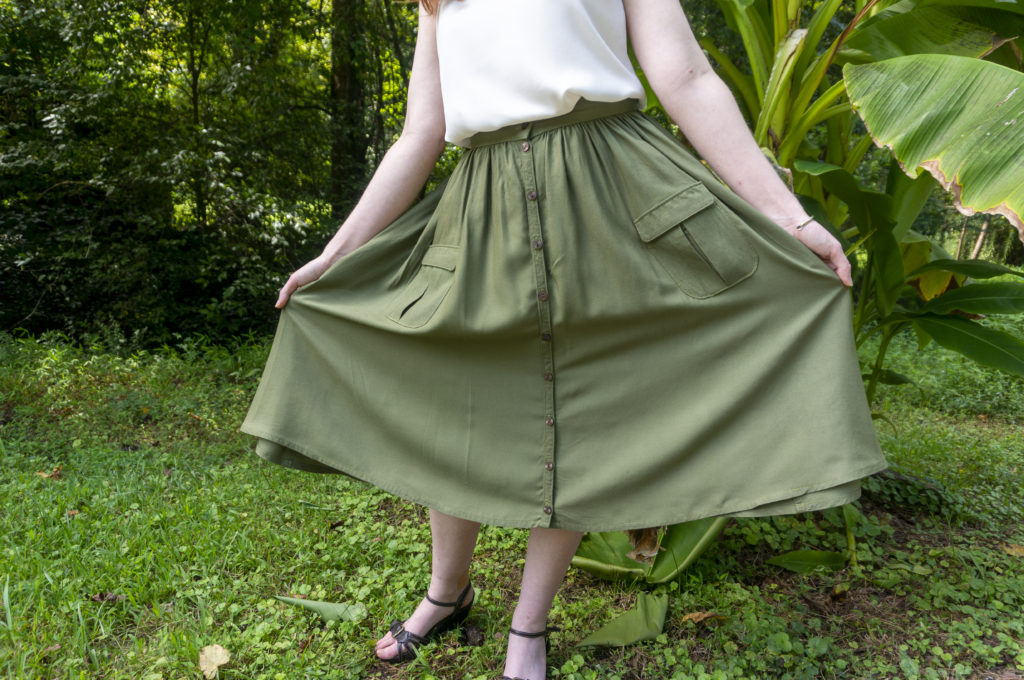
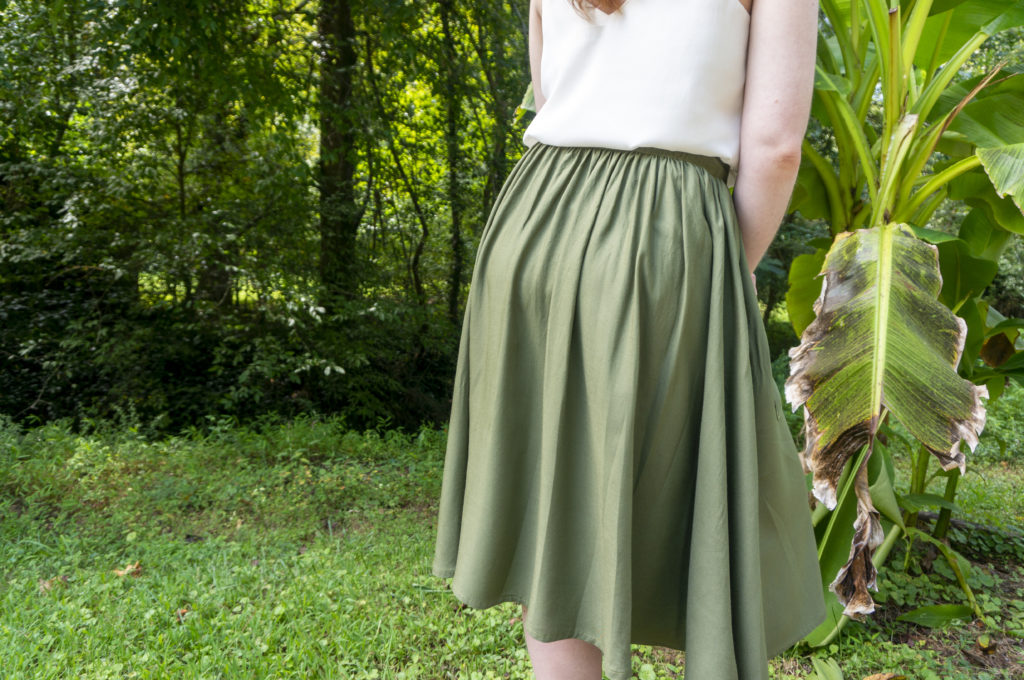
I went with View 1, which has a gathered skirt attached to a waistband, a button placket, and patch pockets with flaps. I cut a size 8, preferring to err on the side of a larger waist since like most people my measurements fluctuate and I abhor the feeling of anything too snug on my midriff. I didn’t bother to adjust the length for my shorter-than-average height since it’s designed to fall below the knee anyway.

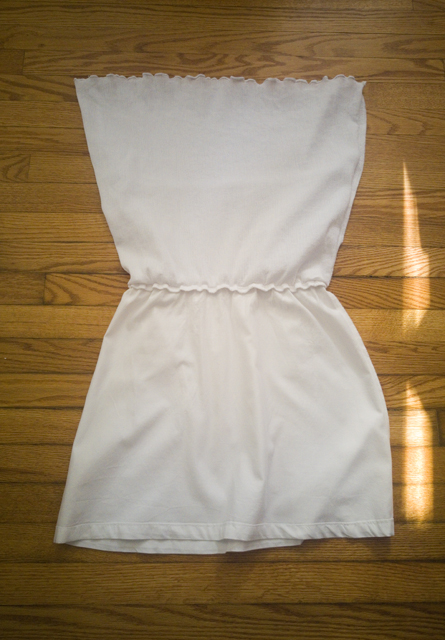
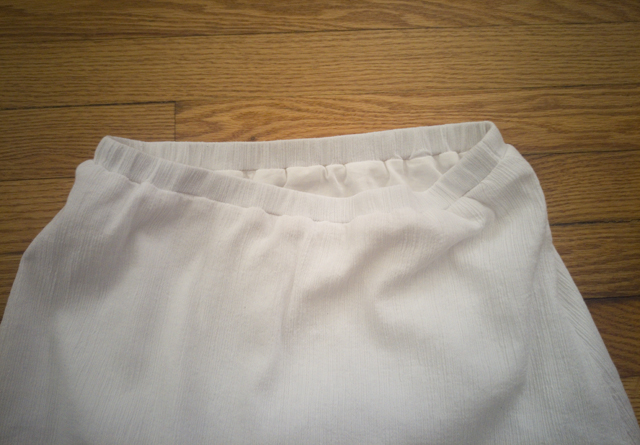
To keep the waistband from being too big, I took a page from Cashmerette’s book and added an elastic to the back waist only. I was inspired by this tutorial, but since her construction order is different from that of the Colette Zinnia and I’d already sewn up the side seams—which I French seamed and then edgestitched down to produce a mock felled seam—I had to improvise a bit:

  • Cut the waistband pattern piece apart at the side seam circles to create front waistband and back waistband pattern pieces
  • Add 5/8″ seam allowances to the new front and back waistband pattern pieces
  • Cut front and back waistband from fabric; interface the front waistband piece only
  • Sew front and back waistband pieces together at side seams
  • Attach waistband to inside of skirt (rather than outside)
  • Calculate elastic length using Cashmerette tutorial and cut a piece of 1.25″ no-roll elastic to length
  • Cut two rectangles of fabric measuring 2″ x 1.25″ and stitch one rectangle to each end of elastic
  • Place the elastic along the inside of back waistband and sew the rectangles into the side seams
  • Fold waistband over to the outside and topstitch in place, stretching the back elastic to fit as you sew

Other notes include edgestitching everything, using three rows of basting stitches to gather the skirt, and not interfacing the placket. (To be clear, the instructions don’t call for interfacing, but that seemed odd to me, so I tried it anyway. As it turns out, a narrow cut-on placket doesn’t need it because of the layers of fabric involved, and I ended up peeling the interfacing off before re-sewing it. It seems Colette knew what they were about with this one.)

I very much wanted to use buttons from my stash on this one, since I had these cream-and-brown marbled ones harvested from somewhere that looked perfect. But they were 5/8″ instead of 1/2″ (not a huge problem) AND I didn’t have enough (*sob*). I ended up purchasing these two-hole buttons from JoAnn, which are described as brown but are really more of a dark coppery color and have a slightly reflective quality due to the ridged pattern in their surface.

Because the buttons came in packs of four, I had enough to add buttons to the pockets, but opted not to. I figure if I lose any along the way, I’ll have replacements on hand, and I won’t have to steal them off the pockets, leaving behind orphaned buttonholes.

My one regret may be not adding inseam pockets. I love the look of the patch pockets, but I really wish I had a place to put my hands. I even thought about adding some during the cutting-out stage, but decided they would be unnecessary. I have no one to blame but myself for this foolish lack of foresight.

If I were to make the Colette Zinnia again—and I feel like I will—the only thing I’d change besides the pocket situation would be to tinker with that back elastic waistband. I like it in principle, but in practice I should have cut the fabric portion longer so that it can gather/stretch more. Because I kept the original waistband length intact, it (surprise, surprise) doesn’t expand enough to allow the skirt to come on and off without unbuttoning. Because, you know, the original elastic-free skirt wasn’t intended to be taken on and off that way. Go figure. The no-roll elastic might also be a bit aggressive, and it can definitely still irritate when I’m feeling stuffed from the local food trucks.

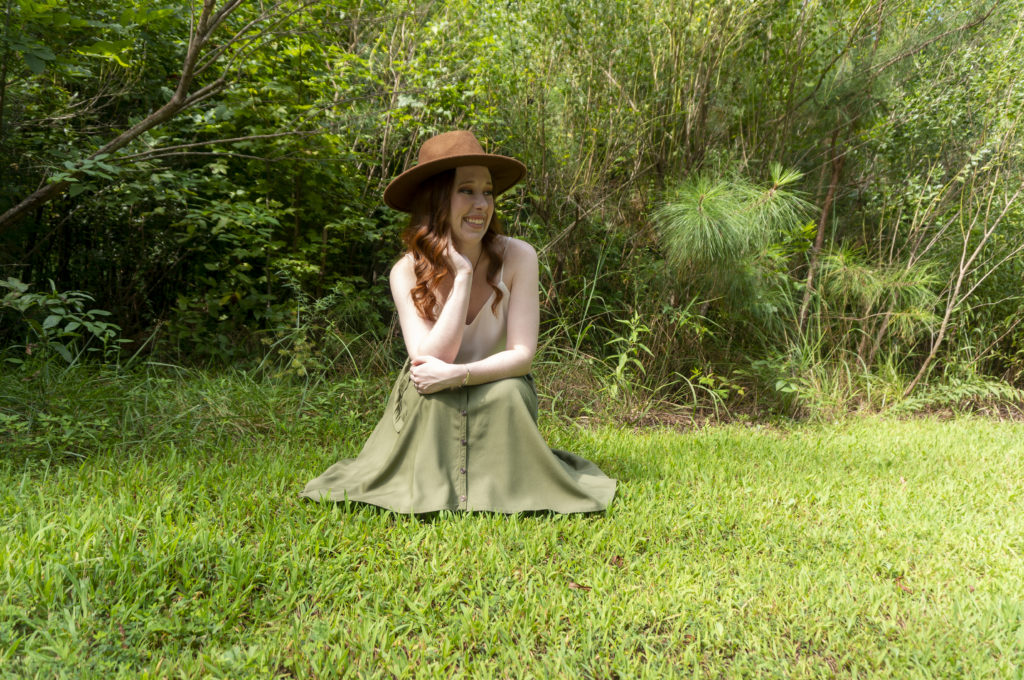
While I don’t think I’d reach for this skirt every day, as I’m not much of an everyday skirt wearer, I love that it coordinates with a bunch of different tops already in my closet and in my sewing queue. I’m already looking forward to remixing it with other things I’ve made. Three cheers for wardrobe-boosting separates!


Outfit Details

Hat: Target | Camisole: Banana Republic | Skirt: Colette Zinnia | Sandals: Aerosoles | Earrings: Vintage | Necklace: Jenuinely Jeni | Bracelet: Gift/unknown

Tribute Month Sewing Notes

Have you been following Tribute Month over on the Sewcialists blog? My own tribute went up earlier this week—check it out here to read how Erica Bunker inspired this outfit, and don’t forget to follow the blogs of all the creative and inspiring contributors who made Tribute Month possible! I can hardly wait for the next theme—having direction and a concrete deadline really helped to focus my sewing, especially when I came close to stalling out right before the finish.

Before these garments are too far behind me, it seems like a good idea to record some of the more technical details of what I did. I deviated significantly on both patterns, but I do hope to make them again, and I’d like the next versions to be even better.

First, the skirt. It’s Simplicity 1465 View C, a straight skirt with a waist facing, front and back darts, and a center back invisible zipper. I’ve said many times before that I’m not fond of skirts that sit the natural waist because they feel constricting to me, and because they tend to emphasize that my waist is not much smaller than my bust and hips, making it look thicker than it is and making my whole torso look rather straight-up-and-down. But I’ve also had minimal success at finding or altering patterns to be low-rise, and after ruining a lovely lightweight yardage of navy corduroy trying to make that modification, I decided to bite the bullet and give a natural-waisted skirt a try. I wagered that, since I was planning to make it in a dressier print, I’d probably only wear it for nicer occasions anyway, and if I didn’t love it, I’d only be wearing it for a few hours at a time a few times a year anyway.

I cut a straight size 12 based on my waist measurement, but pegged the bottom of the skirt by subtracting 1 inch at each side seam (4 inches total). My waist is a fraction larger than a 12, but after reviewing the pattern pieces I was confident that there was enough ease to cover that extra quarter-inch. In fact, after wearing the skirt out to take photos, I think that I could take the waist in a little on a future iterations. I don’t know if I could go down a full size, but I could probably shave a little off each side seam—and possibly a little more if I chose not to line it or chose a slightly stretchier fabric than the mid-weight stretch cotton sateen I used here.

The pattern is designed to be unlined, but I wanted the option to wear it with tights in cooler weather, so turned to Sunni’s BurdaStyle tutorials for how to create a ventdraft a vented lining, and sew a vented lining, but modifying my pieces slightly to keep the original waist facing. These instructions used to be on Sunni’s blog A Fashionable Stitch, and I vaguely recall them being easier to follow when I used them the first time. I managed to muddle through them with much reading, re-reading, and test-folding my fabric, but it does bug me (more than it should, to be honest) that they create a vent that is lapped in the opposite direction than usually you see in ready-to-wear: normally the satin stitches that tack the top of the vent in place create the appearance of the number 1. In future iterations, I’ll reverse my left and right back pattern pieces and back lining pattern pieces. I’ll also make the vent longer (taller?), because I find it shortens my walking stride a little more than I like.

One critical thing that’s not covered by the tutorial is attaching the lining to the skirt at the waist. The tutorial is written for the BurdaStyle Jenny skirt, which has a waistband, so you can follow all of the steps for attaching the lining to the skirt at the vent and then worry about attaching the lining to the skirt at the waist afterward. Because I was using a pattern with a facing instead of waistband, I figured out that I needed to attach the shell and lining at the waist first if I wanted to be able to get a clean finish, including understitching the waist facing to keep it lying flat. Once the waist was taken care of, then I could follow the instructions for attaching the lining to the vent, and then finally handle attaching the lining to the zipper tape so that it doesn’t get caught in the zipper.

And now, the top. It’s Simplicity 1425 View E, a sleeveless, princess-seamed top with a pleated peplum. Although my measurements put me in a size 12, I cut a size 10 after seeing that the pattern has 3.5″ of ease at the bust and 4.5″ of ease at the waist. If/when I make it again, I’ll go down a size; with such a contoured style, and especially in a fabric with stretch, I’d like it to fit more closely to my body than it does.

When I pulled this pattern from my stash to sew, I actually thought it was designed with a back zipper, and it wasn’t until I had cut out all the pieces and was skimming the instructions before starting to sew that I realized it has buttons. I can’t imagine making it that way; it’s not loose enough to render the buttons purely decorative, and having to do them up behind my own back—with fabric loops instead of buttonholes, no less!—is not my idea of fun.

Despite some initial trepidation about using a separating metal zipper, the entire process was painless, easier than installing an invisible zipper. I used an 18″ zipper, which ended up about 3.5″ shorter than the length of the top. I knew that the top of the skirt would come up higher than the bottom of the zipper, and if I’m wearing it casually with low-rise jeans I don’t mind the possibility of flashing a tiny sliver of skin, but if that’s a concern then definitely consider getting a longer zipper and shortening it.

For both pieces, I finished things cleanly and invisibly everywhere I could. The skirt lining has French seam; the skirt shell has serged seams (I thought Hong Kong seams, while lovely, would be too bulky and hidden anyway); the cut edge of the skirt hem is covered with a fun purple grosgrain ribbon and blindstitched in place. The top has bias facings at neck, arm, and peplum hem, all blinstitched as well. I enjoy hand-sewing, but next time I’ll draft an all-in-one facing for the bodice.

On the whole, I’m very pleased with how the entire outfit came out, and I’m very much looking forward to wearing it to a professional event in October. It’s also restored some of my desire to sew with wovens (or stretch wovens, at least), because it proved that I could find middle ground between a comfortable fit and a flattering silhouette. I doubt they’ll overtake knits in my wardrobe, but at least I can regard them with a little less prejudice.

FO: Vanilla

Before I post my (overdue) reflections on Me-Made-May, I wanted to catch up my records by sharing the projects I completed during the month. The first is below; the others will be combined in another post.

When I was a teenager my parents paid for my clothing, and because they allowed me a fair amount of latitude in picking out what I wanted to wear, I didn’t have much impetus to buy clothing myself. The first time I can distinctly recall paying for a garment that I wanted with my own money was in high school. I don’t remember now what I’d originally gone to the mall to buy—I wasn’t the type to shop recreationally—but I ended up bringing home a white cotton gauze A-line skirt that had been on sale for only $10. It hit around knee-length and had an elastic waist and slightly stretchy lining, all of which made it wonderfully comfortable and allowed me to sit crossed legged without flashing anyone. From a design standpoint it was nothing special, but in my eyes it was pretty much perfect, and I adored it.

I wore the skirt through high school and then college; I don’t remember the exact reason that I eventually got rid of it, but the only reason I would have parted with it was that a) it had acquired an indelible stain, or b) it had completely fallen apart from endless wearing and washing. I’ve wanted to replace it ever since, but somehow never mustered up the gumption to actually do so.

As the weather warmed up throughout May, however, I finally pulled out a crinkled poly-cotton I scored at Hancock’s going-out-of-business sale and Simplicity 1662 and set to work.

This pattern doesn’t really mimic the shape of the inspiration skirt that well, nor is it a great match for the fabric, but I had it in stash already and it has an elastic waist—arguably my favorite feature of the original—so I went with it to avoid the perils of trying draft something myself. (I know that an A-line skirt should be about the easiest thing to draft after a dirndl or a circle skirt, but I have an exceptional ability to over-complicate the drafting process, so I decided not to chance it. I wanted something easy.)

I traced view C, but rather than have it rise in the front and dip in the back, I cut it straight across at the side seam, perpendicular to the center front/center back. I cut a size small based on my waist measurement, with the intention of stretching it to sit at the top of my hip bones.

I prepped the fabric by washing it in cold water and tumbling dry on low heat, which caused its already crinkly surface to pull in even further, making it much too narrow for the pattern pieces. After consulting a few discussion threads online, the only advice I could find was to relax the fabric with steam. I was dubious—wouldn’t it ruin the very thing about the fabric that attracted me to it in the first place?—but after aggressively steaming the yardage and even gently tugging/prodding it until the selvages were straight again, it was wide enough to use and still had those characteristic crinkles, albeit less deeply furrowed. Like the gauze of the original, this fabric is sheer when the light hits it, so I decided to line the skirt with leftover white cotton sateen I had in stash from lining my Garden Party Dress.

I attached the lining by serging it to the shell and the waistband, simultaneously securing the lining, creating the casing for the elastic, and finishing the edge. The serging is invisible because it ends up sandwiched between the shell and lining when everything is turned right-sides-out.

After the success of my super simple tartan scarf, I decided to finish the skirt hem with my rolled hem foot. The act of pulling the stretchy material taut to feed it through the foot led to the lettuce edging, which I should have expected but ended up pleasantly surprised by. It will take a little practice to achieve a consistently ruffled edge, but I’m happy with the outcome.

The lining was turned up 3/4″, then turned up again 1″ and edgestitched, for a deep hem and a clean finish.

For the elastic waist, I ended up changing the length of the elastic to get a snug fit, but I forgot to write down by how much. Whoops. I did follow the tip included in the instructions to use little strips of fusible interfacing to glue down the side seam allowances within the waistband, to make it easier to thread the elastic through the casing, and it worked a treat.

At this point, you may well be wondering why there are no modeled shots, especially given the attention to detail in both the sewing and the posting. The truth is, after wearing it one time for Me-Made-May, I realized that something is wrong with the waist. Instead of lying smoothly when stretched the way its predecessor did, it has this weird puffiness right below the elastic that stubbornly refuses flatten out. Maybe it’s because the fabric is slightly gathered, or maybe it just has more body than my beloved older skirt did, but in any case, it looks horrible under the fitted and semi-fitted shirts I prefer. Maybe it would look okay under a boxy, drapy tee, but that’s not a combination I see myself wearing. So it’s probably destined for the donation pile, in the hopes that someone else will love it when I can’t, and I’m back to the drawing board for the perfect summer skirt.

What’s your perfect summer skirt look like? Is it something you own already, or are you still on the hunt for it?