We Bought a House!

2015-12-28_House-Exterior-Front

While I don’t think anyone online is obliged to explain their silence, I’d like to think that buying our first house is a sufficiently momentous accomplishment to justify a freaking two-month-long absence. Believe me when I say that I’ve spent every single day of that time thinking about all of the things I want to share about the process. I’m glad that I’ve finally slowed down long enough to catch my breath and do some of that.

But let’s begin at the beginning, shall we? Our house hunt began this past summer. I had made a lateral career move to the same position with another company, and Justin was hired permanently by the company that he had been temping at since February. Both of these job changes came with welcome pay increases, but they moved us to new offices in Cary and Durham, respectively. Although commuting was not entirely out of the question—it’s fairly common around here, and even more so in the area of Virginia that we came from most recently—it was not particularly pleasant for either of us. Combined with the fact that the management of our apartment complex had changed for the worse the prior year and we had new neighbors with serious domestic issues (including two uncontrollable children), we felt it was time to explore owning instead of renting.

Since it was our first time in the real estate market, we chose to work with agent Cindy Leonard. She came highly recommended by a coworker who had worked with her on four different transactions, and we had a very positive experience with her. Not only was she incredibly flexible—and backed up by her business partner Chuck Hinton when she was unavailable—but she also understood our desire for a bit of a fixer-upper that we could shape and learn from. She has a good eye for simple aesthetic problems versus more serious structural ones, and she recommended several of the inspection services that we used, including home inspection and pest inspection companies. She also steered us to a mortgage company that handles non-conventional mortgages, which will become important shortly.

With Justin already working in Durham, it was difficult for both of us to get to properties during the day, so we did most of our viewing online rather than in person. Having a must-have/nice-to-have list was crucial, and we got pretty good at spotting deal-breakers in listing photos. In all, I think we visited about ten houses.

2015-12-28_House-Porch

Our breakthrough came when we spied this 1957 ranch selling well below our maximum budget. It was a single-owner home in an aged neighborhood, and the elderly owner had passed away about a year before. Although the home was clearly well built and maintained, it suffered from a not-inconsiderable list of problems due to age and drastically changed building codes. For example, the porch was never properly tied into the foundation, so over time it had pulled away from the house, allowing stormwater to penetrate behind the porch and pool against the foundation, which in turn caused the basement wall to bow inward.

Under ordinary circumstances something like this would have scared us away before stepping foot inside. But I had read an eye-opening article by Faith Durand, Executive Editor of TheKitchn.com, who introduced the idea of a construction or renovation loan. These loans allow home buyers/homeowners to roll the cost of renovations into their mortgage, increasing the monthly payment but eliminating the need to have a lot of cash on hand (which we didn’t). Discussing the arduous process of obtaining a renovation mortgage is material for a whole post unto itself, but suffice to say that it allowed us to buy a home that needed of a lot of work without the fear of going bankrupt on repairs or living somewhere potentially hazardous. (Speaking of hazardous, the property also had an inactive underground storage tank that needed to be addressed, but that, too, is a post for another day.)

For reasons related to the loan process and the sellers, we weren’t able to close on the house until October 2. Our apartment lease didn’t end until November 16, so the heaviest renovation work was completed before we moved in. But lest you think we arrived to a pristine new house on move-in day, let me assure you that this was not the case—in fact, we’re still tying up loose ends this very week, and we hope to officially close out the formal renovation process at the start of the new year.

Then the real work of making this house a home can begin.

I can’t wait to do it. And I can’t wait to share it all with you.

The Great Paper Purge, Part 1

How much paper do you keep at home? Do you diligently recycle flyers and shred credit offers, or do you find receipts constantly piling up on end tables, nightstands, and the kitchen counter? Do you keep just seven years of personal tax documents, destroying the oldest return each year after you file a new one, or do you still have pay stubs and W-2s from a part-time college job almost 10 years ago? Do you keep a log of car maintenance, or do you rely on a heap of invoices from every oil change and tire replacement to keep track of what you’ve done and what you haven’t?

Since I’m writing about it, you can probably guess which boat I’m in. I’ve got it all. I have pounds of paper of every conceivable kind. Fortunately, I haven’t had too much trouble keeping it organized: most of it is neatly sorted into labeled hanging file folders, although some of it inevitably collects on clipboards and in baskets around the apartment. Unfortunately, I’ve taken an overly zealous approach to saving things since I moved out and got married in 2009, which means I have whole folders full of papers that I don’t really need to keep.

Then about a month ago, I started a new job and got my own office for the first time in my working life. I was told that it had been cleaned out before I arrived, but I quickly discovered that this was not the case. The woman I inherited it from, who had been with the company about 10 years and quit a couple months before I came on, had an attachment to paper records coupled with a complete lack of an organizational system. I spent the first two weeks just wading through shelves and drawers jammed full of manila folders, opened envelopes, and scraps with notes written on them. (I also found personal items like nail files, open packets of water flavoring, and partially used lip gloss and perfume—eww!—but that’s neither here nor there.)

Attempting to sort through someone else’s work clutter and general detritus cast my own paper situation in stark relief. Faced with a mountain of paper—some of it half a decade old—it’s hard to know what, if anything, is important. I realized as I never had before that the longer I wait to do it, the longer and more unpleasant it will be to do. Plus, I’m not planning to live in this apartment forever, so at the very least I’d like to avoid hauling around unnecessary documents (again). Paper’s heavy!

Breaking the project down into more manageable tasks helped, and I accomplished a lot in a couple of hours the course of a week. Here are the steps I took:

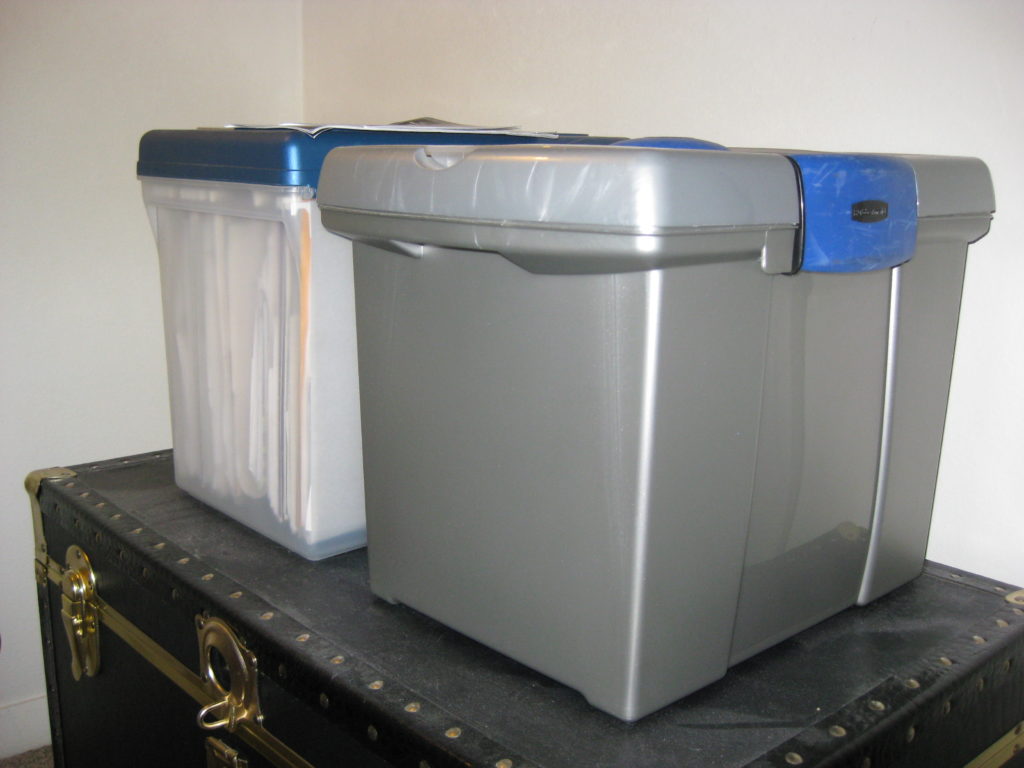
1. Find a large, clear surface and round up documents. When I want to spread out, I prefer to work on the floor, but if your dining table or desk is large enough and clean enough, more power to you! You could even use your bed, as long as it’s made. If you keep things in a stationary file cabinet, it’s probably easiest to stay in whatever room is closest to it. Once you’ve got a safe place to make a mess, grab the accordion folder, banker’s box, or hanging files that keep your important papers, then gather any unsorted mail, notes posted on the fridge, and scrap papers on the desk.

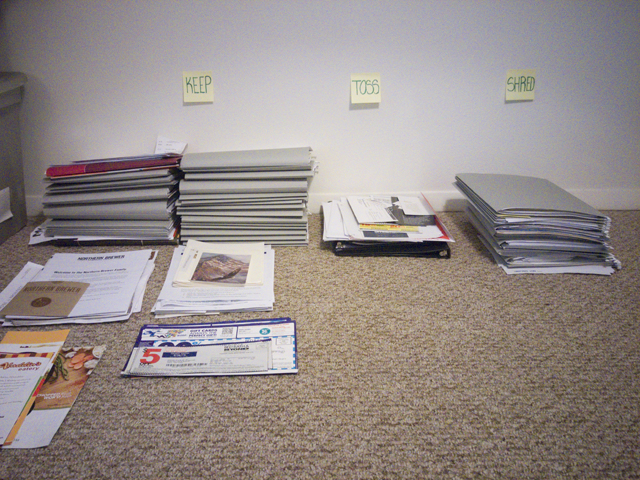
2. Designate three piles: keep, shred, and toss.

2015-07-20_01_Keep-Toss-Shred-Setup

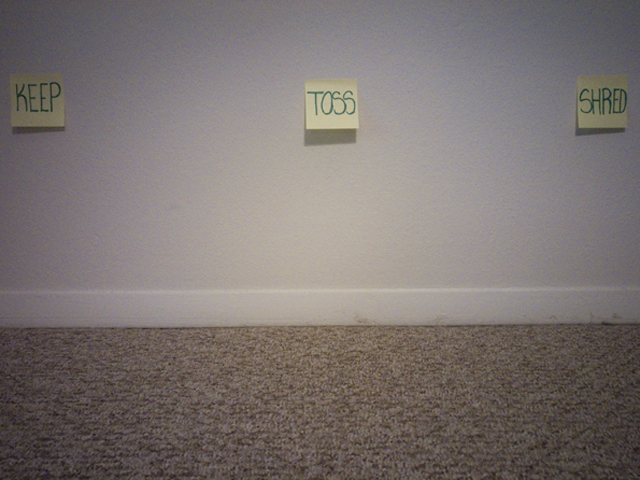
I labeled my piles, because I wanted to be 100% certain I didn’t lose track of which pile was which halfway through the exercise, especially if I got interrupted unexpectedly; you’re not obligated to stick Post-It notes to your wall like I did.

Individual papers went into the keep pile if I definitely needed to keep them; folders went into the keep pile if I knew or suspected there was at least one important paper in them. When in doubt, send it to the keep pile—you can (and probably should) do a second review, so putting it here doesn’t mean you’ve absolutely committed to keeping something for ever and ever. Sensitive documents that I didn’t need to keep went into the shred pile; non-sensitive documents went into the toss pile.

Not sure what you should keep and what you should dispose of? Me neither. That’s how I ended up in this situation. Lucky for you and me, Consumer Reports has a handy guide for what documents to keep and how long to keep them, the IRS has a guide for how long to keep tax documents, and House Logic has a more detailed rundown tax- and investment-related documents you’ll want to keep, for how long, and why you might need them. Don’t forget to check with your bank/credit union, insurance carriers, etc. for more specific information, as their requirements may differ from the general guidelines provided elsewhere.

Once I had permission to get rid of things, this…

2015-07-20_02_File-System-Before

…quickly turned into this:

2015-07-20_03_Sorting-in-Progress

3. Recycle the toss pile, and savor a little (or a lot) of shredding. A couple of years ago we bought a seven-sheet cross-cut shredder designed for home use for about $40, and we don’t regret the expense. It shreds plastic cards and staples no problem, which is a nice plus (and pretty common in consumer shredders these days). The shredder can overheat if used for a large amount of shredding at once, but shredding in smaller batches with short breaks in-between helps, and letting the device rest for 30 minutes if it stops working always solves the problem. If you don’t have a shredder, find out if your workplace, your bank, or your city has shredding events. While not as convenient as home shredding, they usually have only have minimal requirements (like how much each person can drop off or how it should be delivered) and they’re often free.

I’m going to be 100% honest: I optimistically thought that I could knock out this task in an evening or two of dedicated shredding. I grossly underestimated how much there was to do and overestimated how sturdy our little shredder is. Don’t get me wrong, it fought like a champ. But I tripped the circuit on the motor every single time I sat down to shred. The task definitely dragged on, but I kept reminding myself how much easier it would be moving forward if I created a streamlined system once and for all.

In case you think your own paper Everest is insurmountable, or you just want the satisfaction of knowing that there’s someone out there as badly off—or worse—than you, let me present my own wood pulp behemoth:

2015-07-20_04_Shredding-After

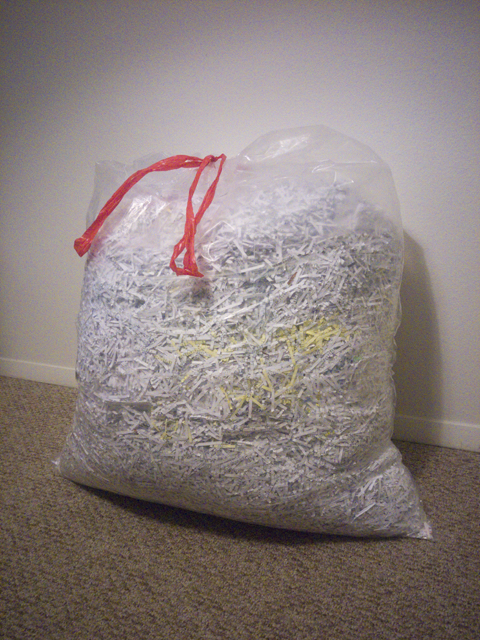
That’s not a kitchen trash bag; that’s a lawn-and-leaf bag. It weighs 13 pounds. It doesn’t even include the stacks and stacks of things that went straight into the recycling bin.

4. Organize what’s left. Actually, pat yourself on the back first, because at this point you definitely deserve it. Then, take a look at what you’ve decided to save, and assess whether your current storage solution is working. I had no complaints with my hanging file folders inside a portable plastic file box, so I decided to stick with them. You might decide that you’d rather switch to an accordion file, a filing cabinet, or some other solution. You might consider re-purposing an unused or under-used storage solution you already have. If you don’t have something like that, now’s the time to make a list of the things you need for your ideal storage system so that you can start shopping around.

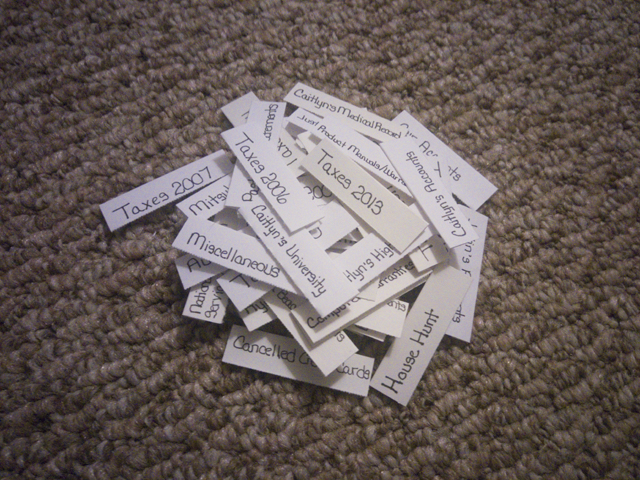
I decided to replace my handwritten labels with nice, neat typed labels. I didn’t do anything fancy like color-code them but you certainly could—maybe as a reminder of how often they need to be cleaned out? I used this opportunity to do a second review of everything, which allowed me to consolidate some files (like all of my academic records) and separate others (vehicle financing and property taxes versus vehicle maintenance records). I was able to shred a couple more small trash cans’ worth of unneeded documents as a result.

2015-07-20_05_Old-Handwritten-Labels

2015-07-20_06_File-System-After

I moved all of our product manuals and warranty documents out of one overstuffed folder and put them into sheet protectors, organized by room, in a three-ring binder designated “home stuff.” It’s not a perfect solution yet, since the sheet protectors aren’t designed for multiple thick booklets and the binder itself is too small, so I’d eventually like to get a beefier binder with envelope-style pockets so that nothing slips out of the top.

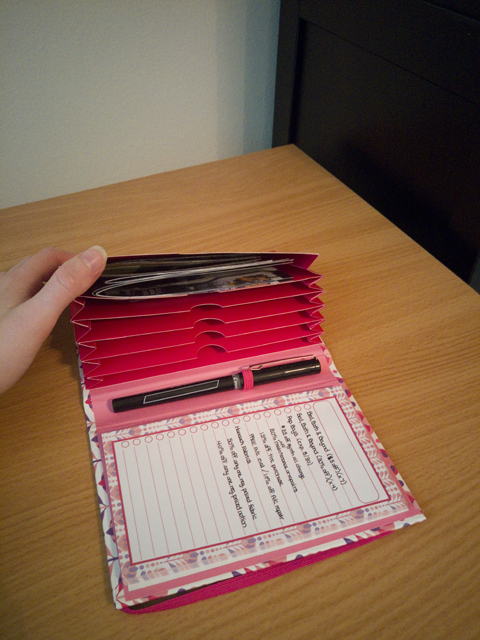
Finally, I stole borrowed a page from Sherry Petersik’s book and bought a little notebook for $5.99 that contains a mini accordion file on one side and a notepad on the other for organizing coupons. I made a list of the coupons I have and their expiration dates before sliding them into the pockets and tossing the whole shebang into my purse. As I use the coupons (or find that they’ve expired) I’ll cross them off the list. If/when I eventually run out of paper, I can just glue in a new pad.

2015-07-20_07_Coupon-Keeper

5. Optional (but highly recommended): Vacuum! Seriously, I did all of my shredding in our office and still ended up tracking little bits of paper all over the place.

When all is said and done, to the casual observer it probably doesn’t look like anything has changed. But after thinking hard about whether I really need each and every sheet, it’s a lot easier to assess my mail and decide what needs to stay permanently, what needs to hang around only temporarily, and what can go straight to the bin. I expect to accumulate paper at a much less alarming rate.

So, are you motivated to clean out your hard copy files? Have any suggestions to make my system even better?

Assignment #20: Empty the Outbox

The last lap. It’s done. Finally. And it’s a good thing, too, because the section of the office that we’d designated for the outbox was starting to take over the room:


2015-02-07_1_OutboxHere’s the rundown of where everything went:

Housewares and clothes: Ranging from sweaters and belts to towels and decorative baskets, the items in the three boxes on the left went to the Raleigh GCF Donation Center & Store (Goodwill, for my Virginia readers). The box of housewares to the right is holding items that I’m tentatively saving for my sister-in-law, who recently moved into her first apartment. If she doesn’t want them, they’ll also go to GCF.

Shoes and fabric scraps: The shoes were too worn out to best re-sold in a GCF store, and the fabric scraps were too small to be reused in any of my projects for the foreseeable future. These items went to Clothes the Loop, The North Face’s textile recycling program.

E-waste and plastic bags: Empty ink cartridges. Batteries. An old computer case fan. A whole lot of plastic bags. Although there are probably a handful of different places that can handle these kinds of items, including municipal household waste disposal centers, I find it’s easiest to drop them off at Best Buy’s recycling station, which is always right inside the front doors.

In case you’re wondering, the box on the far left is full of sentimental stuff that I’m not sure what to do with yet. It’ll probably linger in the outbox a while longer. If I come up with a creative solution for dealing with it, I’ll let you know, since I know that sentimental items are always a sticking point when you’re trying pare unneeded/unwanted items.

Assignment #19: Blast the Bathroom

Rounding the corner and the finish line of the January Cure is in sight. I feel like I’ve been dropping off here toward the end, so I’m glad the official activities are nearly over so I can start scheduling things at my own pace.

Since talking about cleaning the bathrooms is boring, I thought I’d share a few ideas I’ve had for decorating the master bath. (If I had my way, we’d be painting it this weekend, but alas, the home improvement fund is rather lean after the pantry installation earlier this month.) We’ve sort of gone about things backward, since we bought new towels, a bathmat, a soap dispenser, and a toothbrush holder about nine months ago, but the walls are still beige and we could use an étagère. Here are a few ways we could fix that.

1_Master_Bathroom_Moodboard

1 – Light Pewter // 2 – Peace and Happiness // 3 – HJÄLMAREN // 4 – VITTSJÖ // 5 – Chevron Shower Curtain // 6 – Cabana Strip Shower Curtain // 7 – Paisley Shower Curtain  // 8 – Hampton Links Shower Curtain

The first paint color is the lightest shade on the same card as our bedroom paint color and, despite how it looks on screen, it’s actually grey, not tan. After true white, it’s the easiest choice. I’ve been thinking it could also be fun to bring in something a little different in the form of a pinky lavender like the one shown above, but I’m a lot less sure how I feel about it. I’m afraid I’ll get bored of it too quickly, and I don’t know if it will jive with whatever accent color we eventually pick for the master bedroom. But I’m kind of intrigued by the idea of creating a palette that’s a little warmer, a little softer, and a little more sophisticated than I may have originally imagined.

For an étagère, I keep coming back to this relaxed, leaning style. I don’t think it’s terribly practical as a bookshelf—not when you have as many books as I do, anyway—but for rolled towels and a basket of toiletries I think it could be perfect. For something with a little more shelf real estate, there’s the more traditional option on the right. I’d like to think the glass shelves would keep it from feeling too heavy in the small space of the bathroom. I’m even entertaining the idea of spray painting it in a metallic like Censational Girl or Bethany Seawright from Apartment Therapy’s Design Diary, who was inspired by Just Bella.

Finally, the shower curtain. I’m actually quite fond of the white one we have, because it’s made out of this lovely dense cotton gauze with a waffle weave. But the first time I washed it (in cold water) and dried it (on low), it shrank horribly. Now it doesn’t really stretch from one end of the shower to the other, and it drives me a little crazy. Okay, a lot crazy. So for fun, I looked at a few patterned curtains to replace it. The first is supposed to be grey and white; it seems to match the paint swatch well, but I’m a little afraid it’s closer to beige and cream, so I’d need to see it in person. The slightly painterly chevrons are a lot less structured than I usually go for in a pattern, as evidenced by my other three choices. The cabana stripe feels classic, as does the links pattern, though the latter may be a little overpowering and better as a bedspread rather than a curtain. I couldn’t resist throwing in a paisley, though I’d probably need a different shade of grey walls to pull it off. But the touch of yellow would be cheery in a space that gets no natural light.

It was nice to get a couple of ideas down, even if they might change, because it’s allowed me to see trends in what I gravitate toward in a way that mindless online browsing doesn’t. Do you collect inspiration in moodboards, or dive right into your designs? Have you ever been surprised by the patterns that emerge?

Assignment #18: Digital Dump

In previous years, this assignment was dedicated to digitizing files, which I had been dreading and looking forward to in equal measure. When Justin and I first got married, I was obsessed with keeping hard copies of everything—bills, receipts for paid bills, rental agreements, amendments to same, every version of every insurance policy document—because I was mortally afraid that I’d pay a bill online, the transaction wouldn’t be completed, and then collections would come to knock down my door and repossess my furniture. Money was tight, and I was afraid that one wrong move would ruin our credit forever.

The result looks something like this:

2015-01-27_Files

As it turns out, we managed just fine. A few minor slip-ups were easily corrected, and nothing money-related we did online ever failed catastrophically. And yet, the paper remains. Sorting through everything, digitizing, labeling, and filing the important stuff—and then shredding everything when I’m done—is going to be a monumental task.

Luckily, the assignment says to spend only 30 minutes focused on improving one area. Since digitizing will definitely take more than one evening, I decided that I had a more pressing issue to address: the fact that I haven’t back up anything in an appalling long time.

I started by ripping two CDs that I received for Christmas to my computer. Then I pulled out our external hard drive, wiped all of the outdated information saved on it, and promptly copied over my documents, pictures, and music. It certainly doesn’t capture everything, but it does provide a stop-gap for my most important data.

When I have a solid weekend that I can dedicate to it, I plan to do the following:

  1. Research options to backup my computer and Justin’s to the same device, automatically.
  2. Research cloud storage options for additional protection.
  3. Digitize all physical files, preserving the ones that are smart to have in hard copy and shredding the rest.
  4. Review documents and photos; purge anything that is no longer needed/wanted and improve the organization of everything that remains.
  5. Check smartphones for photos or information that should be backed up on a less lose-able/less drop-able device.
  6. Fine tune our home network to better share information across devices.
  7. Clean everything inside and out: wipe down keyboards and mice, blow out cases, replace old fans, run disk defragmenter, etc.

I’m sure I’ve missed something, but it seems like a solid start anyway. What things do you do to protect your data and stay organized at the same time?