Doppelgänger

While I was visiting my family for Thanksgiving, I had the experience of witnessing a time-worn idiom come to life, when my mom approached me with hat in hand to ask for my knitting expertise. The very literal hat in question was a light grey, slouchy, slightly fuzzy beanie with alternating bands of plain and textured knitting, the crown of which had started to come undone. She had picked up the hat to wear when walking the dog, and she admitted that though it was nothing particularly special, she would nevertheless be sad to lose it to unraveling. She asked if I would be willing to take it home and try to repair it, which I readily agreed to do.

Fortunately for the hat (and my nerves), once I carefully unpicked the tangle of loops at the top of the hat, I discovered the situation was not as dire as I feared. The crown had not been cinched shut with the tail of the working yarn, but had instead been secured with a separate strand of yarn, and it was this strand only that had broken. None of the yarn used in the knitting itself was damaged—no snags or severed plies to fuss with—which meant it was a relatively simple task to latch up the few dropped stitches and then close the top of the hat with a strand of stash yarn in a similar weight and color.

Since I knew I’d see my parents again at Christmastime, I had the hat in my possession for a couple of weeks, during which time it occurred to me that I had the power to do more than simply keep a humble accessory from meeting an untimely demise: I could, in fact, template the cherished item and ensure that it lived on through an infinite number of iterations, should the owner so desire. Or, at the very least, I could create a copy, doubling my mom’s sartorial choices and prolonging the life of the original hat. Which, as far as I’m concerned, is a close second behind hat-based immortality.

To make my copy, I started by taking some flat measurements of the height from brim to crown, the height of the ribbing, and the height of a pattern repeat. The stockinette and reverse stockinette portions were easy to identify, but I had a slightly harder time with the other texture, which sort of resembles ribbing if the knits were squatter and more pronounced and there were no purls between them. After some searching and comparison, I came to the conclusion that it was probably fisherman’s rib. Whereas the original hat had been worked flat and then seamed, I think seamless hats are one of the ways handknitting distinguishes itself as superior to machine knitting, so I found instructions for knitting fisherman’s rib in the round and was off.

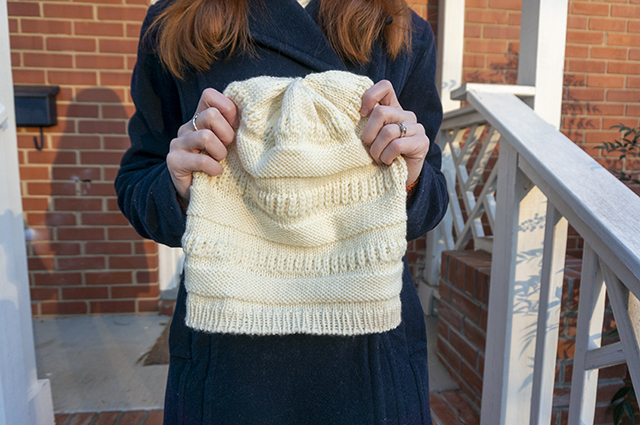
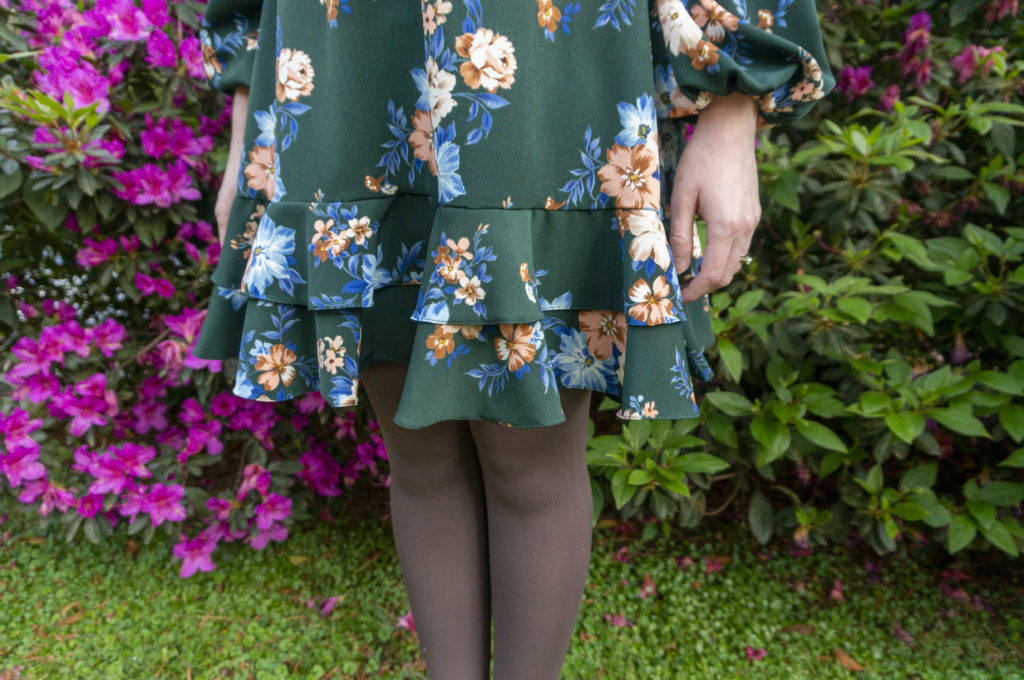
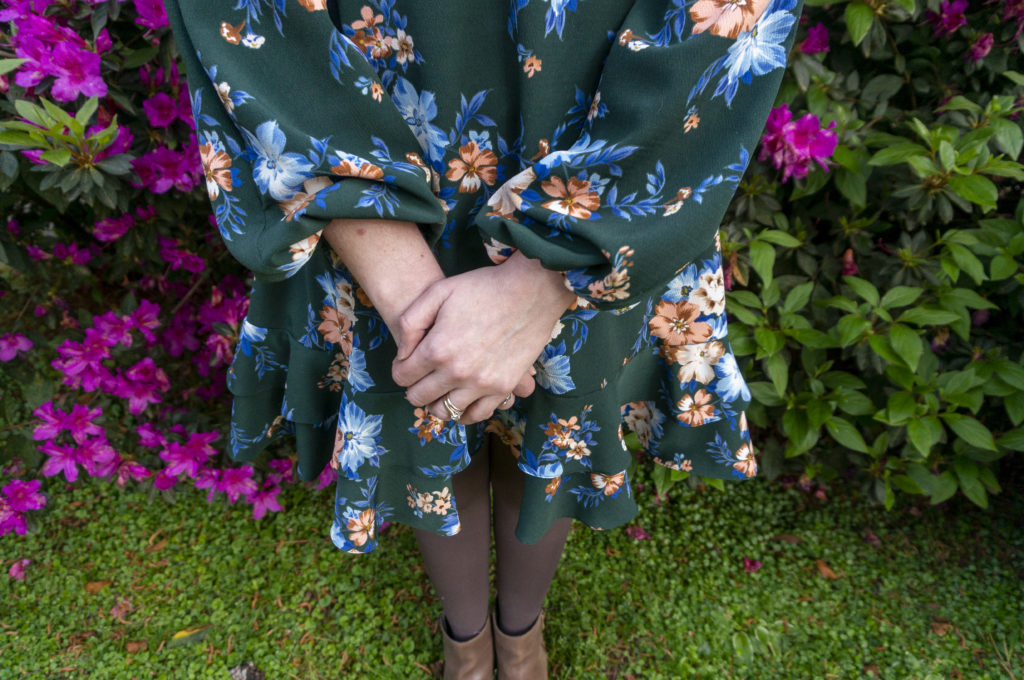
The yarn is Malabrigo Rios; the colorway is Natural. The recipe for this hat can be found on my Ravelry project page. Contrary to the care note I sent my mom (hi Mom!), it is, in fact, machine washable, so long as it’s placed in a garment bag on a cold, gentle cycle. It still has to be laid flat to dry, but being wool, it doesn’t need to be washed all that often. I enjoyed working with the yarn so much that I used it again for another hat and also a sweater—more on them soon.

I wish I’d had the common sense to take a photo of the original so I could show you both hats side-by-side and you could be impressed by what a good match they are, but I think we all know by now that that kind of forethought isn’t my specialty. Just picture the hat above in light grey and a little fuzzier. Pretty similar, eh?

Belated Floral Birthday Dress

There’s a bit of a tradition in the sewing community of sewing a new outfit for a special occasion—for once-in-a-lifetime events like weddings and proms and graduations, as you might imagine, but also for those smaller milestones like birthdays and vacations to new places. Not everyone does this, of course, nor even the majority of people who sew, but it’s a ritual I’ve seen a fair few sewists indulge in, and I’ve secretly cherished the idea of doing it myself for rather a long time.

The trouble is, I always think to do it as the date of the event is closing in, when it’s only a week or two a way, which simply isn’t enough time (for me) to do a special project any kind of justice. Not without an excess of wailing and hair-pulling, anyway. I’m generally self-aware enough not to create that kind of stress for myself around an occasion I’m particularly looking forward to, so year after year I watch my birthday, and my dream of a birthday dress, come and go.

Not so in 2019, however. This time, I was determined to start early and finish with time to spare. I was helped considerably by having a strong idea of what I wanted right out of the gate: a 70s-style mini dress in a floral print, preferably with a gathered sleeve, maybe with a ruffle somewhere. I suspect I was influenced by the True Bias Roscoe Blouse and the Friday Pattern Co. Wilder Gown, or more specifically Allie’s mashup of the two.

Fortunately for me, I found what I was looking for more or less instantly in Butterick 6705. I chose View B, which offers a shorter length, sleeves gathered by elastic at the wrist, a bound neckline, and a double flounce at the hem. The relaxed waist and hip and flared hem are balanced by the peaked empire waist and bust gathers, which provide shaping around the chest. The raglan sleeves keep things on the casual side.

The fabric is a polyester crepe from JoAnn. I briefly considered a slightly more graphic design with black-and-white line art flowers on a solid background, but loved the dark green of this floral too much to pass up, and besides, if ever there was a time to lean into a softer, more romantic style, this seemed like it.

Despite its textured face, the polyester crepe has a smooth back that, when combined with the fabric’s thinness and fluid drape, made it an absolute pain to cut and pin. I did try to starch it with a homemade spray starch solution, but was too impatient for it to dry before trying to press it, and I ended up foregoing starch on all but the two bodice pieces. It really would have been better to wait, and if I use polyester crepe again I’ll factor in time for starching and drying before cutting.

I cut a size 10 at the bust, grading to a size 12 at the waist and hip. I removed 2″ from the lengthen/shorten line above the waist and below the hip, shortening the dress by a total of 4″. I made the decision to shorten in both places based primarily on my CustomFit measurements, which have separate lengths for “waist to armhole” and “waist to hip” that I compared to the finished garment measurements, but also based on the principle that it’s generally a good idea to split such large differences over multiple areas to avoid any weirdness at the seams.

For the sewing itself, I had no issues with a 70/10 universal needle and polyester thread. The pattern instructions didn’t offer any suggestions on how to finish the raw edges of the center front bodice seam, so I extended the narrow hem that’s used on either side of the front neckline slit. The rest of the raw edges are finished with French seams, and each flounce has a tiny rolled hem.

Stitching the narrow binding on the neckline was a beast, but worth it because I like that finish. As with my Archer shirt, I opted to sew the binding to the wrong side first, then wrap it to the outside and stitch in place from the right side; if the stitches don’t go through the binding on the outside, I have to go back and re-stitch them anyway to secure the binding, but if they don’t land “in the ditch” on the inside, who cares? Nobody can see it anyway.

My only complaint with the pattern, and it’s only a very minor quibble, is that the two-piece sleeves are designed to be eased, but there’s only one notch indicating where the easing should end, instead of two notches like you’d find on a princess seam.

In terms of improvements, I wish I’d gotten the zipper to lay a little more smoothly and stop a little closer to the top of the dress. I also hope to one day be able to sew on hooks and eyes competently. These ones are okay, though they’re a little more visible than I would have liked. Because the neckline is so high in the front, I will sometimes leave the front closure undone like you see in the last photo.

On the flip side, I’m proud of how the flowers accidentally lined up quite neatly across the front slit, since (as you can see from the rest of the dress) I didn’t even bother to try pattern matching.

The only way in which this dress could be said to have missed the mark was that I didn’t have it done in time for my birthday. As I approached the day of, which I planned to celebrate with a small group of friends at a local game cafe, I realized that all of the painstaking pinning I was having to do was slowing me down, and I was going to have to really sprint to get the neckline binding and the flounces completed. But after visiting the cafe and realizing it was going to be far too cold inside to wear an unlined, artificial-fiber dress comfortably, I decided to cut myself some slack and finish after the party (which also gave me more time to focus on making a cake, so win–win).

Not to worry, though—my birthday dress dreams were not, in fact, dashed, as I ended up having a second birthday celebration with my family during our Thanksgiving holiday. The dress garnered many compliments and was wonderfully accommodating of my turkey-day indulgences.

While I don’t see myself having the wherewithal to make a new frock for every special occasion, I might be contemplating making a travel wardrobe for our next big vacation, which will likely be so far into the future that I will surely have at least even odds of achieving my sewing ambitions.

Magical Realism

On the opposite end of the spectrum from my Pumpkin Pie sweater is this monster, which did not so much inspire introspection into the nature of craft as it did provoke spates of cursing and self-condemnation.

The pattern in question is Casapinka’s Magical Thinking, the Local Yarn Shawl of 2019. As in 2018, I found it difficult to resist the lure of a “free” pattern in support of my beloved LYS Warm ‘n Fuzzy. I’ve put “free” in quotation marks because you receive a download code for the shawl only when you purchase suitable yarn for the project on Local Yarn Store Day (the last Saturday in April).

That’s where the trouble began.

Don’t get me wrong—I don’t begrudge my LYS one cent of the money I’ve paid for yarn, needles, notions, or knitting swag over the years. But I have no shortage of sock yarn shawls already, and within the framework of having no particular need for another sock yarn shawl, I definitely spent more money than I should have. Whereas my 2018 Local Yarn Shawl required two skeins of fingering weight, this year’s offering demanded three—three! As you might imagine, these hand-dyed beauties—a semi-solid, a tonal, and a speckle—came with a premium price tag. I do very much love the colors, though, both individually and together. That’s how they get you.

Everything would have been peachy if all I’d needed to do was assuage a bit of guilt for indulging in luxury yarn (a trivial inconvenience for the veteran knitter). At some point, no doubt around the time I had an armload of yarns I was auditioning for my next neck accessory, it dawned on me that I had, in fact, been suckered into yet another striped project. (If you’re wondering why three out of the four links lead to apparently solid-colored knits, it’s because I had to alternate skeins to manage dye lots/color transitions, which works the same as knitting contrasting color stripes).

“It’s fine,” I told myself. “It’s knit in the round. I can carry the unused yarn inside the work.”

This is…not really the case. There are a handful of places where you can carry the yarn, true, but it’s not possible to carry all three yarns all the way through from beginning to end. My sense of betrayal and disappointment (mostly with myself, to be clear) when I realized there were actually going to be a lot of ends to weave in did not contribute to an auspicious start to the knitting portion of this endeavor.

The pattern instructions were, quite frankly, not my favorite. For starters, there seems to be no consistent logic to when the first stitch of the round is slipped. It’s supposed to prevent a jog in the stripes, but slipping the first stitch isn’t indicated for every color change, nor is it omitted when the color stays the same. There’s probably some esoteric bit of stripe-knitting theory I’ve failed to grasp here, and that’s hardly the designer’s fault. Regardless, I struggled with the transition between the end of one round and the beginning of the next looking like a gappy, jagged mess the whole time I was knitting, even with the slipped stitches.

Then, there’s the explanation of the increase rounds. In theory economical but in presentation inelegant, the increase rounds caused more than a few minutes of puzzling on my end. “Do them as you do the first increase round” it says in bold, and “Note that increase rounds are defined in bold, above” it says, but then doesn’t specify whether it means the first increase round in each section (nope) or in the whole piece (yep, it’s this one). The stitch instructions for this foundational increase round are not themselves bolded for convenience, which is baffling when you consider they’re referenced throughout the remaining 6 pages of the pattern.

Eventually the entire thing became so big and unwieldy that not even novel changes in the texture held my interest; eventually “one more round” was not the breathless whisper of anticipation but the ragged mantra of someone who just wants the thing to end.

And, wonder of wonders, it finally did. The issues I had with the beginning of round transition disappeared with blocking, and, as is so often the case, the memory of my agitation during the making-up has dulled with time. I may not have loved a single minute of the process, but I’m pretty fond of the finished product—fond enough that I wore this exact outfit for my birthday party, back on a bitterly cold night in November. (I was supposed to wear a dress I’d made myself, but that’s a story for another day…)

Work-to-Glory Ratio

In the early, sporadic days of my knitting, when I was making the transition from wistfully reading knitting blogs to actually doing some knitting myself, I had the great good fortune to stumble upon TECHknitter. Though their identity remains (to me, at least) a mystery, they are clearly a capable and inventive knitter, because their blog, which spans more than 10 years, is really an electronic book full of improved solutions to many of knitting’s everyday challenges. From them I have learned a gap-less, jog-less way to join a piece of work in the round, three ways to bind off circular knits depending on the type of project, and ten methods for weaving in ends (though I’ve only used four or five of them to date).

Much of TECHknitter’s writing deals with the mechanics of knitting, like why a stockinette edge curls (and why adding a border doesn’t really fix the problem), and how to use that knowledge to your advantage. But sprinkled throughout are bits of knitting philosophy, such as when to choose an excellent but fiddly solution and when to settle for a pretty good one. Very occasionally—only a handful of times in a decade—TECHknitter treats the reader to a pure philosophical refection on the craft.

The one that’s stuck with me, that continues to thread itself through more and more of my thinking, is the work-to-glory ratio. Originally posited by TECHknitter’s friend Carol, the work-to-glory ratio is the relationship between the amount of effort that goes into a project and the degree to which the result is impressive or satisfying. A project that appears difficult but was in fact easy to knit has a good work-to-glory ratio, whereas a project that was tedious or hard and turns out indistinguishable from something machine-made has a bad work-to-glory ratio.

As TECHknitter is quick to point out, there are of course plenty of projects that are both challenging and gratifying: some projects are rewarding precisely because of the time and effort that went into their making. A practical project in a workhorse yarn with a familiar pattern might turn out precisely as useful as the knitter intended. For TECHknitter, the work-to-glory ratio is more an observable phenomenon than a guiding principle.

The orange sweater above, a CustomFit version of Amy Herzog’s Foyle’s Pullover, has proven to have a pretty good work-to-glory ratio. The allover lace on the front is an easy-to-read and memorize six-row repeat where the wrong-side rows are all purled, and it’s a great design to practice decreasing in pattern (though no specific instructions are given for this, and the source I was going to recommend is no longer available online). Meanwhile, the back and sleeves are simple stockinette, yet these large swaths of plain stitching somehow recede into the background so as not to draw attention to the fact that two-thirds of the sweater are mindless TV knitting.

While to my eye there’s nothing really outstanding about this pullover, everyone who’s seen me wear it has been impressed by its handmade origins and convinced that it must have been quite a bit of work to produce. Oh no, I think, it wasn’t nearly as fraught re-knitting every piece of this sweater to get a mediocre fit, or as mind-meltingly tedious as dealing with the kajillion ends on this one to make it wearable. Both of those projects took far more time and mental energy, but you’d never know it by looking at them.

(In case anyone thinks I’m underwhelmed by the results here, let me assure you that I’m very happy with the outcome and feel it’s my best CustomFit sweater yet.)

The smile of someone who wears their new sweater at least once a week

The work-to-glory ratio as a framework for thinking about things that take work—even if they’re not thought of as work, as a task or a job—has slowly crept into other areas of my life. Increasingly I’ve been thinking about it in the context of friendships, and I’ve been struck by how even a healthy friendship can at times have a pretty poor work-to-glory ratio.

The daily work of being friends, of nurturing a relationship, can involve so many small acts to affirm, question, encourage, and comfort. Making time to call, remembering milestones, knowing a person’s favorite treat or pet peeves—these are all part of the skill of being a friend, a skill that must be learned and can be cultivated.

But it’s also work that can go unrewarded. A deliberate effort to ask about something a friend is working on might lead to a dead-end in conversation; a genuine desire to check up on their wellbeing might go completely unanswered or unacknowledged. Frequent small touches become shallow interactions, which can start to feel like more of a rote exercise than the practice of making a genuine human connection.

In my lowest moments, I wonder if the work isn’t worth the paltry sum of glory.

And yet TECHknitter offers another way of thinking about this too: work as product plus process. The idea that the value of a thing lies in the thing itself, and also in all of the moments that went into making the thing added up. A handknit sock is no longer just a sock: it’s an act of care, patiently created to be something functional and comfortable and beautiful that someone can use and enjoy every day. The knitter knows it, and so does the wearer, and that knowing is as much as part of the joy as the sock itself.

The time, place, and emotional space the knitter was in while they knit are also part of that sock, whether the wearer knows it or not. They become folded into the process part of the equation, bringing further dimensions to that sock’s intangible value.

But beyond even these things are the very act of making itself: the friction of yarn sliding over the tensioning finger, the clicking of needles in motion, the rhythm of forming stitches and turning the work. Watching the balance of yarn change, the unraveled cake collapsing as the yarn is raveled back into a slowly lengthening sock. Choosing to see and hear and feel the process of yarn becoming a sock when it would be far faster and simpler to buy socks at the store.

How much better to think of friendships as product plus process! To imagine each moment of connection, no matter how seemingly trivial, as another stitch in the knitting—by itself practically inconsequential, but in aggregate absolutely essential. To treat the intention behind each small act of kindness as equal to the outcome of the act in importance. The goodness of a friendship is thus measured not only in how meaningful are the conversations or how memorable the events, but also in how much love and concern motivated every effort to have those moments, even when those efforts appear to fail.

The work of friendship and the rewards of friendship are not two sides of an equation to be weighed against each other: a friendship is the sum of the work and the rewards, the product and the process added up and divided between friends.

Reciprocity

The first designer item I owned was a Vera Bradley purse I received from my parents for my high school graduation. Over the years my mom, my sister, and I each gathered a small collection of Vera Bradley bags and accessories in a smattering of colors and patterns. Despite our varying needs and tastes, we all agreed that the bucket bag was an eminently practical choice whenever you needed to carry the usual wallet, keys, phone, and personal items, but also sunglasses, two water bottles, an entire packet of tissues, a book, and maybe a snack.

My mom liked the bucket bag she owned, but wanted one in a solid color. After sweetly dropping hints both to me and to my sister to relay to me, I figured it was time I put my skills (such as they are) to use to make that wish a reality.

Fortunately, my sister had an old bag that was too worn out to carry around anymore, which she graciously sacrificed to my seam ripper. By taking the bag apart over several days and photographing each step, I was able to understand the construction and use the pieces as templates for a new bag.

The bag has an exterior zipper pocket, an interior zipper pocket, and three interior open-top pockets. It closes with a magnetic button. The straps are fixed. There’s a sleeve in the bottom of the bag for an insert to stabilize the base so that it doesn’t sag and the bag can stand up on its own; I took the insert from the deconstructed bag, which is just a piece of mat board or heavy cardboard, for use in my re-creation.

I didn’t make any modifications to the design or size, but I did opt to use a thick stable knit with a quilt-like pattern (leftover from this cosplay) for the shell instead of quilting together plain cottons. The lining is a polyester silky solid that I’d bought several years/moves ago for an ill-fated Sorbetto top.

I definitely saved on quilting time as a result of using a a “pre-quilted” fabric, but toward the end it was a challenge to feed the many layers of thick fabric through my machine. For the straps, my attempts to sew a tube and turn it right-side-out proved disastrous. I ended up cutting new straps, sewing one edge right sides together, opening the seam out, folding under the raw edges, and topstitching them in place, then topstitching the first seam to match. I didn’t even attempt to machine-stitch the bias binding that encloses the last raw edges on the inside bottom of the bag, preferring instead to wrestle everything into submission with hand-stitching.

If I were to attempt it again—and I think I might—I’d use a thinner shell fabric, but otherwise the construction is straightforward and didn’t require any special tools or techniques.

Judging by her reaction, my mom was pretty pleased with the outcome, and this bag has joined the rotation with her other favorites. For myself, I’m glad I could reciprocate the gift of a good bag that she once gave to me.