FO: Pumped Up in Pink

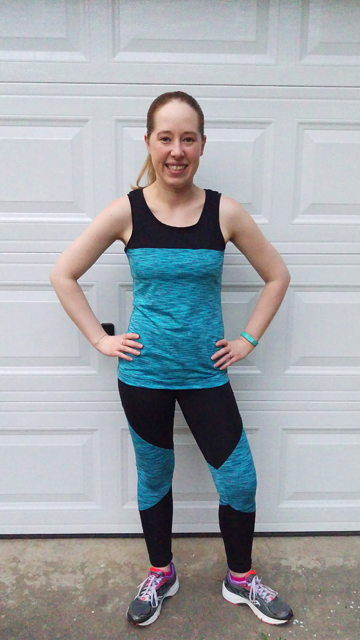
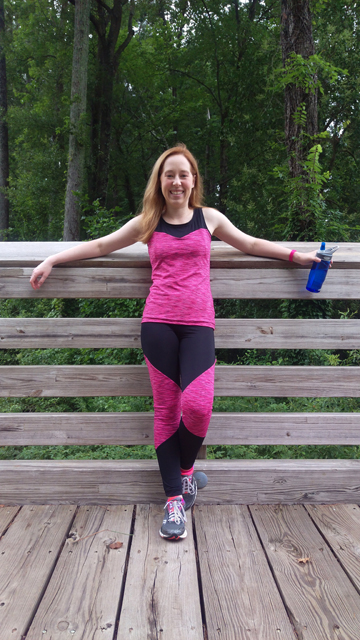
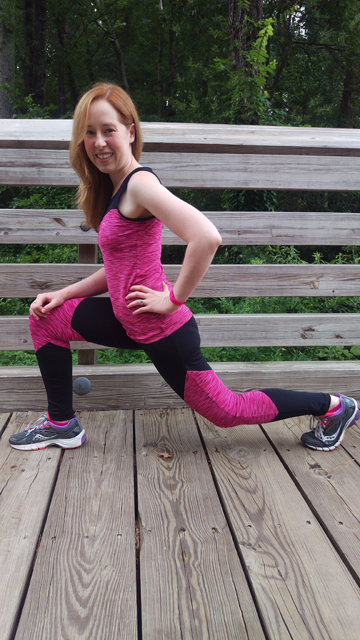
At some point around the end of June or the beginning of July—that hazy time before the flood—I completed a second set of gym clothes using the same patterns as my first set (Top: New Look 6285 View C; Leggings: McCall’s 7261 View D). I had expected the first attempt to be something of a wearable muslin, and when it indeed turned out to be quite wearable, I had high hopes that with the second attempt I would skillfully incorporate all of those lessons learned, resulting in a nigh-on-perfect fit. Instead, I managed to create new issues while fixing the original ones, so that take two is more of a different fit than a better one.

2016-09-05_01_full-length

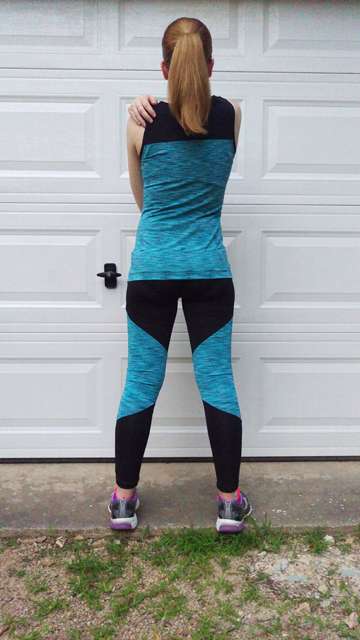
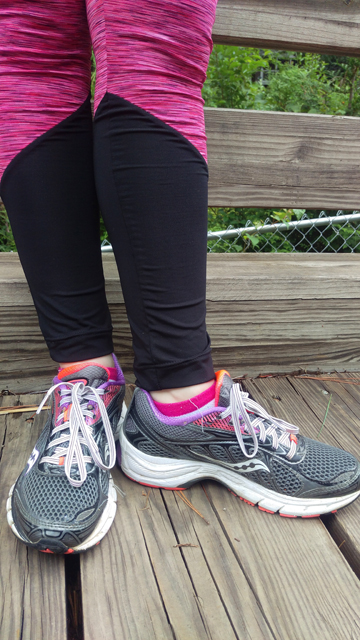
The first thing I set out to fix was the tightness of the pants. While I like my leggings to fit closely, there was some straining at the seams, especially when I was doing leg presses. No popped stitches yet, but better safe than sorry, right? So instead of using the pattern pieces I had traced off previously, where I had shaved off ¼” all the way around so that I could serge with a 3/8” seam allowance on the original stitching line, I traced off a fresh set of pattern pieces along the original size lines but serged with the same 3/8” seam allowance, effectively increasing the leg, hip, and waist circumferences by 1”. (Lengths were also increased, which I figured would be beneficial, and could be shaved down easily enough if needed.)  One inch ended up being a lot more than I needed, so I pinched out the excess and resewed the outseams, removing—can you believe this?—1/2” each from the front and back leg pieces, or a total of 1” for each leg. Somehow, this still resulted in an ever-so-slightly roomier fit, and now I can safely do lunges without fear of splitting a seam open.

2016-09-05_02_lunge

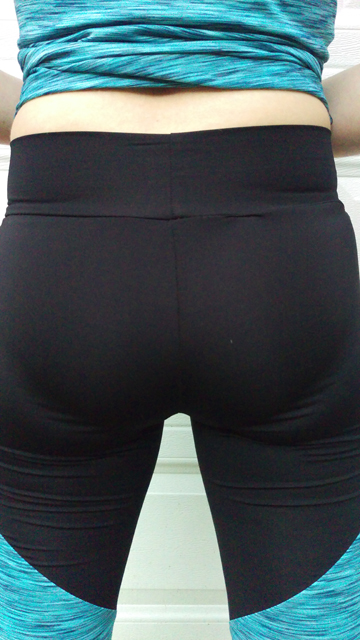
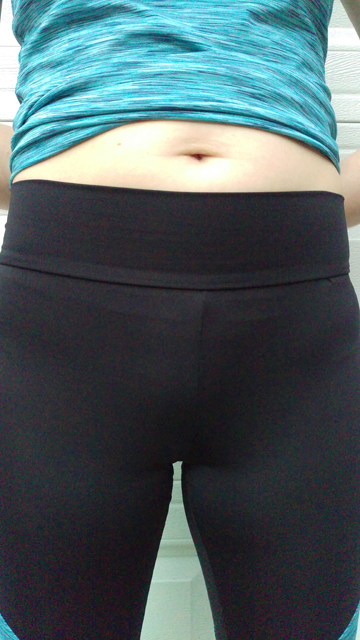
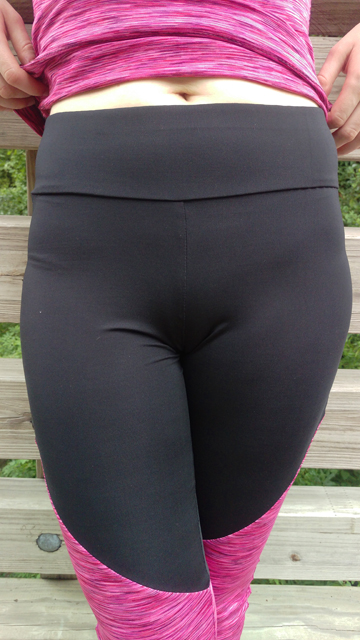
The other major change I made to the pants was the waistband. My first pair had a wide band but no elastic, so the band tends to fold or roll down on itself when I bend or sit. To prevent this, instead of cutting one folded waistband, I cut two waistband pieces, each with an extra 3/8” seam allowance on the top edge, and sandwiched the elastic in the top seam.

2016-09-05_03_front-waistband

In order to get the smoothest possible interior and exterior, my steps (to the best of my recall) looked something like this:

  1. Place waistband pieces right sides together.
  2. Lay ¾” elastic on top of the waistband pieces, aligning them along one long edge.
  3. With the elastic still on top, serge all three layers together. The waistband piece in direct contact with the elastic—the middle layer of the sandwich—will be the inner waistband; the other waistband piece will be the outer waistband.
  4. Turn the sandwich over so that the elastic is now on the bottom.
  5. Open the waistband pieces so that the right sides are visible.
  6. Understitch the inner waistband—the piece lying directly on top of the elastic, the middle layer of the sandwich—by using a narrow zigzag to sew the fabric to the elastic opposite the serged edge.
  7. With the inner and outer waistband pieces still opened up, fold the entire waistband in half to align the short edges—the center back seam—and serge.
  8. Wrap the outer waistband piece over the top of the serged edge of the elastic, placing the elastic in the middle of the sandwich and aligning the bottom edges of the inner and outer waistband pieces. (If you cut the waistband pieces the same size, they won’t actually align; you can either try to calculate how much longer one piece needs to be than the other and cut your original pieces accordingly, or do like I did and just trim the longer piece to match the shorter one during this step.)
  9. If the center back seam feels too pronounced, you can open the inner and outer waistband pieces back up, snip into the serged edge just above the elastic, and then fold the seam allowances in opposite directions before turning the waistband wrong sides together again.
  10. Attached the waistband to the top of the pants as you normally would.

The result is smooth waistband with a lot of more staying power.

Unfortunately, I’d completely clean-finished the waistband before attaching it and realizing that the pants were too big around. Since I didn’t want to completely disassemble the waistband to take out the extra width, I only went back as far as Step #7, cut off ½” from each short end, and re-serged. It saved time but meant that the bulk-reduction trick in Step #9 wasn’t feasible, and I can definitely feel the CB seam when I’m sitting with my back against a chair/weight machine. I had also clearly lost my motivation to line up my seams by the time I was attaching the waistband for the second time.

2016-09-05_04_back-waistband

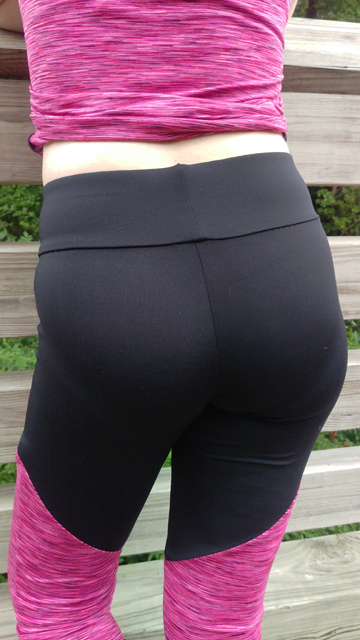
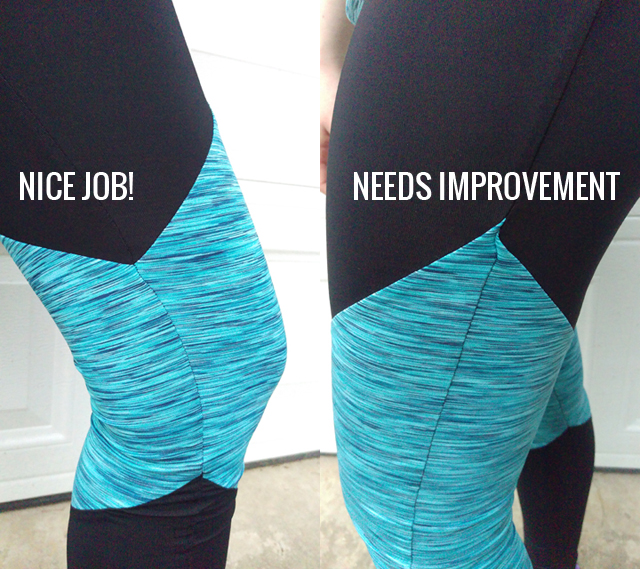
On the bright side, other seams match up a little better this time around.

2016-09-05_05_leg-seam-detail

Seriously, is there a trick to this? Even with pins and a walking foot, matching seam lines is like spinning a roulette wheel for me.

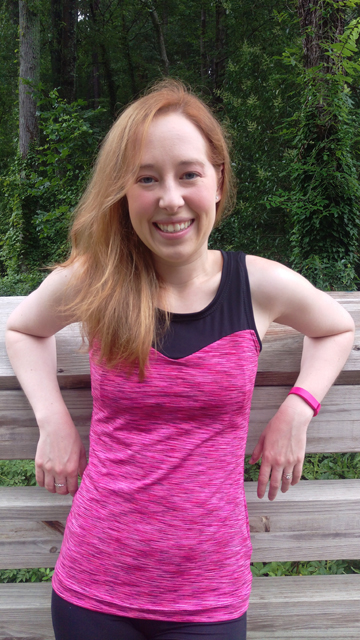
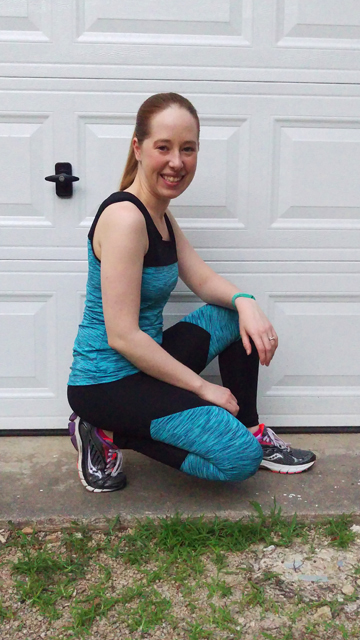
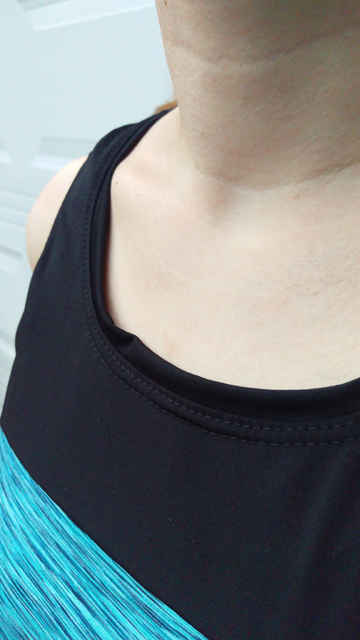
Anyway, on to the top! I’m ashamed to admit how long it took me to change the essentially straight seam to the sweetheart one you see below, and it’s entirely down to the fact that when I tried to join the original yoke and body pattern pieces into a single piece that I could modify, I completely missed that some parts of the pattern are marked with a 3/8” seam allowance and others are marked with a 5/8” seam allowance. There doesn’t appear to be any rhyme or reason to this, and I definitely sewed the first top with 3/8” seams throughout. Once I got that sorted, it was easy enough to draw in my desired seam shape, cut apart, and add new seam allowances.

2016-09-05_06_yoke-detail

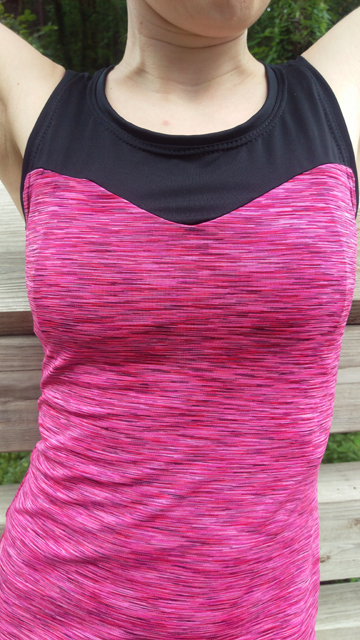
I didn’t quite get a point at the bottom of the heart, but using a ton of pins, basting, and then serging slowly made for a pretty smooth curve that I’m rather proud of. Then I forgot to topstitch the yoke seam. Again.

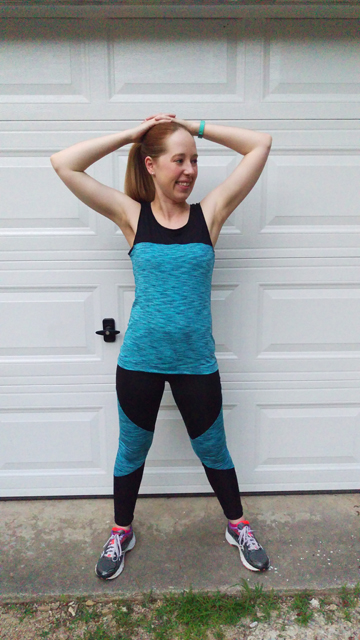
I chose to take the entire top up at the shoulders by an inch based on the fit of the earlier incarnation, but I wish I hadn’t: the armholes were a bit low before, but they’re definitely too high now. Also, I’m pretty sure I’ve caused back neck gaping that wasn’t there before. Live and learn, I suppose. If ever there was someone prone to overfitting, it would be me.

2016-09-05_07_back-view

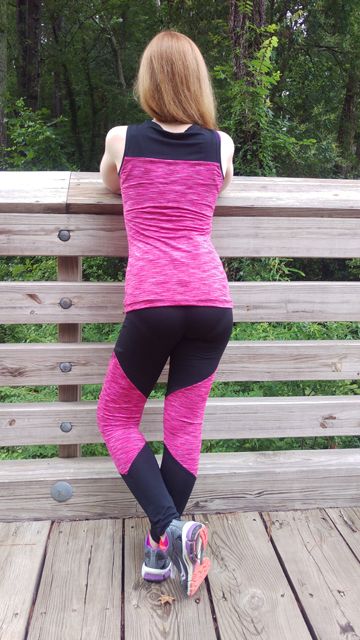
All in all, it’s not the perfect fit I was hoping for, but I’ve increased my workout wardrobe by another 50%. Can’t complain about that!


2016-09-05_08_happy-face

Progress? Progress!

Remember this promising sliver of knitting?

2016-01-02_01_Striped-Sweater-Beginnings

I’m not surprised if you don’t—it made its first and only appearance all the way back in January. January. That was six months ago, friends. Egads. (So much for this being a year of knitting productivity…)

I stalled out sometime in April after I completed the back and started the front. Fingering-weight stockinette doesn’t make for particularly speedy knitting, but it’s mindless enough that I can work on it while watching TV and riding in the car. No, what strangled my enthusiasm for the project was not the pace, but the prospect of weaving in all. those. ends.

2016-06-09_02_Striped-Sweater-Pieces-Blocking

I hate weaving in ends. Every time I sat down and knit another stripe, I created two more ends to loom on the horizon. Just look at them, promising hours of tedium—and no doubt frustration—as I try to figure out where to put all of them without any stray colors cropping up where they don’t belong.

2016-06-09_03_Striped-Sweater-Ends-Detail

But, fueled by my Me-Made-May pledge (which came about in part because of this very project), I finally made a concerted effort to drag this project toward the finish line. Over the course of four weeks, I knocked out the front and started in on the first sleeve. (Interestingly, it doesn’t bother me to be on Sleeve Island, and I’ve yet to experience Second Sleeve Syndrome on a project.)

To help combat the tyranny of ends, I used one of TECHKnitter’s strategies for weaving in as I go on the front and the sleeve. It slows down the process of turning a row and joining a new color, but I’d like to think it’s preferable to the interminable and uncertain job of dealing with all the ends at, well, the end. But I’m withholding full judgment until I can seam everything and put it on—I don’t want to actually recommend this approach until I know that it won’t come apart or create unsightly lumps or bumps on the face of the fabric.

Meanwhile, I’m itching to move on to other projects. With consecutive days of 80-degree temperatures and 90-degree days on the horizon, I won’t be sporting this sweater any time soon—except for blog photos, of course. 😉

FO: Active in Aqua

For Christmas 2014, Justin encouraged my renewed interest in fitness by gifting me a complete gym kickstarter kit that included a Fitbit, a Camelbak water bottle, and a pair of athletic leggings with matching wicking T-shirt. The clothes, which replaced the ratty cotton-spandex yoga pants and novelty tees I’d worn to the gym all throughout college, were a huge upgrade in terms of comfort and performance. They’re easily in my top 5 most used gifts, and they’ve held up really well over the last year and a half—in fact, they’re still going strong—but they have two drawbacks. First, the leggings are from Under Armour’s ColdGear line, which means they’re lined with microfleece for warmth and thus not the most suitable for spring/summer wear (even though that wear takes place in an air conditioned gym). Second, they’re just one set, which means I have to wash them at least once a week if I don’t want to offend fellow gym-goers with my rank aroma.

I’d been eyeing a few different options from major athletic brands online and crossing my fingers for a sale, until, on a quick trip to JoAnn to pick up some notion or other, I casually spied some pretty space-dyed polyester-spandex described as a quick-drying performance fabric (still available here at the time of writing; don’t trust the color in the shop photo).

2016-06-01_01_Full-Length-Front-View

I tried to talk myself out of it, but in the process only managed to stumble upon the same fabric in another colorway (also still available here; again, don’t trust the color in the shop photo) as well as a complementary solid black (I believe this is the one). Deciding this was a prime opportunity to vote with my dollars and show JoAnn there’s a market for apparel fabric and specifically athletic fabrics, and also determining that this was probably the one time where it actually would be cheaper to make my own clothes rather than buy them, I brought home a couple of yards of each.

2016-06-01_02_Full-Length-Back-View

Lightweight leggings and a fitted tank are perfect for the warmer days of spring. The tank top is New Look 6285 View C and the leggings are McCall’s 7261 View D.

2016-06-01_04_Crouched-Side-View

Let’s talk about the tank top first, since it was a much more straightforward project.

N6285 isn’t marketed as an athletic pattern, but the basic design works for both my casual wear and exercise needs, and the color-blocking possibilities immediately caught my attention. Coordinating gym separates are something I’ve longed for since my (broke) college days—who doesn’t feel more motivated by a matching gym set? It may not be readily apparent from the envelope art, but View C has an hourglass silhouette while Views A and B are straighter and looser. Since my current gym t-shirt is on the relaxed side, I thought it would be fun to try a more fitted top to see which I prefer.

2016-06-01_03_Full-Length-Front-View

I cut a straight size 6 based on the finished measurements; a size 8 would probably work just as well, but cling a little less around the stomach. The pattern is drafted with 3/8″ seam allowances, which is perfect for serging. I jumped straight to assembling everything on my serger rather than basting/sewing with a zigzag on my sewing machine first, which resulted in three places where I failed to catch all of the layers. But a little hand-stitching followed by more careful topstitching made those places practically invisible on the finished garment. In fact, I’m pretty pleased with how steady my topstitching came out, even if the neckband is a little wavy.

2016-06-01_06_Neck-Detail

The top is a little longer than I expected, but the length combined with the negative ease keeps everything anchored nicely around my hips, even when I’m running, so I don’t think I’d shorten it on future versions. The straps also seem a wee bit long: the armscyes don’t quite expose my sports bra, but it’s close, and even though that doesn’t really bother me, I think I’d like to take them up a bit just so the yoke, the widest part of the bust, and the armscyes are sitting where they’re supposed to. I wish I had thought to topstitch the yoke seam, but I’d already sewn everything together by the time the idea occurred to me, so I’ve filed it away for next time.

2016-06-01_05_Full-Length-Back-View

Now, let’s talk about those leggings. I’d made two pairs of cotton-spandex leggings using McCall’s 6173 View B (unblogged, because they’re vanilla black leggings), so I initially assumed that these athletic leggings would be built from the same block, and that I could simply transfer the minor fit changes I’d made previously to this new, slightly more interesting variation. A quick look at the tissue proved that this was not the case. In fact, I have this sneaking suspicion that the M7261 leggings aren’t designed from a knit block at all, but instead use a woven trouser block. Based on the observations below, see if you agree with me:

  • M6173 is sized XS–XL, whereas M7261 is sized 6–22
  • M7261 has a completely different front and back crotch curve than M6173
  • M6173 is graded such that the sizes are nested with no overlap, whereas M7261 is graded with overlapping size lines
  • Most if not all of the reviews on Pattern Review complain that M7261 run large instead of being fitted like one would expect for a pair of leggings

Pretty fishy, right? Luckily, I had the two patterns to compare as well as the reviews to help me choose my base size and modifications. Unfortunately, McCall’s was not about to let me off that easily, as they did not see fit to include the finished waist, hip, or inseam measurement, nor did they mark the location of the hipline. I found myself muttering “Seriously?!” over and over as I tried to line up the pieces to determine the correct size. I cannot for the life of me figure out why none of this information is printed on the envelope, in the instructions, or on the tissue, since ALL of this information was essential to creating the pattern. Surely it’s in a spreadsheet somewhere?

I ultimately chose to make the size 6. Because I’m only 5’2″, I shortened the legs by a total of 4″; to keep the balance of the contrasting sections, I subtracted 2″ at the lengthen/shorten line and another 2″ from a line I drew on the bottom leg piece (specifically, a line drawn at the same distance from the leg seam as the provided length/shorten line is located). Since I’m not a fan of pants that sit at my natural waistline, I lowered the front rise by 1.5″ and the back rise by 1.25″ based on the fit of my RTW running leggings, which sit slightly higher than my regular pants and hit between my natural waist and the top of my hip bones.

Then, I painstakingly reduced the seam allowances of every piece from 5/8″ to 3/8″. Ostensibly this was for ease of serging and because I hate waste, but in reality I might just be some kind of masochist. I’m not sure if I redrew some of the notches in the wrong places, or if I made the mistake of matching edges when I should have been matching notches, but my seam intersections are hit-or-miss.

2016-06-01_07_Seam-Details

The verdict on all those fit changes? Good, but not great. As soon as I pulled on the finished leggings I could detect a bit of camel toe happening in the front and a valley forming along the center back seam. It’s not terribly noticeable to others, but I can definitely feel it. The obvious solution will be to copy the crotch curve from my other pairs of McCall’s leggings, which don’t have these issues. The fit is also a little too snug throughout, especially around the bum when I squat/do leg presses, but I think this can be easily solved by tracing off the size 6 with its 5/8″  seam allowances, but sewing them at 3/8″ instead.

2016-06-01_09_Waist-Detail-Back-View

A few people on Pattern Review noted that the waistband doesn’t stay put. I didn’t think it would be a problem at first, but when I move around, it definitely has a tendency to roll. I thought maybe it was just a result of using a very light material under too much tension, but after re-inspecting my RTW running leggings, I realized that they do, in fact, have an elastic sewn into the seam at the top of a wide waistband. I’m definitely going to incorporate this feature into my next pair.

2016-06-01_08_Waist-Detail-Front-View

The real test, of course, comes from wearing the ensemble for exercise. I’m happy to report that this outfit’s maiden voyage to the gym did not result in any split seams, unexpectedly see-through fabrics, or other forms of abject embarrassment. In fact, although I said the fit was good but not great, a lot of the nit-picky fit issues weren’t that noticeable once I fell into the rhythm of jogging on the treadmill. That’s not to say the issues aren’t worth fixing, but it just goes to show that just because a garment doesn’t bear up under minute scrutiny doesn’t make it unwearable or even all that uncomfortable. And that gets me pretty pumped to sew up another set so that I have more options on gym days.