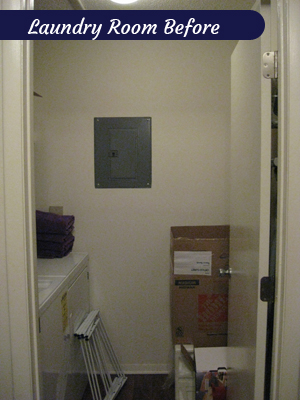
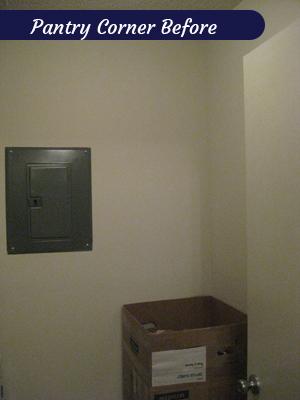
First project of the year completed, and it didn’t even take all weekend! After cleaning out our cart full of non-perishables and placing an order for an elfa system, we were anxious to get the pantry project rolling. Wouldn’t you be, if your laundry closet looked like this?
On Saturday I received a text to say that our order was ready for pickup. Even though everything fit easily into a single cart, the associate was kind enough to take it out to our car and load it into our trunk.
When we got home, we laid everything out on our dining room table.
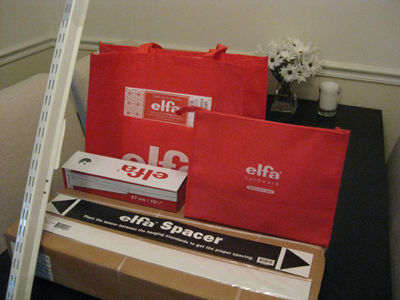
The large reusable tote held the shelf brackets, the top track cover, and the smaller red bag. The smaller red bag held all of the hardware, which included drywall anchors with screws, wood screws, and independent shelf pins.
After checking to make sure that everything we’d ordered had made it home—and it had—we cleared the table to make room for all of the required tools.
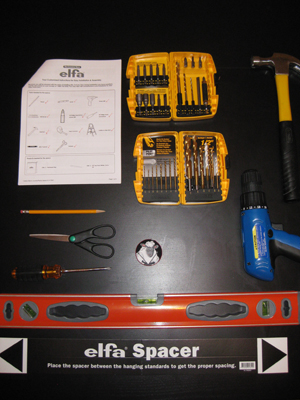
The round thing with a picture of a sheep on it is a tape measure that usually lives in my knitting bag. I couldn’t find our regular metal tape measure, although it ultimately didn’t matter, since we didn’t end up using it for our installation.
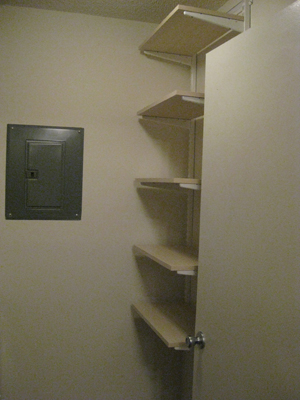
We have roughly eight-foot-high ceilings, but we opted to go with a five-foot-high system since we knew we wanted space underneath it for a recycling bin of some kind. We could have gotten one that went floor to ceiling and just chosen not to hang shelves at the bottom, but didn’t see a reason to spend extra money for something we weren’t going to use. (Even if we re-purpose it, I doubt I’ll want to bend over to get things off the lowest shelves and would probably end up putting some kind of box or bin below it anyway.)
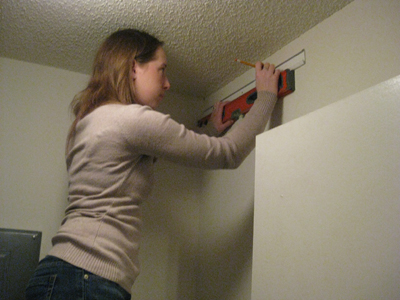
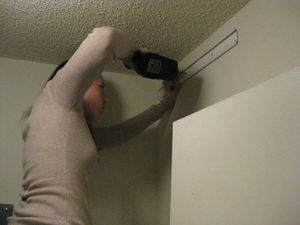
Because we weren’t concerned about fitting the vertical pieces exactly between the floor and the ceiling, and because the popcorn texture makes the ceiling uneven, I moved the top track down a couple of inches from the top of the wall. I also moved it away from the corner of the wall by about a half inch. There was no formula to it, I just eyeballed it and then made sure that the track was level before marking the holes.
Using the recommended 1/8″ bit, I drilled three pilot holes where I had marked them.
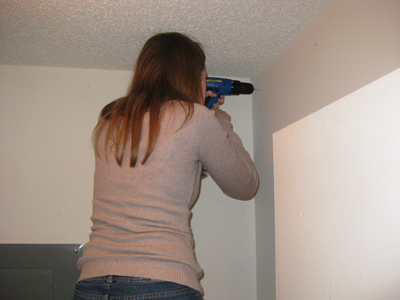
Since I didn’t hit a stud with any of them (something I’d already checked with a stud finder), I enlarged the holes with a 3/8″ bit…
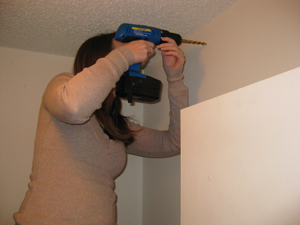
…and tapped in the drywall anchors.
(I’m laughing here because Justin pointed out that 1) strands of my hair kept getting stuck to the ceiling, and 2) I apparently tend to work with my mouth open, which was making for a lot of funny pictures. About two-thirds of the photos ended up as outtakes, between my dumb faces and crazy hair moments.)
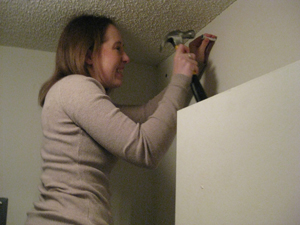
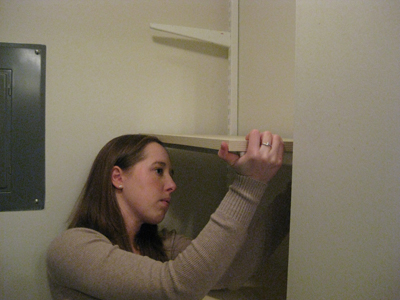
Once I gave up trying not to look goofy, I could concentrate on securing the top track to the wall, starting with the center hole.
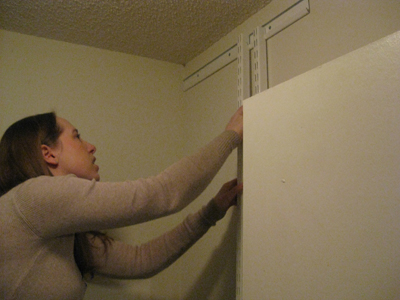
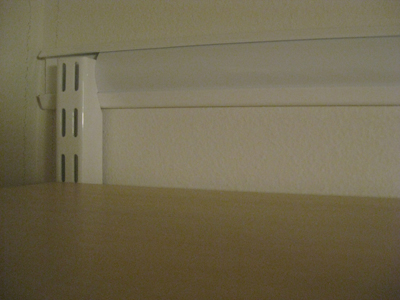
Once the top track was in place, I transitioned from installation to assembly mode. The hanging standards slipped into the top track and the brackets hooked into the standards without any issues.
For shelves, we settled on the Sand color, since the laundry room is small and gets no natural light even when the door is open. I don’t mind doing laundry, shopping for groceries, or cooking, but I figure there’s no reason to go out of my way to make the space feel dark, cramped, or uninviting.
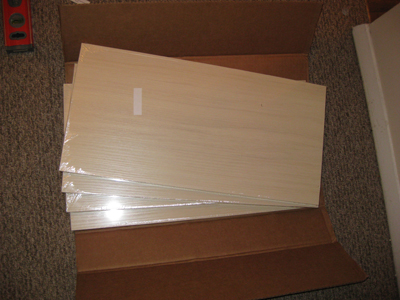
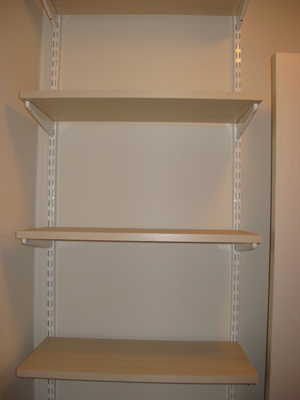
I’d originally planned on four shelves, but only because I completely failed to do basic arithmetic while I was in research mode. When it came time to place the order, we went with five. There are only four in this shot because I was already tearing into the shrink wrap of shelf #1. I may have been cackling gleefully at the time.
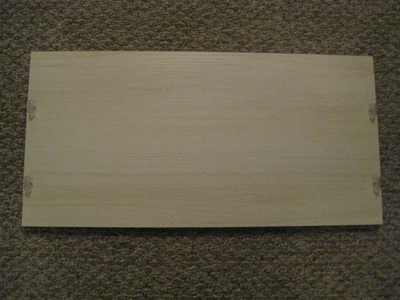
There are three options for securing the shelves to the brackets: wire connectors, independent shelf pins, and screws. Several reviews I saw indicated that the wire connectors felt a little loose and flimsy. Using screws would obviously provide the most security, but since we don’t have kids or live in an earthquake-prone area, it seemed like an unnecessary length to go to, so we chose the independent shelf pins. They’re little wedges of clear plastic on a long peg, with smaller pegs sticking out of the widest part of the wedge at a 90° angle. The long peg is inserted into a pre-drilled hole in the shelf and the wedge fits into the shelf bracket, with a smaller pegs slipping into notches in the bracket to prevent the pins from twisting and the shelf from skewing.
The shelves dropped into place on the brackets easily; a gentle squeeze ensured everything was snuggly in place.
The last step was to cut the top track cover to size with a pair of regular scissors, bend the long edges toward each other slightly to get it to fit under the edges of the top track, and apply gentle pressure until it snapped into place.
At last, we had a pantry!
Then came the fun part: filling it up. Even after cleaning out our old cart last week, I still found items that I could consolidate into a single container. Once I started putting things on the shelves, I realized that it made more sense to have them at different heights than to keep them evenly spaced. I grouped the shelves that needed less clearance at the bottom, which put more shelves within my reach (I’m only 5’2″). This gave us enough room on the top shelf to move most of Justin’s beer making kit there; I prefer that to store it next to the cleaning supplies on the other wall.
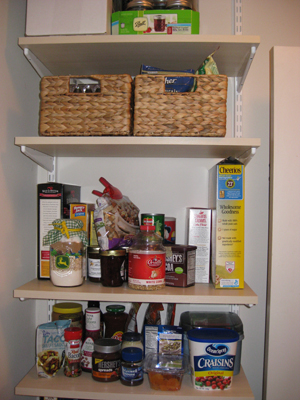
Looking at the pictures, I kind of wish I’d made a gif of the shelves filling up. Live and learn for next time.
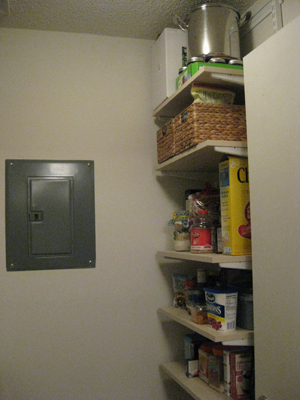
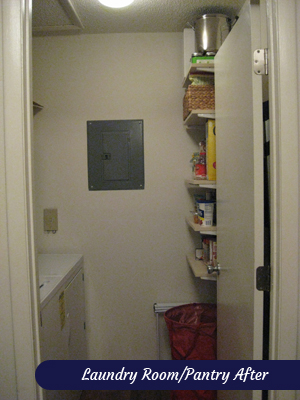
Now for my favorite part: the side-by-side comparison of the old, sad space and the new, awesome space:
The blank wall where recyclables used to pile up is now an organized pantry. Speaking of recyclables, the red thing at the bottom of the photo is an Umbra Crunch Can that we picked up on sale at The Container Store while we were returning the unused wood screws that were included in our elfa order and a utility hook for another space that didn’t work out.
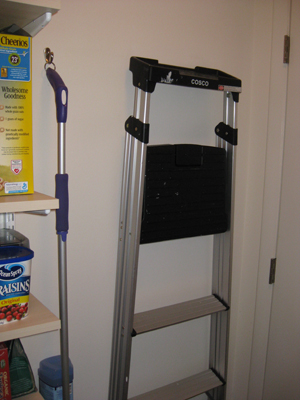
Next to the pantry shelves are hooks to hold our Swiffer WetJet and ultra-lightweight ladder. The Swiffer used to live on the back of the laundry room door along with our ironing board. I made the decision to hang them there right after we moved into the apartment, and it made sense to me at the time because I was frequently doing laundry in the dining room (which didn’t have any furniture in it for about 5 months). But we were getting tired of things banging around every time we opened the laundry room door, and we knew it would only get worse once the space started pulling double duty. So I relocated the ironing board to the back of the linen closet door in the hallway, which freed up space for the ladder. New homes for everything!
We still have the cart in the living room, and it’s still hosting the caffeination station. We’ll probably move it into the dining room for now, but I think the ultimate goal is to sell/donate it and replace it with a bar cart that’s a little less visually bulky. Or maybe we’ll find another solution all together.
To celebrate the new pantry, I cooked dinner on Saturday. Justin usually handles the cooking these days since he isn’t working, so it was really nice to get into the kitchen and make something for a change. I foresee many more home-cooked meals to come.