First Foray into Lingerie

When planning my visit to the NYC Garment District last year, I knew it was important to not only narrow down the number of shops we went into but also to have a list of projects I was shopping for. As someone who is easily overwhelmed by choice on the best of days, I would have been mad to walk into a place like Mood without a plan.

My list looked something like this:

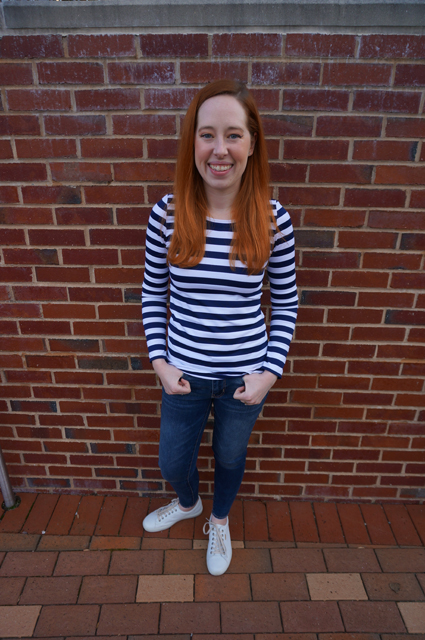
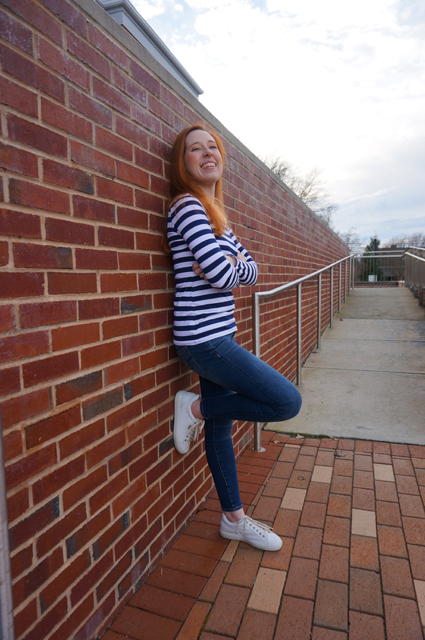
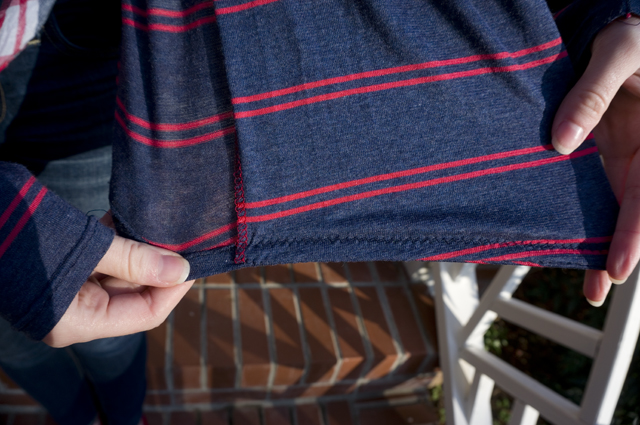
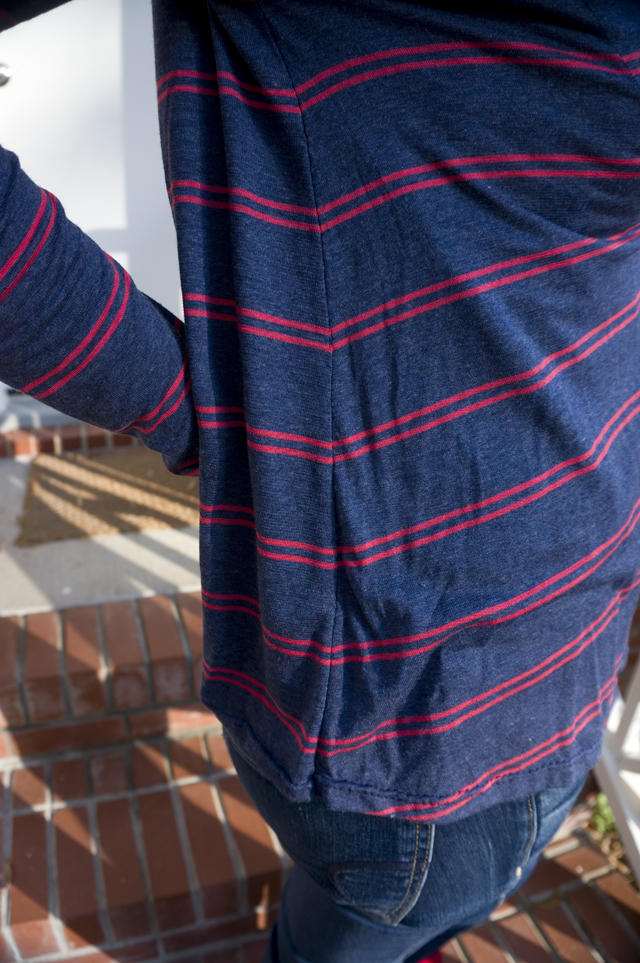
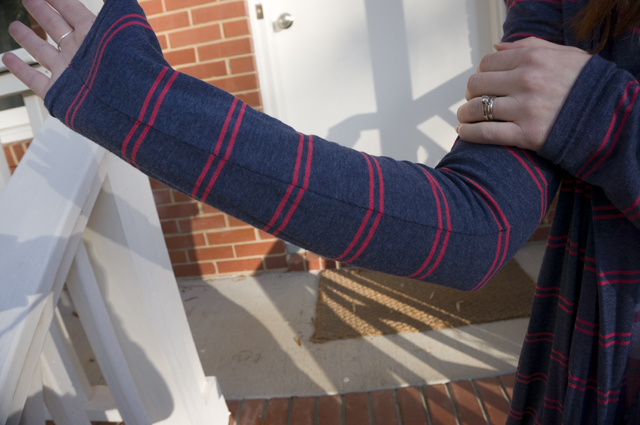
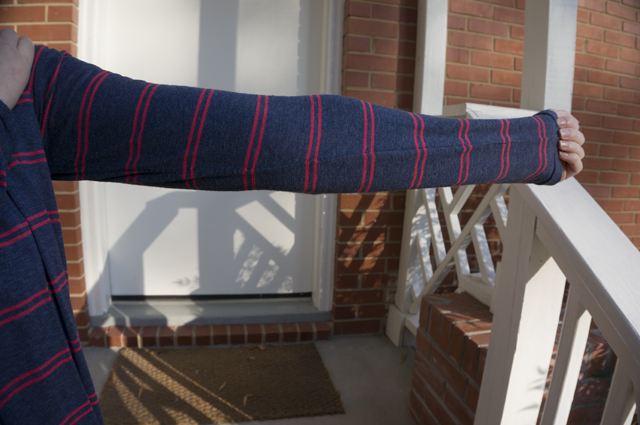
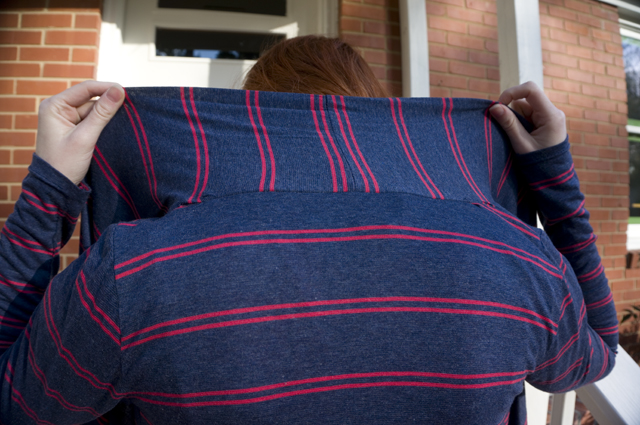
  • Spandex blend knit(s) for t-shirts, preferably at least one with navy stripes
  • A knit with a print other than a stripe for a top or dress
  • A solid rayon or bamboo knit (in a color from my palette) to make a Madalynne x Simplicity bodysuit
  • A stretch denim to make a pair of jeans
  • Lace and stretch mesh/power net to make a Madalynne x Simplicity bralette
  • Notions for the bralette and bodysuit

I struck out on the denim, but was able to bring home a lovely white stretch cotton sateen instead. I also picked up an unplanned-for white mystery fabric with alternating solid and sheer stripes. I was looking forward to making a pleated midi skirt inspired by one I’d seen at Express several seasons ago, but pre-washing the fabric completely changed the way it behaved and it may end up a total loss.

After finishing a couple of striped long- and short-sleeved t-shirts using the fabric from my haul, I decided to dive into the world of lingerie. Well, dip a toe in, anyway.

Front view of dress form displaying a lace halter bralette and high-waisted underwear with lace side panels

Side view of dress form displaying a lace halter bralette and high-waisted underwear with lace side panels

Back view of dress form displaying a lace halter bralette and high-waisted underwear with lace side panels

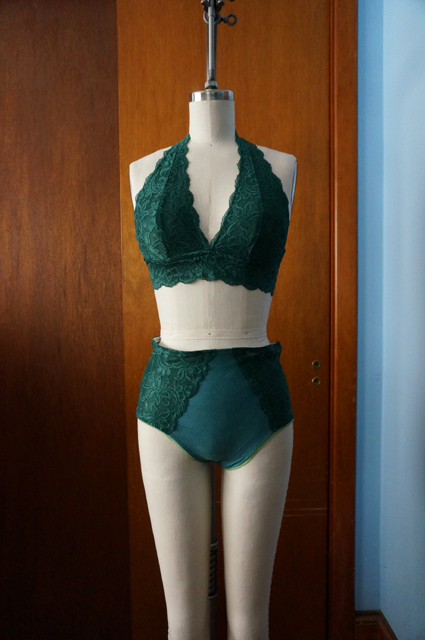
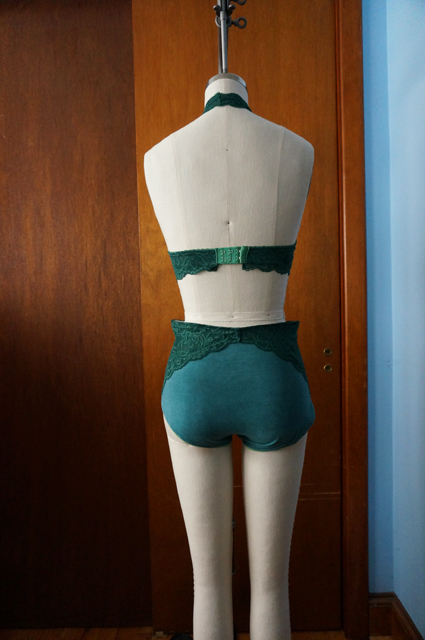
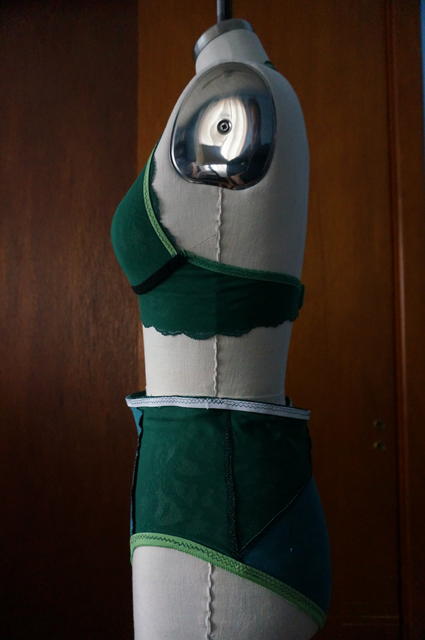
This is Simplicity 8228, a lace halter bralette and embellished high-waisted underwear from the Madalynne x Simplicity collaboration. I wanted to model these myself, because I think the best way to effectively judge a garment is on the body it was intended for. But the lighting inside my house is unpredictable at best, there’s nowhere private for me to take pictures outside even if it were warm enough, and—spoilers—I’m not thrilled with the fit I achieved, and I liked it even less after scrolling through the photos we took. My dress form isn’t necessarily doing the fit any favors either, as I haven’t padded it out to my actual measurements yet. (I have the kit for it, but I’ve been so focused on knitting during the tail end of winter that I haven’t gotten around to doing the work. It will probably take all of 15 minutes when I finally do, and then I’m going to feel like a real chump.)

Style & Size

For the bralette, I chose View A, the halter, which closes in the back with hook and eye tape. While View B, a pull-on racerback style, would have technically been the easier of the two designs to sew, I wanted at least a little bit of challenge, and I was concerned a bralette without closures might be annoying to get on and off (I nearly popped a seam on a similar RTW racerback bralette once). I measured as a 32D according to the instructions. That seemed reasonable, as I measure a 30D in RTW, and anyway 32 was the smallest band size available, so I didn’t have the option to size down (it seemed best not to tinker with the size on a pattern I’d never sewn, especially when I didn’t have any other lingerie experience to compare to either). For the underwear, I cut a size small.

Fabric & Notions

The stretch double galloon lace was a happy find at Spandex World; it was tucked away in the basement along with a small selection of stretch laces in other colors/patterns/widths. I had unthinkingly left my tape measure behind at the hotel and nothing was labeled, so I eyeballed this at 8 inches wide like the pattern called for. It’s actually only 7 inches at the widest point, making me sweat for a hot minute when it came time to lay out the pattern pieces. Everything just fit without needing any piecing, but the message was clear: this pattern isn’t nearly as conservative in its fabric estimates as most Big 4 offerings, so don’t chance it if you’re buying lace specifically for the project.

After being unable to find any green stretch mesh or power net at either Spandex World or Mood Fabrics, I remembered I had a plain white stretch mesh at home already, and I resolved to dye a length of it to match my lace. I thought might use mesh for the main fabric of the underwear as well as the bralette lining, but on sewing day decided to dye a remnant of cotton spandex leftover from some t-shirts instead.

For notions, I turned to Pacific Trimming. After hemming and hawing, I decided to buy white plush picot elastic and white hook and eye tape that I could also dye to match, but black channeling since it would be hidden on the inside anyway.

Dyeing

Because the stretch mesh, elastics, and hook and eye were wholly or primarily synthetic fibers, but the cotton spandex was primarily a natural fiber, I had to cook up two dye baths with Rit DyeMore and Rit All-Purpose, respectively. I was pleased with the color I got on the mesh, so-so with the cotton spandex, and disappointed by the notions. I knew different fabric compositions would take dye differently, but wasn’t expecting the closure to turn out a leafy grass green and the elastics to be neon.

Close-up of the hook and eye closure on a lace halter bralette

Close-up on the inside of a lace halter bralette showing the seams, elastic, and channeling

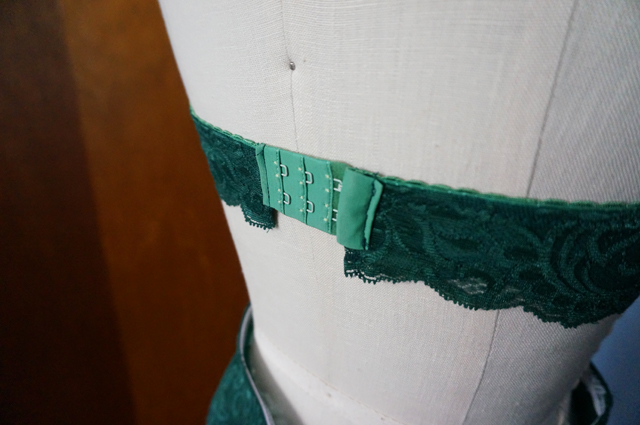
While it’s not the end of the world, it makes the whole thing feel less professional and more DIY, which is a real damper to the enthusiasm for trying something new.

Cutting & Sewing

I took the pattern’s advice to use spray adhesive to baste the lace and mesh together, but I must have missed the instruction about applying the lace to the mesh, because I tried doing it the other way around and ended up painstakingly re-positioning the flimsy, slithery mesh multiple times.

I followed the (rest of the) instructions to the letter, sewing the bralette entirely on my sewing machine and alternating between sewing machine and serger for the underwear. My stitching is a little lumpy and/or wavy in places, but the busy-ness of the lace covers a multitude of sins.

Construction & Fit

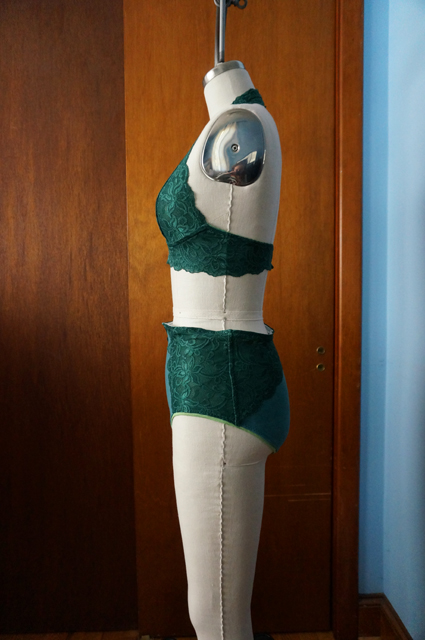
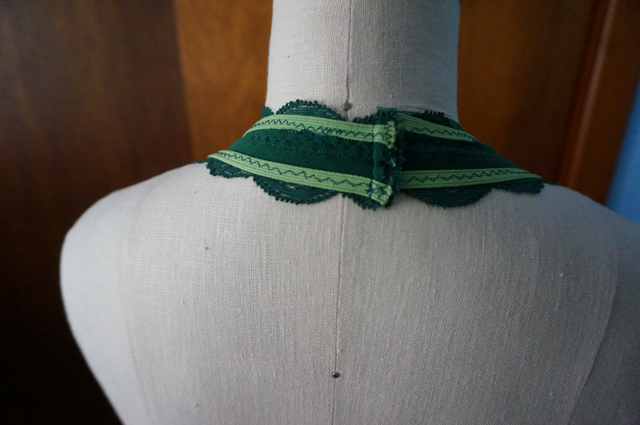
For the bralette, I have two minor complaints. The first is there are a lot of raw edges, and the only ones you’re instructed to finish are the cup seams, where you’re told to sew down the seam allowance. There is a note at the beginning about minding the seam allowance size “if you use a serger,” but there aren’t any instructions on when/where to use it. I’ve seen many people talk about constructing and finishing lingerie entirely without one, but perhaps that’s true more for a conventional underwired or padded bra. Using a serger on the halter seam, for instance, would have helped to make the whole thing feel a little more finished, a little more polished:

Close-up on the inside of a lace halter bralette showing a messy back neckline seam

Then again, maybe this is typical of RTW bralettes. I don’t own one, so I don’t know. Maybe it’s time to pop into a store and examine some seams?

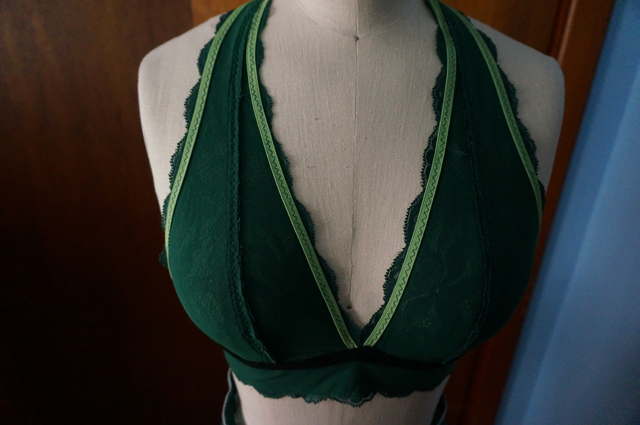
The second minor gripe I have is the lace and mesh making up the frame aren’t sewn along the bottom. Elsewhere the lace and mesh are secured by stitching on two or more edges, but the bottom of the frame is open. For me, this means the mesh tends to wrinkle and roll at every opportunity, especially when I sit down. This might be solved by sewing a zigzag across the bottom of the frame above the scallops, although I’m concerned the stitching wouldn’t hold up to stretching.

Apart from these complaints, it does fit well enough, although ideally I’d prefer to go down a band size and up a cup size to gain a little more cup projection and prevent the band from sliding up or down.

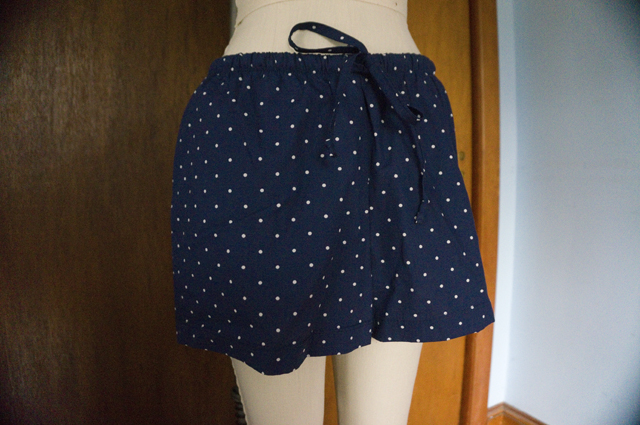
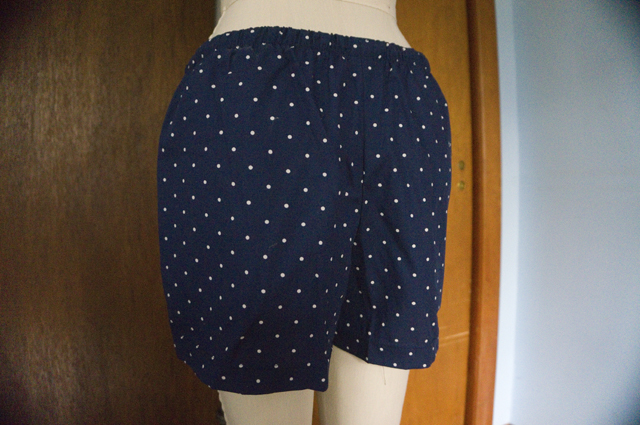
For the underwear, I knew I was taking a gamble since I don’t normally wear a high-waisted style, but I thought it might be worth revisiting my preference, and there was always the option to wear it under dresses since it wouldn’t work with my pants.

I could not get the elastic to lie flat around the waist, even after removing and re-sewing it. I assume I stretched the fabric, the elastic, or both while sewing, even though I was trying not to. It’s definitely more pronounced on my form than my body, but the effect is the same: rippling and buckling.

Side view of dress form displaying a lace halter bralette and high-waisted underwear turned inside-out

Final Thoughts

After wearing the bralette a couple of times I realized I’m pretty attached to underwire. Sure, I don’t necessarily need it, but I like it and feel more comfortable with it than without it. Given that the pattern is designed to use channeling to shape and support the cups, it might be worth it to try making another version in a (hacked) 30D and adding underwires.

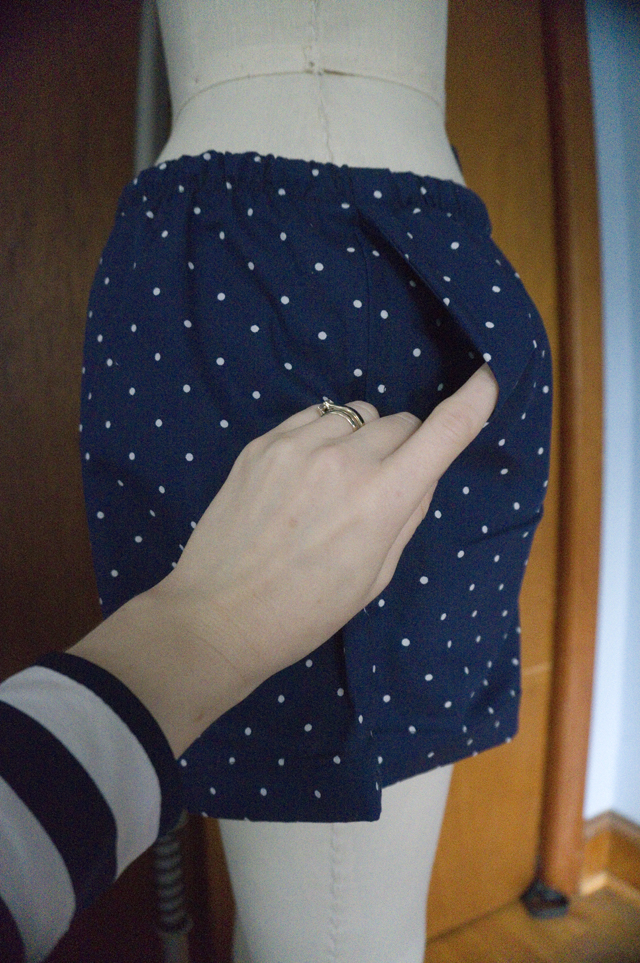
I thought about cutting the panties down to a mid-rise style, but the truth is that the cotton spandex I used is just too thick for comfort. They ended up feeling sort of like shapewear without any of the benefits. It was not a good call for underwear; I’d used the fabric for for fitted t-shirts and leggings—what was I thinking here? So even if I managed to nail the fit, I know I wouldn’t wear them.

On the whole, I’m more than a little bummed about the experience. I’ve mostly let go of the feeling I’ve wasted precious fabric—it’s not exactly one of a kind, and there’s always more fabric—but I’d hoped to get bitten by the lingerie bug and embark on a spree of replacing all of my tired old things with fresh, perfectly fitting handmade undergarments.

I’d sort of scoffed at the idea of kits, because in the trade-off between money and time I can afford to source materials myself, and as someone who prefers self-directed learning and doing things on my own, paying someone to figure things out for me doesn’t come naturally. But I’ve started to see how a kit is a good way to break into new territory of a hobby. And it’s hard to argue with how pretty they are!

Positive Peer Pressure

Caitlyn holds up a shawl made with Freia Handpaints yarn to show the full wingspan and different lace patterns

Caitlyn stands with one hand on a brick wall and her lace shawl wrapped around her neck like a bandana

Caitlyn sits on the steps of a public building with her shawl wrapped around her neck like a bandana

Caitlyn sits on the steps of a public building and peers playfully from behind her bandana shawl

Peer pressure: the catalyst of lying, cheating, stealing, drinking, smoking, and who-knows-how-many other societal woes. As a topic and a scapegoat, it was a perennial favorite in D.A.R.E. Seemingly all of the world’s vices would, someday, be offered up to us innocent lambs in the guise of friendship, and it was our solemn duty as good citizens to stand our ground and say, “no, thank you, I don’t need that to be cool.” We dutifully role-played each of the tactics, in escalating degrees of righteousness, for declining these tantalizing but ultimately life-destroying activities.

Peer pressure got a bad rap. What about using peer pressure for good? There was precious little talk about how peer pressure is also a lever for positive action. You can call it motivation, or a good influence, or tough love, but let’s be clear: it’s still peer pressure.

Take this shawl, for instance. The pattern is the Local Yarn Shawl from designer Casapinka. It was designed and released to commemorate the inaugural Local Yarn Store Day on April 21, 2018. I don’t particularly follow new pattern releases in the knitting world, and I’m not usually tempted by flash sales, special events, and the like. I will occasionally download free patterns when they’re offered, but I don’t go out of my way for them.

But as it happened, my own local yarn store Warm ‘n Fuzzy was one of the participating vendors. It doesn’t take much to bring me into the store, and the promise of a small discount on yarn purchased to create the pattern was as good a reason as any to at least drop by and see what was new.

While I liked the look of both of the sample shawls shown in the pattern and knew that Warm ‘n Fuzzy would have a delectable array of speckled and tonal yarns to suit the larger design, I kept coming back to the blue gradient. It wasn’t really a mystery to me why: every time I went into the store, I’d eye the Ombré Gradients by Freia Handpaints. I’d seen them used to great effect in yoked sweaters, but as I wasn’t ready to tackle large-scale stranded colorwork yet, and the yarns are on the pricier side anyway, I’d always sigh admiringly over them and then move on to something more “practical.”

On LYS Day, there was a great bustle of people in the tiny store, and energy was high. Despite the crowd, I shopped as was my wont: I went immediately to the Freia, which I loved and which absolutely met my needs; then I proceeded to examine, heft, and pet every other fingering-weight yarn on display, because there might be something more suitable, something better than the thing I wanted most; then I drifted back to the Freia collection to dither a little longer, as though there were a real choice to be made.

Eventually Justin took me by the shoulders and said, more or less, “We’ve taken up space long enough; either we buy this yarn or we leave.” (He has a real knack for getting to the point.)

If it had been a sleepy Sunday afternoon, if we had been the only people in the shop, if I hadn’t gotten a cheerful email saying “come out and support your local business!” I might have put the yarn down and walked away. But I wanted the Freia, and I wanted to show Warm ‘n Fuzzy the love they deserve on a day dedicated to everything great about small (and often woman-owned) craft businesses.

Did I spend more money than I intended, more than I’ve ever spent on a shawl? Yes I did. Was I happy with my purchase? Also yes, very much so.

Of course, since I had something else on the needles at the time (though I’ll be blowed if I have any idea what), I didn’t immediately dive into knitting. In fact, I very nearly forgot I had either the pattern or the yarn until I was casting about for something to knit five months later. I had been seeing more sampler-like shawls popping up on Ravelry—ones that used bands of different lace or textural stitches—and got a hankering to knit one.

After scrolling through several pages of designs and finding nothing that particularly scratched the itch I had, Justin very sagely interrupted to ask whether I might have something in my Favorites already, and to suggest that I ought to work on knitting the things I already liked instead of searching high and low for new things to fall in love with. More positive peer pressure at work.

Once I rediscovered the pattern and the yarn, everything was smooth sailing. In the ongoing cosmic irony of my knitting life, I needed two balls of the Freia to have enough yarn for the small shawl which meant—you guessed it!—alternating skeins as though for stripes. Two balls was a manageable level of hassle, however, and the end result was well worth the minor inconvenience. You can find the (few) technical details on my Ravelry project page.

On a less thrilling, more workaday note, the top I’m wearing in these photos is also handmade. The pattern is the SBCC Tonic 2, the (free) long-sleeve version of their popular t-shirt (also free). The fabric is a mystery blend with a high spandex content; it (appropriately) came from Spandex World in the New York City Garment District. I picked up this fabric and another navy-and-white stripe there, along with a small collection of other fabrics from other stores, during a day-long fabric shop tour we planned as part of our 9th anniversary vacation.

Caitlyn is smiling as she stands with her thumbs hooked through her belt loops and shows off the long-sleeve striped t-shirt she made

Key differences between the Tonic 2 and the original Tonic tee are the higher crew neckline, longer length, and less-slim-fitting waist and hip. I’ve found I prefer the higher neck, and the longer length meant I didn’t need to add any length like I did to my Tonic tees—in fact, I could probably stand to shave off an inch, to perfectly nail the proportion I like. While think the slightly looser waist is probably a good call in such a thin, clinging knit, I don’t love the relaxed hip: it lacks the negative ease to anchor the top the way I feel it should. Fortunately, it should be easy enough to go back and serge a little excess from the side seams, tapering to nothing at the waist.

Caitlyn is standing with her back and one foot against a brick wall, arms crossed but smiling as she shows off the long-sleeve striped t-shirt she made

The armhole on the Tonic 2 is ever so slightly more scooped than the Tonic. The sleeves feel a little weird to me, like the seam isn’t quite in the right place. I can’t tell if it’s because I might have accidentally set the sleeves in backwards, because the bicep is a little too snug, or because I’m being a princess who wants perfection in handmade clothes. Whatever it is, it isn’t bad enough to stop me from wearing it.

Caitlyn is wearing a long-sleeve striped t-shirt she made, sitting on the steps of a public building, and laughing at something off-camera

I also made a short sleeve version of this top, using all of the Tonic 2 pieces but chopping off the sleeves at the Tonic length. I didn’t bother with pictures, though, because yawn. But I’ve worn both tops a ton in both business casual and casual outfits!

I even eked out a pair of underwear using Zoe’s free Pants/Undies/Knickers pattern, but they’re too small. I can’t decide whether I want to size up or find another pattern; I have a couple in my stash I could try before diving into a search online.

Caitlyn is wearing a long-sleeve striped t-shirt she made, sitting on the steps of a public building, and smiling with her eyes closed as though thinking of a secret

Art Exchange

When my friend Jorren asked me if I’d be willing to do an art exchange, I was beyond flattered—I was intimidated. My D&D group, which is where I met Jorren, is a wildly creative and wickedly clever bunch. To say they’re talented would be to ignore how much work they’ve poured into becoming as good as they are at what they do. Musicians, artists, programmers, writers, cooks, and homesteaders—art and craft are well represented in our group. Jorren could easily be said to be the most dedicated among us, because he’s working toward becoming a freelance illustrator and graphic designer who supports himself full-time with his art. I had seen his work on several occasions, both sketches and completed illustrations, and I was not at all convinced I could put together something comparable to his work.

But he had seen the subversive cross-stitch I made for my sister-in-law Heather, and he wanted something in the same vein. He envisioned a design with the expression “Don’t start no shit, won’t be no shit.” The details were up to me: fonts, colors, and borders were left entirely to my imagination. He elaborated by saying that he was at all not turned off by traditional elements such as florals, script, or muted colors, and if I decided to go that route, to lean into it as hard as I wanted.

With that brief, I picked out the Floral Circle Border Trio Set of 3 Cross Stitch Patterns from TheStrandedStitch on Etsy. Since I hadn’t chosen an alphabet yet and wasn’t sure how large I’d need a floral border to be to fit such a long phrase, a trio of patterns was a great way to hedge my bets.

A cross stitch of the words "Don't start no shit, won't be no shit" surrounded by a floral border and framed in a hoop

The patterns are designed for 14 count Aida. I used the 7-inch hoop design, the largest of the three (the other two patterns were for 6-inch and 5-inch hoops). I followed the instructions to use two strands of floss, and I did’t substitute any colors. The text is the same dark blue used in the flowers; the font is Georgia from the Subversive Cross Stitch website.

I printed the pattern’s chart and used it to plot the arrangement of the words, but only after I had already stitched the entire border. Thank goodness it worked out. I’d like to think that in the future I’ll exercise better judgment and check the layout first—but let’s be honest, I probably won’t. When disaster inevitably strikes, I will be forced to admit that yes, there was a better way and I definitely knew it, and really, I have no one to blame but myself. Till then? Caitlyn: 1, Cross Stitch: 0.

As with Heather’s piece, I finished the back by trimming the excess Aida into a circle a few inches larger than the hoop, using a running stitch to cinch the loose edge, and blanket stitching a piece of white felt as close to the hoop as possible to hide everything.

Half the fun of making the thing was sending these teaser photos to Jorren of my progress:

Collage showing a ring holding bobbins of embroidery floss, a close-up of a cross stitch chart, a close-up of the loose threads on the back of a cross stitch, and the back of a finished hoop covered in felt secured with blanket stitch

He ate it up. 😀 He’s a good friend like that.

You might be wondering what I asked for in exchange. At the time, we didn’t have much in the way of art at home, and basically nothing hanging on the walls. We’d lived in our house for just shy of three years, and we’d come to playfully refer to it as Pineheart because of the heart pine paneling and our own secret love of the idea of having a Big Fancy House with a Name and an Estate. I’d imagined doing some kind of drawing or collage or maybe even cross stitch to represent the house, and in my head I’d pictured a stylized pine tree with shield on it bearing the image of heart. Maybe a sunset in the background, or woodland creatures about the tree.

That’s what I described to Jorren. And do you know what that absolute madman did?

A framed illustration of a cottage-style treehouse with the silhouettes of a cartoon bear and rabbit in the foreground

THIS.

First off, it’s gorgeous. Second, it exceeded my wildest expectations in both scope and detail. He’s put in lots of little nods to us and the house, things I wouldn’t have thought to ask for. Third, whydidyoudothisIdon’tfreakingdeserveit?!

Jorren gave Justin a sneak peek of his progress when he finished the line art, and Justin tipped me off to how to just how awesome it was turning out. I panicked, because even with only a tiny bit of information I knew I was way out of my depth. I didn’t want Jorren to feel disappointed that he’d gotten a bad trade, so I decided to do a companion piece to the one above in attempt to move up to “nice effort” from “laughably unequal.”

A cross stitch of the word "fuck" surrounded by a floral border and framed in a hoop

Yep. That’s about how I felt about the situation.

The pattern is the 6-inch hoop design; everything else is the same as the larger one.

For his part, Jorren seemed really happy with how things turned out. I still can’t believe I came away with such an incredible and personal piece of original art from someone I respect and admire, and I continue to feel like I owe Jorren a little something extra to make things even.

If you’d like to see more of his work, purchase a print, or commission an original design, check out his positivity brand Mind Fuzz on Instagram!

A Short Entry on Pajama Shorts

When I finished muslining McCall’s 7324, I had about as much leftover fabric as I’d used for the top. And since my muslin wasn’t wearable, I thought I’d have another go at some kind of top to make up for it. Despite the fact that I myself professed this navy fabric closer to a quilting cotton than to the shirting it was marketed as, I foolishly latched onto the idea of making a ruffle top following this Megan Nielsen tutorial (and brought to my attention by this Peneloping blog post).

It was a hilariously abject failure. For starters, I didn’t actually have enough fabric, which makes for some sad not-really-ruffles. The fabric was entirely too stiff, so it hung like a paper bag. The cheerful yellow bias tape I used around the armholes was also too stiff and didn’t want to stay rolled to the inside, and even though it was mostly hidden it managed to tip the entire thing from playful and cute into clownish territory in my mind.

So…I cut both the failed top and the muslin apart again and made pajama shorts.

The front of a pair of drawstring pajama shorts hanging on a dress form

The back of a pair of drawstring pajama shorts hanging on a dress form

I used Simplicity 1520, the same pattern as my tartan pajama pants, along with my trusty pocket template. There’s something deeply satisfying about a well-sewn pocket, even a very simple in-seam one.

A close-up of the pocket opening in a pair of drawstring pajama shorts hanging on a dress form

I incorporated all of the after-the-fact modifications I made to my flannel pants, which made this relatively quick and simple to whip up. I have vague recollections of unnecessarily complicating the sewing of the elastic/drawstring casing, but I’m positive it was for no good reason whatsoever, so I won’t try to recall what I did or didn’t do here.

Everything was sewn on my regular sewing machine, and then the edges were finished on my serger. There’s both an elastic and a drawstring at the waist; the drawstring is just a strip of the main fabric with the raw edges tucked in, sewn flat, and then knotted at each end. The elastic and drawstring were threaded through buttonholes (reinforced with interfacing, which you can see peeking out in the shot below) in the casing.

A pair of pajama shorts turned inside-out on a dress form to reveal in-seam pocket bags and the stitching throughout

The finished pajama shorts fit just fine, but I haven’t actually worn them yet. We keep the house too cold in the late fall, winter, and early spring for shorts (for me, at least), and even in the warmer months you’re more likely to find me wearing loose, lightweight pants than shorts indoors. If I don’t find myself reaching for these come summer, at least they’re made well enough that I wouldn’t feel guilty about donating them.

An Open-Front Cardigan for Transitional Weather

Caitlyn stands on her front porch smiling and wearing a denim hat, open-front cardigan, tie-front button-up shirt, jeans, and pointed-toe flats

Caitlyn is turned sideways and holding out one side of her open-front cardigan to show its drape

Caitlyn is facing away from the camera to show off the back of her open-front cardigan

A close-up shot of the twin-needle topstitching on the back hem of the McCall's 6084 open-front cardigan

When I picked up this lightweight sweaterknit during Hancock’s going-out-of-business sale, I imagined it as a relaxed-fit pullover, possibly with dropped shoulders. I happened to have just such a sweater in my closet already, and I’d noticed a couple of small holes where it had snagged on something, so I thought it might be a good idea to plan for its replacement.

The more I thought about it, though, the more I felt this fabric was going to land in that awkward territory of too light to be warm when it’s chilly outside, too thin and see-through to be worn as a t-shirt/shell, and too hot to layer over a camisole in the summer. In light of that, a cardigan to throw on indoors when the AC is too strong seemed like a more practical choice than a pullover. Plus, I have lightweight cover ups in several neutral colors—black, brown, grey, and oatmeal—but few colorful ones and nothing with a pattern. Time to expand those sweater horizons!

Picking a pattern was less a comedy of errors and more a two-part skit of failing to pay attention. See, I already had McCall’s 6084 in my stash, so I was prepared to dive right into tracing and cutting. Except that when I’d bought the pattern during some hazy late-night discount-pattern spree of the past, I’d grabbed the L/XL/XXL envelope instead of the XS/S/M I needed.

Fortunately, a quick trot to JoAnn solved that problem, but then I immediately encountered another: McCall’s 6084’s waterfall fronts are just turned under and hemmed, meaning the wrong side would be visible in the finished garment. On a solid fabric that’s probably not a huge deal, but with stripes I expected it would be a lot more obvious. I knew I’d feel compelled to try to make the stripes match at the boundary between right- and wrong-side, and I knew that caring that much would drive me mad.

Instead, I did the “less mad” thing (yes, those are sarcasm quotes) and decided to hack the pattern in arguably the weirdest way possible. By way of explanation, let me first provide the following context:

Three of the four neutral-colored cover ups I mentioned before are from Express. (You’re probably starting to notice a trend here.) Those workhouse cardigans have wide front panels that can overlap in the front but, by dint of the drape of the fabric, the shape of female anatomy, and the lack of closures, tend to hang open. The panels are attached along shoulder princess seams, and they’re level with the rest of the cardigan at the hem (rather than angled like you see on waterfall-front cardigans). Most importantly, the panels are wide strips of knitting that have been folded in half before being attached, so that not only is the edge of the front opening finished, but also if you open the cardigan you’re still seeing the right side of the fabric all the way to the princess seam where it’s attached. Basically, the panels act like bands, but very, very wide ones. I love this finish, because no matter how the fronts flop around, you never see the wrong side of the fabric.

I decided this doubled-front-panel approach was the way I wanted to go on my cardigan. There were, however, two major challenges to this. The first was that McCall’s 6084 doesn’t have princess seams, just a shoulder dart that subtly shapes the front/neckline/collar. I considered cutting through this dart to make a princess seam, but then ran into the second issue, which is I only had two yards of fabric. I definitely didn’t have enough fabric to double the width of the front piece between the opening and the shoulder dart, nor did I have enough to cut narrower facings to attach to the front edge.

My solution? Cut the pattern as drafted, but then fold the front edge to the inside until it aligns with an invisible princess seam drawn through the shoulder dart.

I had to adapt the order of operations in order to get finished edges where and when I needed them, but apart from the mental gymnastics required this caused no major issues. The grown-on front facings, for lack of a better term, are held in place at the neckline (the fronts extend to form the collar) and at the bottom hem where they’re tacked down by the twin-needle topstitching; they hang free between shoulder and hem:

Caitlyn holds open the fronts of her cardigan to show how the grown-on facings hang on the inside

A close-up shot of the inside hem of the McCall's 6084 open-front cardigan, showing how the topstitching holds the grown-on facing in place

This works…okay. Because there’s no seam to provide structure, the fronts tend to sag and bag toward the bottom. It’s not super noticeable in these pictures, and no one is likely to notice when you’re moving around, but standing still, on a hanger, or lying flat, it’s pretty obvious. Luckily, since I’m not constantly positioned in front of a mirror or doing artsy flat-lays, the shortcomings of my hacky construction aren’t annoying enough to keep me from wearing this—once it’s on, I only notice if I think about it.

Construction-wise, I basted everything on my sewing machine and then ran everything through my serger. I spent entirely too much time matching the stripes during cutting AND sewing, but let me tell you, it paid off. Look at this side seam!

A close-up shot showing meticulous stripe matching at the side seam of the McCall's 6084 open-front cardigan

And this sleeve!

A close-up shot showing the stripe matching on the right sleeve of the McCall's 6084 open-front cardigan

And the other sleeve too!

A close-up shot showing the stripe matching on the left sleeve of the McCall's 6084 open-front cardigan

There’s nothing particularly noteworthy about the collar, but here’s a picture anyway:

A close-up shot of the back neckline of the McCall's 6084 open-front cardigan, showing how the front extensions are seamed to make a deep shawl-like collar

I used up every inch of this fabric that I could, which is incredibly satisfying. Bringing more blue and an easy-to-coordinate pattern into my closet also ticked two important boxes for me. I finally feel like I’m transitioning from making projects to making and wearing clothes. It feels good.

Caitlyn sits on her front porch next to a denim hat, smiling and wearing an open-front cardigan, tie-front button-up shirt, jeans, and pointed-toe flats