Reciprocity

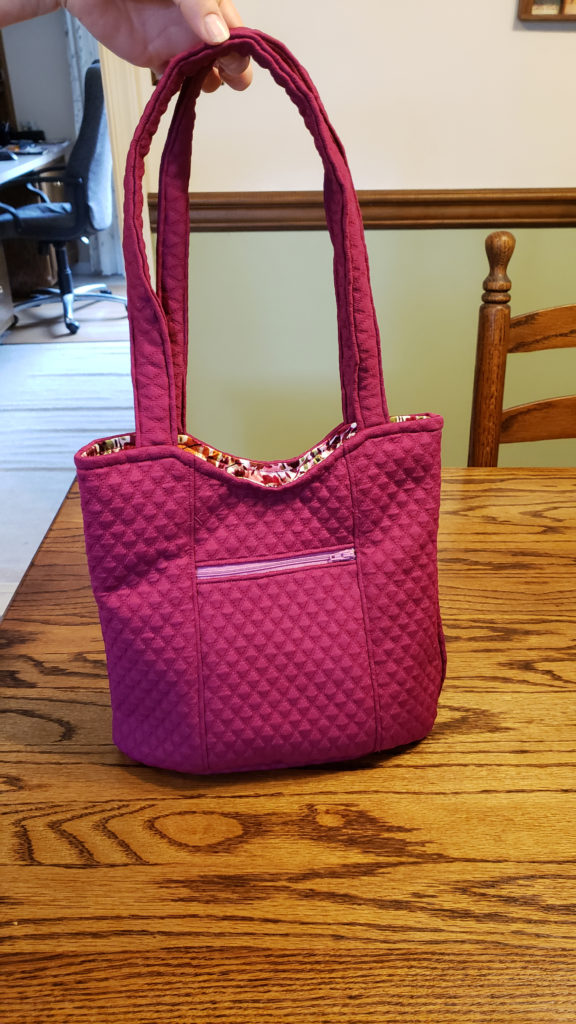
The first designer item I owned was a Vera Bradley purse I received from my parents for my high school graduation. Over the years my mom, my sister, and I each gathered a small collection of Vera Bradley bags and accessories in a smattering of colors and patterns. Despite our varying needs and tastes, we all agreed that the bucket bag was an eminently practical choice whenever you needed to carry the usual wallet, keys, phone, and personal items, but also sunglasses, two water bottles, an entire packet of tissues, a book, and maybe a snack.

My mom liked the bucket bag she owned, but wanted one in a solid color. After sweetly dropping hints both to me and to my sister to relay to me, I figured it was time I put my skills (such as they are) to use to make that wish a reality.

Fortunately, my sister had an old bag that was too worn out to carry around anymore, which she graciously sacrificed to my seam ripper. By taking the bag apart over several days and photographing each step, I was able to understand the construction and use the pieces as templates for a new bag.

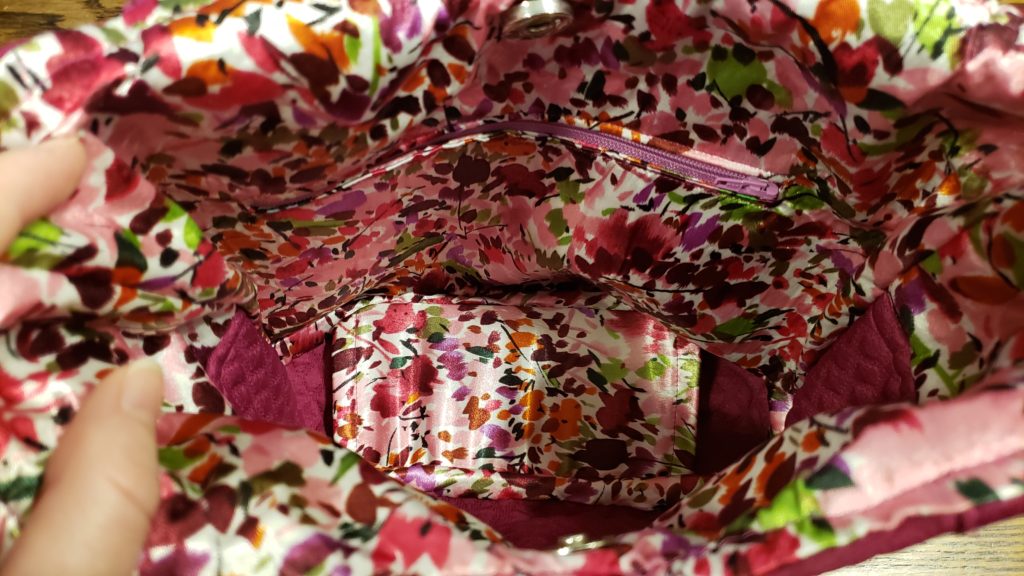
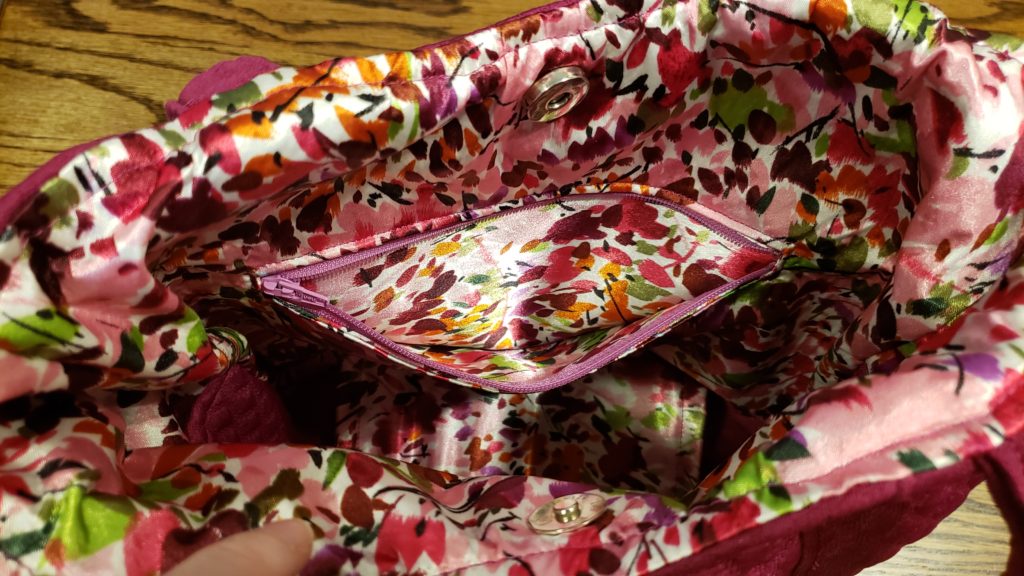
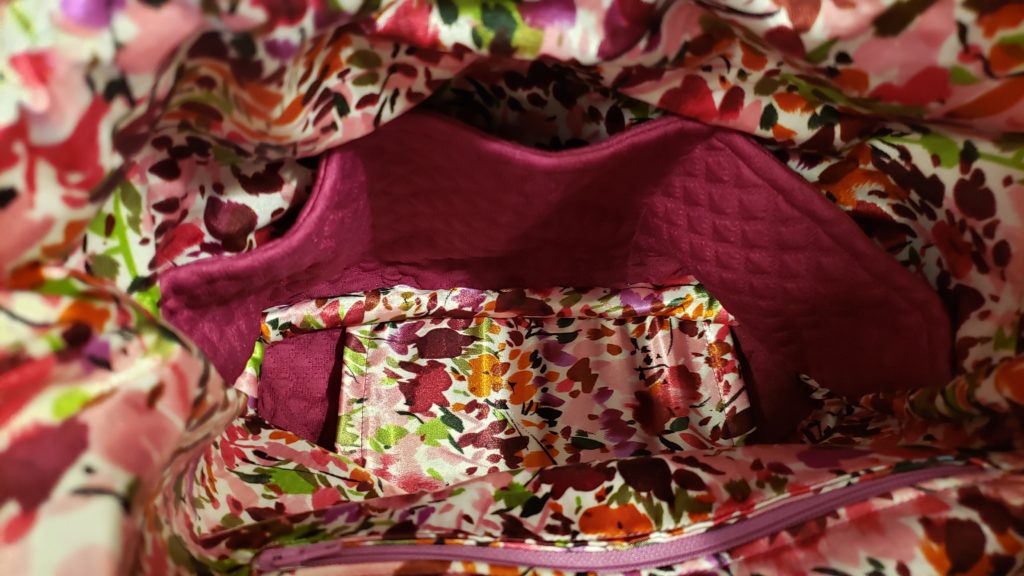
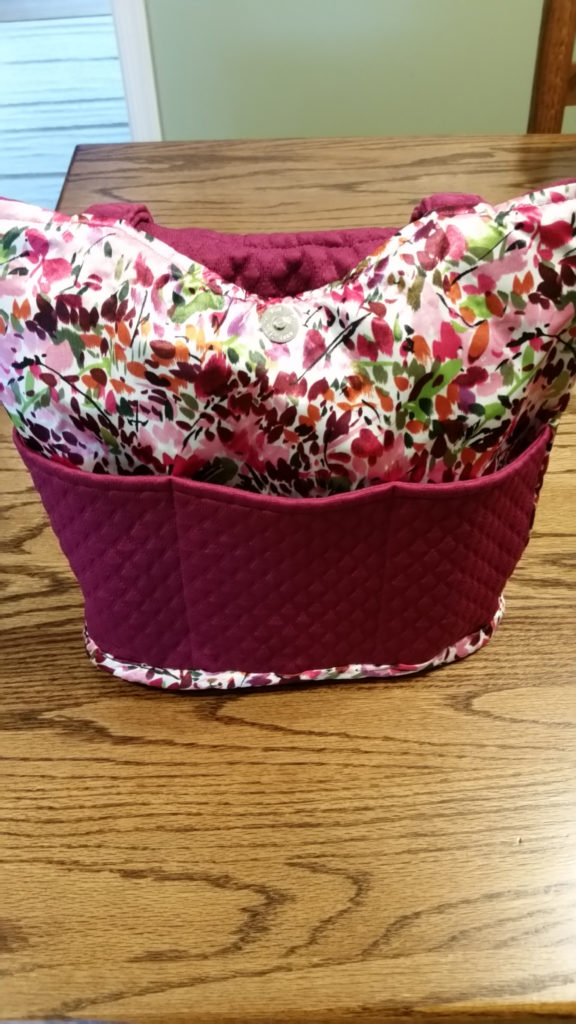
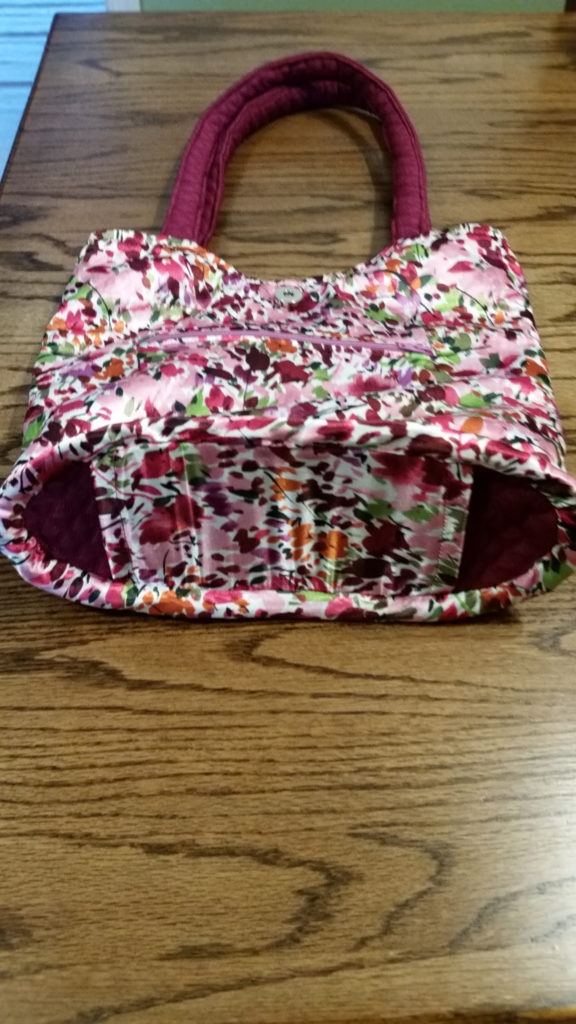
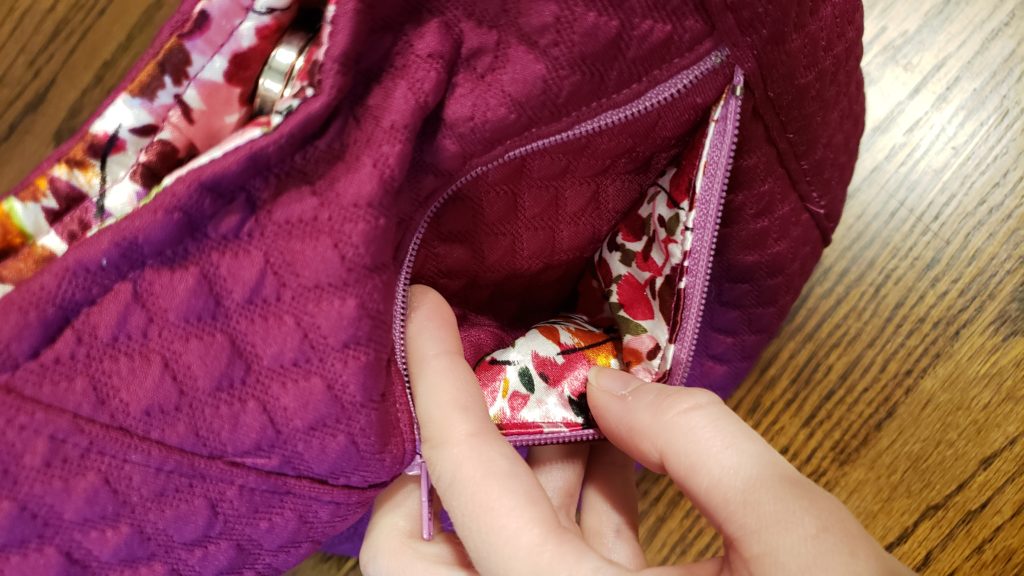
The bag has an exterior zipper pocket, an interior zipper pocket, and three interior open-top pockets. It closes with a magnetic button. The straps are fixed. There’s a sleeve in the bottom of the bag for an insert to stabilize the base so that it doesn’t sag and the bag can stand up on its own; I took the insert from the deconstructed bag, which is just a piece of mat board or heavy cardboard, for use in my re-creation.

I didn’t make any modifications to the design or size, but I did opt to use a thick stable knit with a quilt-like pattern (leftover from this cosplay) for the shell instead of quilting together plain cottons. The lining is a polyester silky solid that I’d bought several years/moves ago for an ill-fated Sorbetto top.

I definitely saved on quilting time as a result of using a a “pre-quilted” fabric, but toward the end it was a challenge to feed the many layers of thick fabric through my machine. For the straps, my attempts to sew a tube and turn it right-side-out proved disastrous. I ended up cutting new straps, sewing one edge right sides together, opening the seam out, folding under the raw edges, and topstitching them in place, then topstitching the first seam to match. I didn’t even attempt to machine-stitch the bias binding that encloses the last raw edges on the inside bottom of the bag, preferring instead to wrestle everything into submission with hand-stitching.

If I were to attempt it again—and I think I might—I’d use a thinner shell fabric, but otherwise the construction is straightforward and didn’t require any special tools or techniques.

Judging by her reaction, my mom was pretty pleased with the outcome, and this bag has joined the rotation with her other favorites. For myself, I’m glad I could reciprocate the gift of a good bag that she once gave to me.

Another Handmade Christmas

This is it, folks! This is the final post documenting things I made last year. After this, I can move on…to catching up from the first quarter of 2019…

I admire anyone whose holiday traditions—whatever holiday it may be—involves making gifts for their loved ones or community members. My gift-making ambitions have always grossly exceeded my available time, resources, and common sense, but in 2018 I managed to make a few little things for some of my favorite people.

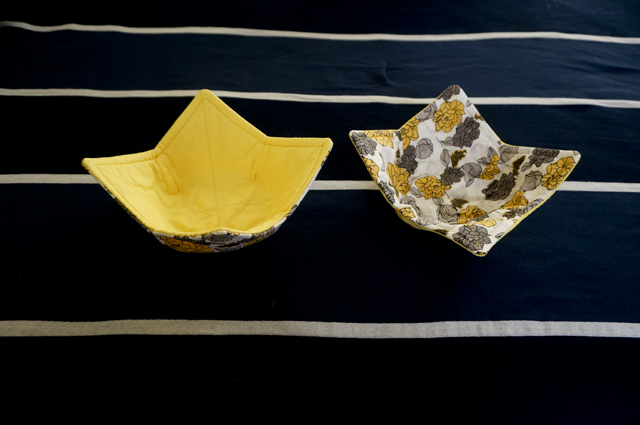
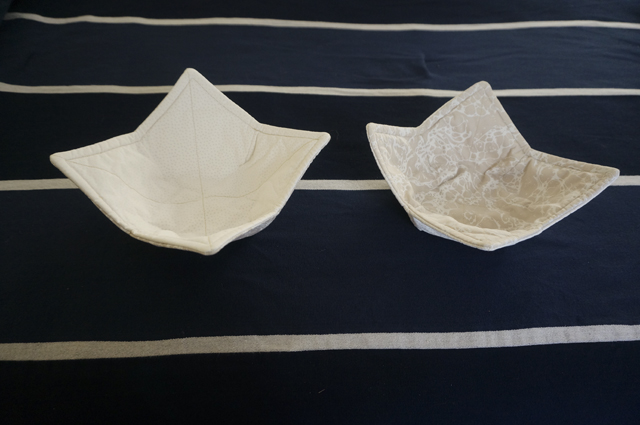
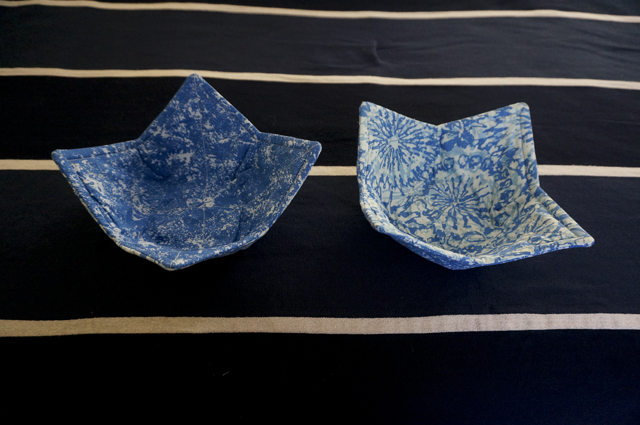
Up first, and by request, bowl cozies! From top to bottom, these went to my sister, my mom, and my sister-in-law Heather and her wife Elaina.

Two bowl cozies with a yellow and grey floral exterior fabric and a solid yellow interior fabric

Two bowl cozies with a taupe and cream abstract patterned exterior fabric and taupe and cream dotted interior fabric

Two bowl cozies with light and medium blue tie-dye patterned interior and exterior fabrics

My mom saw these at a craft fair but didn’t see any in a fabric she liked, so she sent me a text suggesting they might be an easy and well-received gift. I used instructions from Happy Hour Stitches, but you can find the details on any number of sites—in fact, Helen’s Closet just posted a tutorial a little over a week ago in a new series on scrap-busting.

My sister’s bowl cozies were made with leftover fabric (you may recognize it from her casserole carrier from the previous Christmas); the others were made with fat quarters from JoAnn. I already had 100% cotton batting on hand, but I needed to purchase 100% cotton thread to stitch everything up, as polyester could melt or scorch in the microwave.

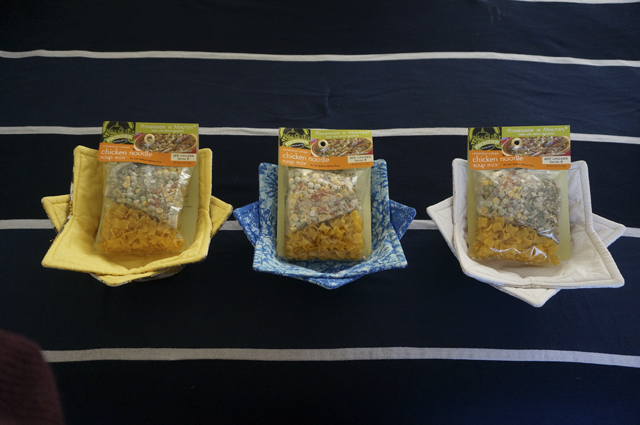
Each recipient’s bowl pair of bowl cozies was served up with a bag of soup mix.

Three pairs of nested bowl cozies, each holding a bag of pre-packaged soup mix

The other gift was for a secret Santa exchange among the members of my D&D group. By sheer coincidence I paired with Jorren, the amazing illustrator from the art exchange. He had been working hard on multiple projects leading up to December, including prints for a holiday pop-up shop and several commissions. I wanted to show my appreciation for his work, so I picked a couple of art-themed gifts: a graphic novel called Junji Ito’s Cat Diary: Yon & Mu and a set of Pentel Arts Aquash brushes.

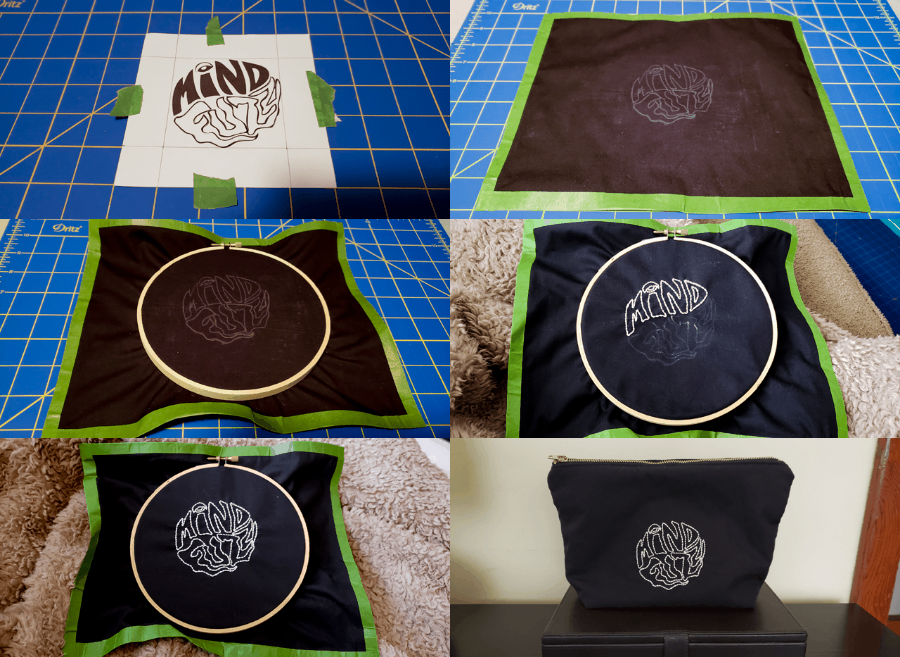
I needed something to round the package out, and Jorren had just debuted his freelance graphic design business, Mind Fuzz, so I got it in my head that I needed to put his logo on something. Trouble was, he wasn’t using the logo as his profile image, and I couldn’t very well ask him for a copy of it without tipping him off to my plan.

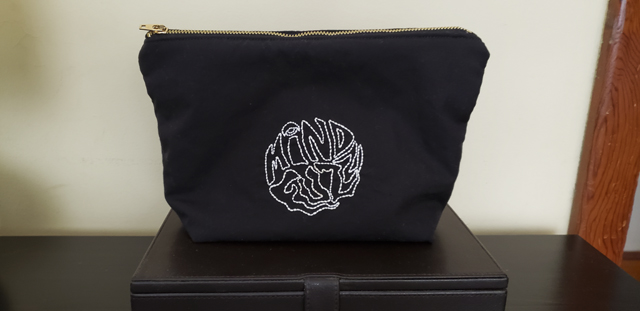
In ninja-hacker fashion, I found a photo that he shared of a t-shirt screen-printed with his logo and proceeded to manipulate it in Photoshop and Illustrator until I had a black-and-white vector image that I could scale and print as a template. I transferred the template to a remnant of black poly cotton blend, embroidered the outlines of the letterforms, and then sewed up the embroidered fabric into a sturdy pouch with a brass zipper. Ta-da!

A black zippered pouch with outline of the words "Mind Fuzz" embroidered in white in a circle in the center of the pouch

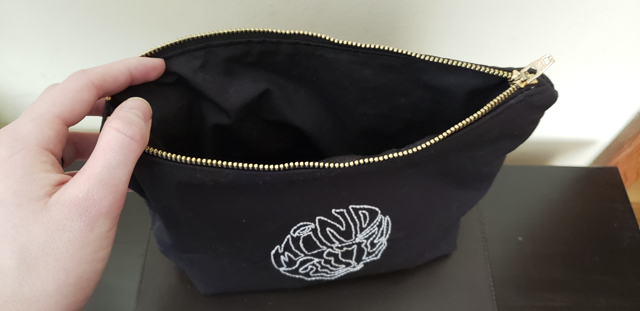
I followed instructions provided by Jedi Craft Girl, but as with the bowl cozies, there are countless examples of this and similar pouches online. My pouch is lined with the same black fabric as the shell and interlined with 100% cotton batting to hold its shape. The embroidery is regular old DMC floss in white, stitched up using a hoop and a crewel needle.

A black zippered pouch with the zipper opened to reveal a cleanly finished interior lined in the same black fabric

I ignored the dimensions in the instructions; they were too small for my purposes. My pouch is slightly smaller than I intended at 9 inches tall by 11 inches wide (at the top), but is large enough to fit Jorren’s preferred style of travel notebook, along with a handful of pencils or pens.

Just for fun, I had Justin put together a GIF of the progress shots:

No last-minute sewing, I didn’t drive myself crazy, and everyone loved their gifts—success!

First Foray into Lingerie

When planning my visit to the NYC Garment District last year, I knew it was important to not only narrow down the number of shops we went into but also to have a list of projects I was shopping for. As someone who is easily overwhelmed by choice on the best of days, I would have been mad to walk into a place like Mood without a plan.

My list looked something like this:

  • Spandex blend knit(s) for t-shirts, preferably at least one with navy stripes
  • A knit with a print other than a stripe for a top or dress
  • A solid rayon or bamboo knit (in a color from my palette) to make a Madalynne x Simplicity bodysuit
  • A stretch denim to make a pair of jeans
  • Lace and stretch mesh/power net to make a Madalynne x Simplicity bralette
  • Notions for the bralette and bodysuit

I struck out on the denim, but was able to bring home a lovely white stretch cotton sateen instead. I also picked up an unplanned-for white mystery fabric with alternating solid and sheer stripes. I was looking forward to making a pleated midi skirt inspired by one I’d seen at Express several seasons ago, but pre-washing the fabric completely changed the way it behaved and it may end up a total loss.

After finishing a couple of striped long- and short-sleeved t-shirts using the fabric from my haul, I decided to dive into the world of lingerie. Well, dip a toe in, anyway.
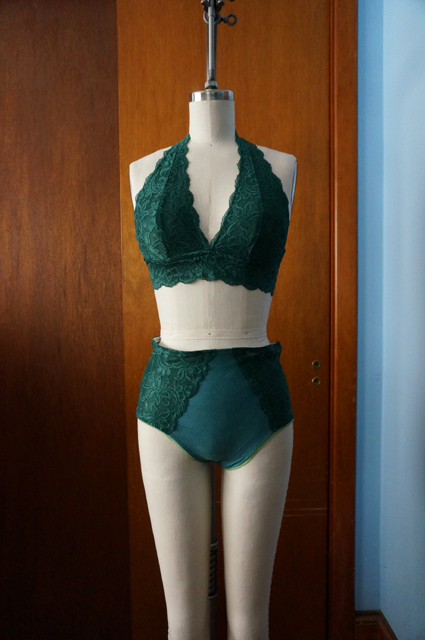
Front view of dress form displaying a lace halter bralette and high-waisted underwear with lace side panels

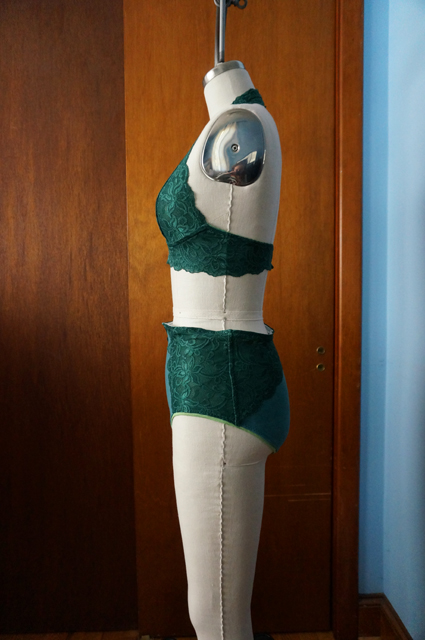
Side view of dress form displaying a lace halter bralette and high-waisted underwear with lace side panels

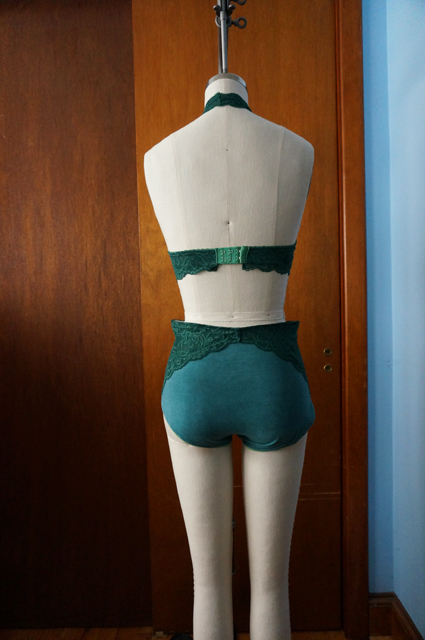
Back view of dress form displaying a lace halter bralette and high-waisted underwear with lace side panels

This is Simplicity 8228, a lace halter bralette and embellished high-waisted underwear from the Madalynne x Simplicity collaboration. I wanted to model these myself, because I think the best way to effectively judge a garment is on the body it was intended for. But the lighting inside my house is unpredictable at best, there’s nowhere private for me to take pictures outside even if it were warm enough, and—spoilers—I’m not thrilled with the fit I achieved, and I liked it even less after scrolling through the photos we took. My dress form isn’t necessarily doing the fit any favors either, as I haven’t padded it out to my actual measurements yet. (I have the kit for it, but I’ve been so focused on knitting during the tail end of winter that I haven’t gotten around to doing the work. It will probably take all of 15 minutes when I finally do, and then I’m going to feel like a real chump.)

Style & Size

For the bralette, I chose View A, the halter, which closes in the back with hook and eye tape. While View B, a pull-on racerback style, would have technically been the easier of the two designs to sew, I wanted at least a little bit of challenge, and I was concerned a bralette without closures might be annoying to get on and off (I nearly popped a seam on a similar RTW racerback bralette once). I measured as a 32D according to the instructions. That seemed reasonable, as I measure a 30D in RTW, and anyway 32 was the smallest band size available, so I didn’t have the option to size down (it seemed best not to tinker with the size on a pattern I’d never sewn, especially when I didn’t have any other lingerie experience to compare to either). For the underwear, I cut a size small.

Fabric & Notions

The stretch double galloon lace was a happy find at Spandex World; it was tucked away in the basement along with a small selection of stretch laces in other colors/patterns/widths. I had unthinkingly left my tape measure behind at the hotel and nothing was labeled, so I eyeballed this at 8 inches wide like the pattern called for. It’s actually only 7 inches at the widest point, making me sweat for a hot minute when it came time to lay out the pattern pieces. Everything just fit without needing any piecing, but the message was clear: this pattern isn’t nearly as conservative in its fabric estimates as most Big 4 offerings, so don’t chance it if you’re buying lace specifically for the project.

After being unable to find any green stretch mesh or power net at either Spandex World or Mood Fabrics, I remembered I had a plain white stretch mesh at home already, and I resolved to dye a length of it to match my lace. I thought might use mesh for the main fabric of the underwear as well as the bralette lining, but on sewing day decided to dye a remnant of cotton spandex leftover from some t-shirts instead.

For notions, I turned to Pacific Trimming. After hemming and hawing, I decided to buy white plush picot elastic and white hook and eye tape that I could also dye to match, but black channeling since it would be hidden on the inside anyway.

Dyeing

Because the stretch mesh, elastics, and hook and eye were wholly or primarily synthetic fibers, but the cotton spandex was primarily a natural fiber, I had to cook up two dye baths with Rit DyeMore and Rit All-Purpose, respectively. I was pleased with the color I got on the mesh, so-so with the cotton spandex, and disappointed by the notions. I knew different fabric compositions would take dye differently, but wasn’t expecting the closure to turn out a leafy grass green and the elastics to be neon.
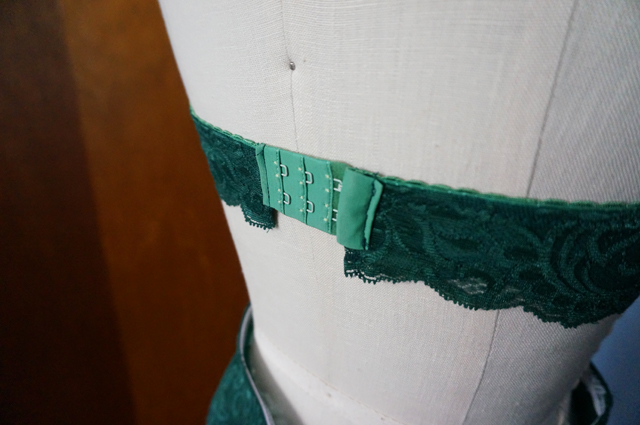
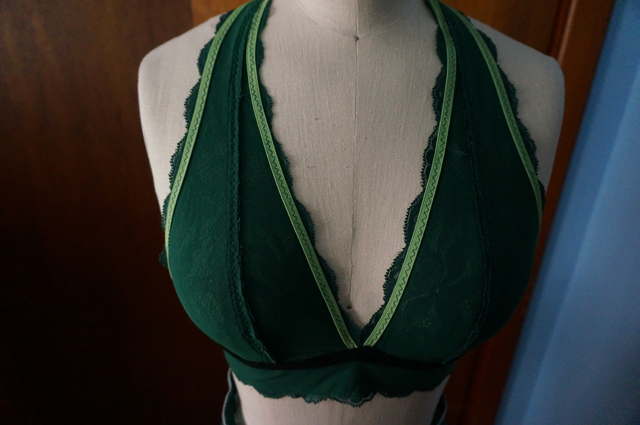
Close-up of the hook and eye closure on a lace halter bralette

Close-up on the inside of a lace halter bralette showing the seams, elastic, and channeling

While it’s not the end of the world, it makes the whole thing feel less professional and more DIY, which is a real damper to the enthusiasm for trying something new.

Cutting & Sewing

I took the pattern’s advice to use spray adhesive to baste the lace and mesh together, but I must have missed the instruction about applying the lace to the mesh, because I tried doing it the other way around and ended up painstakingly re-positioning the flimsy, slithery mesh multiple times.

I followed the (rest of the) instructions to the letter, sewing the bralette entirely on my sewing machine and alternating between sewing machine and serger for the underwear. My stitching is a little lumpy and/or wavy in places, but the busy-ness of the lace covers a multitude of sins.

Construction & Fit

For the bralette, I have two minor complaints. The first is there are a lot of raw edges, and the only ones you’re instructed to finish are the cup seams, where you’re told to sew down the seam allowance. There is a note at the beginning about minding the seam allowance size “if you use a serger,” but there aren’t any instructions on when/where to use it. I’ve seen many people talk about constructing and finishing lingerie entirely without one, but perhaps that’s true more for a conventional underwired or padded bra. Using a serger on the halter seam, for instance, would have helped to make the whole thing feel a little more finished, a little more polished:
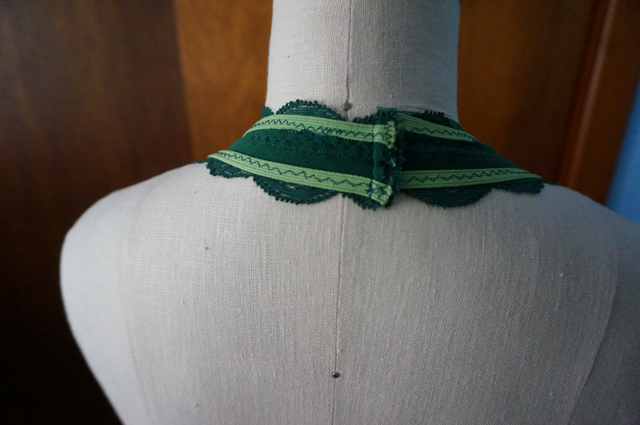
Close-up on the inside of a lace halter bralette showing a messy back neckline seam

Then again, maybe this is typical of RTW bralettes. I don’t own one, so I don’t know. Maybe it’s time to pop into a store and examine some seams?

The second minor gripe I have is the lace and mesh making up the frame aren’t sewn along the bottom. Elsewhere the lace and mesh are secured by stitching on two or more edges, but the bottom of the frame is open. For me, this means the mesh tends to wrinkle and roll at every opportunity, especially when I sit down. This might be solved by sewing a zigzag across the bottom of the frame above the scallops, although I’m concerned the stitching wouldn’t hold up to stretching.

Apart from these complaints, it does fit well enough, although ideally I’d prefer to go down a band size and up a cup size to gain a little more cup projection and prevent the band from sliding up or down.

For the underwear, I knew I was taking a gamble since I don’t normally wear a high-waisted style, but I thought it might be worth revisiting my preference, and there was always the option to wear it under dresses since it wouldn’t work with my pants.

I could not get the elastic to lie flat around the waist, even after removing and re-sewing it. I assume I stretched the fabric, the elastic, or both while sewing, even though I was trying not to. It’s definitely more pronounced on my form than my body, but the effect is the same: rippling and buckling.
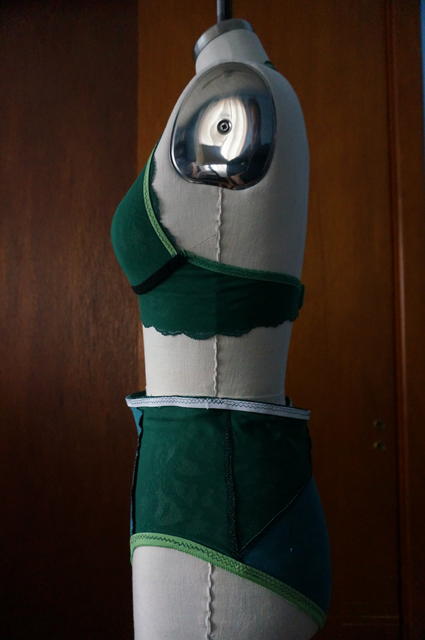
Side view of dress form displaying a lace halter bralette and high-waisted underwear turned inside-out

Final Thoughts

After wearing the bralette a couple of times I realized I’m pretty attached to underwire. Sure, I don’t necessarily need it, but I like it and feel more comfortable with it than without it. Given that the pattern is designed to use channeling to shape and support the cups, it might be worth it to try making another version in a (hacked) 30D and adding underwires.

I thought about cutting the panties down to a mid-rise style, but the truth is that the cotton spandex I used is just too thick for comfort. They ended up feeling sort of like shapewear without any of the benefits. It was not a good call for underwear; I’d used the fabric for for fitted t-shirts and leggings—what was I thinking here? So even if I managed to nail the fit, I know I wouldn’t wear them.

On the whole, I’m more than a little bummed about the experience. I’ve mostly let go of the feeling I’ve wasted precious fabric—it’s not exactly one of a kind, and there’s always more fabric—but I’d hoped to get bitten by the lingerie bug and embark on a spree of replacing all of my tired old things with fresh, perfectly fitting handmade undergarments.

I’d sort of scoffed at the idea of kits, because in the trade-off between money and time I can afford to source materials myself, and as someone who prefers self-directed learning and doing things on my own, paying someone to figure things out for me doesn’t come naturally. But I’ve started to see how a kit is a good way to break into new territory of a hobby. And it’s hard to argue with how pretty they are!
Positive Peer Pressure

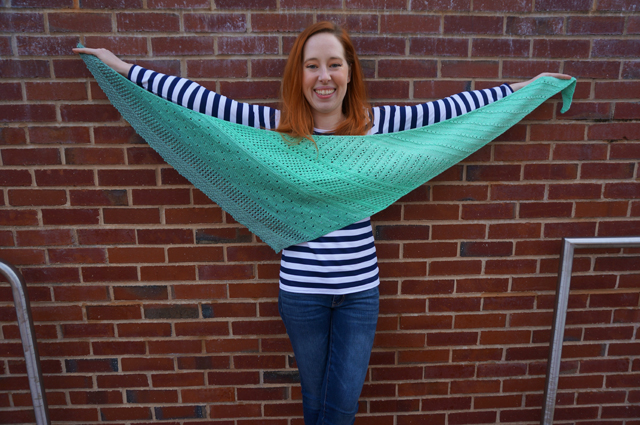
Caitlyn holds up a shawl made with Freia Handpaints yarn to show the full wingspan and different lace patterns

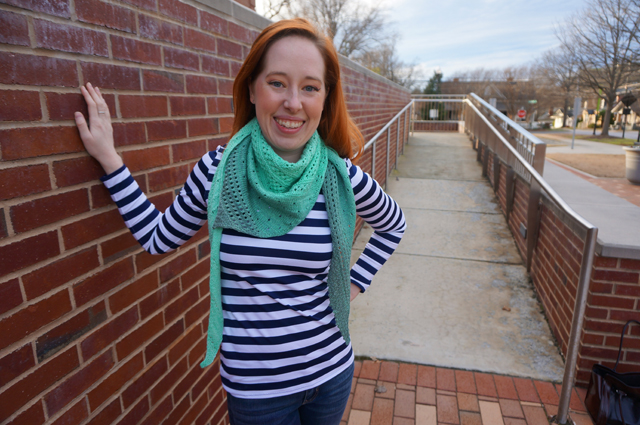
Caitlyn stands with one hand on a brick wall and her lace shawl wrapped around her neck like a bandana

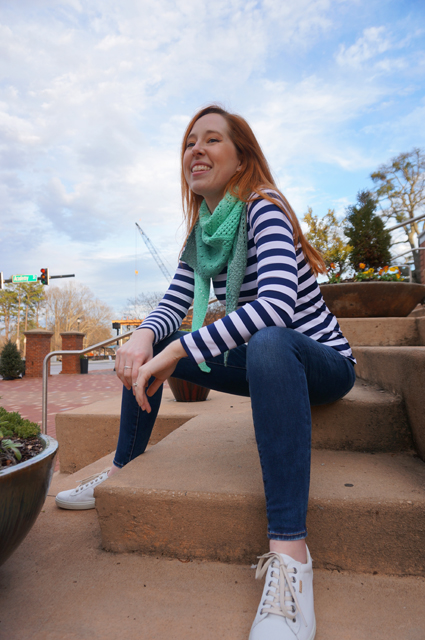
Caitlyn sits on the steps of a public building with her shawl wrapped around her neck like a bandana

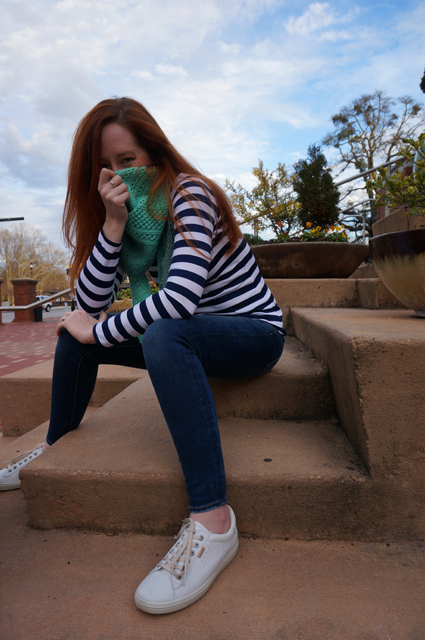
Caitlyn sits on the steps of a public building and peers playfully from behind her bandana shawl

Peer pressure: the catalyst of lying, cheating, stealing, drinking, smoking, and who-knows-how-many other societal woes. As a topic and a scapegoat, it was a perennial favorite in D.A.R.E. Seemingly all of the world’s vices would, someday, be offered up to us innocent lambs in the guise of friendship, and it was our solemn duty as good citizens to stand our ground and say, “no, thank you, I don’t need that to be cool.” We dutifully role-played each of the tactics, in escalating degrees of righteousness, for declining these tantalizing but ultimately life-destroying activities.

Peer pressure got a bad rap. What about using peer pressure for good? There was precious little talk about how peer pressure is also a lever for positive action. You can call it motivation, or a good influence, or tough love, but let’s be clear: it’s still peer pressure.

Take this shawl, for instance. The pattern is the Local Yarn Shawl from designer Casapinka. It was designed and released to commemorate the inaugural Local Yarn Store Day on April 21, 2018. I don’t particularly follow new pattern releases in the knitting world, and I’m not usually tempted by flash sales, special events, and the like. I will occasionally download free patterns when they’re offered, but I don’t go out of my way for them.

But as it happened, my own local yarn store Warm ‘n Fuzzy was one of the participating vendors. It doesn’t take much to bring me into the store, and the promise of a small discount on yarn purchased to create the pattern was as good a reason as any to at least drop by and see what was new.

While I liked the look of both of the sample shawls shown in the pattern and knew that Warm ‘n Fuzzy would have a delectable array of speckled and tonal yarns to suit the larger design, I kept coming back to the blue gradient. It wasn’t really a mystery to me why: every time I went into the store, I’d eye the Ombré Gradients by Freia Handpaints. I’d seen them used to great effect in yoked sweaters, but as I wasn’t ready to tackle large-scale stranded colorwork yet, and the yarns are on the pricier side anyway, I’d always sigh admiringly over them and then move on to something more “practical.”

On LYS Day, there was a great bustle of people in the tiny store, and energy was high. Despite the crowd, I shopped as was my wont: I went immediately to the Freia, which I loved and which absolutely met my needs; then I proceeded to examine, heft, and pet every other fingering-weight yarn on display, because there might be something more suitable, something better than the thing I wanted most; then I drifted back to the Freia collection to dither a little longer, as though there were a real choice to be made.

Eventually Justin took me by the shoulders and said, more or less, “We’ve taken up space long enough; either we buy this yarn or we leave.” (He has a real knack for getting to the point.)

If it had been a sleepy Sunday afternoon, if we had been the only people in the shop, if I hadn’t gotten a cheerful email saying “come out and support your local business!” I might have put the yarn down and walked away. But I wanted the Freia, and I wanted to show Warm ‘n Fuzzy the love they deserve on a day dedicated to everything great about small (and often woman-owned) craft businesses.

Did I spend more money than I intended, more than I’ve ever spent on a shawl? Yes I did. Was I happy with my purchase? Also yes, very much so.

Of course, since I had something else on the needles at the time (though I’ll be blowed if I have any idea what), I didn’t immediately dive into knitting. In fact, I very nearly forgot I had either the pattern or the yarn until I was casting about for something to knit five months later. I had been seeing more sampler-like shawls popping up on Ravelry—ones that used bands of different lace or textural stitches—and got a hankering to knit one.

After scrolling through several pages of designs and finding nothing that particularly scratched the itch I had, Justin very sagely interrupted to ask whether I might have something in my Favorites already, and to suggest that I ought to work on knitting the things I already liked instead of searching high and low for new things to fall in love with. More positive peer pressure at work.

Once I rediscovered the pattern and the yarn, everything was smooth sailing. In the ongoing cosmic irony of my knitting life, I needed two balls of the Freia to have enough yarn for the small shawl which meant—you guessed it!—alternating skeins as though for stripes. Two balls was a manageable level of hassle, however, and the end result was well worth the minor inconvenience. You can find the (few) technical details on my Ravelry project page.

On a less thrilling, more workaday note, the top I’m wearing in these photos is also handmade. The pattern is the SBCC Tonic 2, the (free) long-sleeve version of their popular t-shirt (also free). The fabric is a mystery blend with a high spandex content; it (appropriately) came from Spandex World in the New York City Garment District. I picked up this fabric and another navy-and-white stripe there, along with a small collection of other fabrics from other stores, during a day-long fabric shop tour we planned as part of our 9th anniversary vacation.

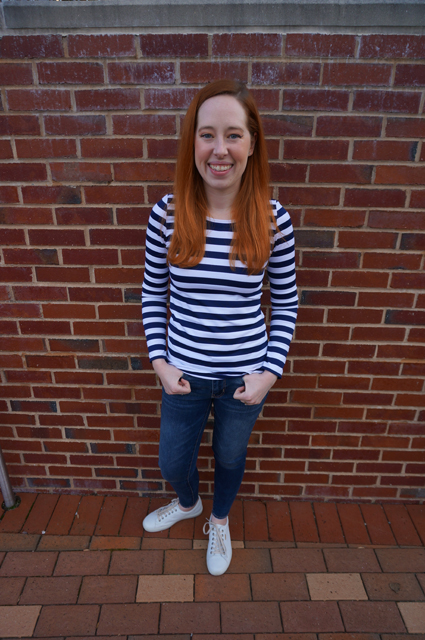
Caitlyn is smiling as she stands with her thumbs hooked through her belt loops and shows off the long-sleeve striped t-shirt she made

Key differences between the Tonic 2 and the original Tonic tee are the higher crew neckline, longer length, and less-slim-fitting waist and hip. I’ve found I prefer the higher neck, and the longer length meant I didn’t need to add any length like I did to my Tonic tees—in fact, I could probably stand to shave off an inch, to perfectly nail the proportion I like. While think the slightly looser waist is probably a good call in such a thin, clinging knit, I don’t love the relaxed hip: it lacks the negative ease to anchor the top the way I feel it should. Fortunately, it should be easy enough to go back and serge a little excess from the side seams, tapering to nothing at the waist.

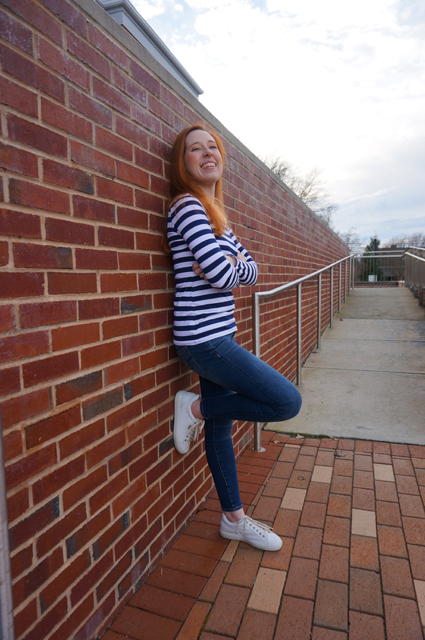
Caitlyn is standing with her back and one foot against a brick wall, arms crossed but smiling as she shows off the long-sleeve striped t-shirt she made

The armhole on the Tonic 2 is ever so slightly more scooped than the Tonic. The sleeves feel a little weird to me, like the seam isn’t quite in the right place. I can’t tell if it’s because I might have accidentally set the sleeves in backwards, because the bicep is a little too snug, or because I’m being a princess who wants perfection in handmade clothes. Whatever it is, it isn’t bad enough to stop me from wearing it.

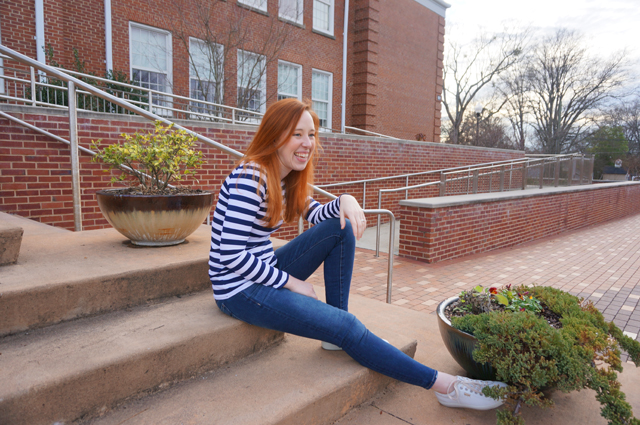
Caitlyn is wearing a long-sleeve striped t-shirt she made, sitting on the steps of a public building, and laughing at something off-camera

I also made a short sleeve version of this top, using all of the Tonic 2 pieces but chopping off the sleeves at the Tonic length. I didn’t bother with pictures, though, because yawn. But I’ve worn both tops a ton in both business casual and casual outfits!

I even eked out a pair of underwear using Zoe’s free Pants/Undies/Knickers pattern, but they’re too small. I can’t decide whether I want to size up or find another pattern; I have a couple in my stash I could try before diving into a search online.

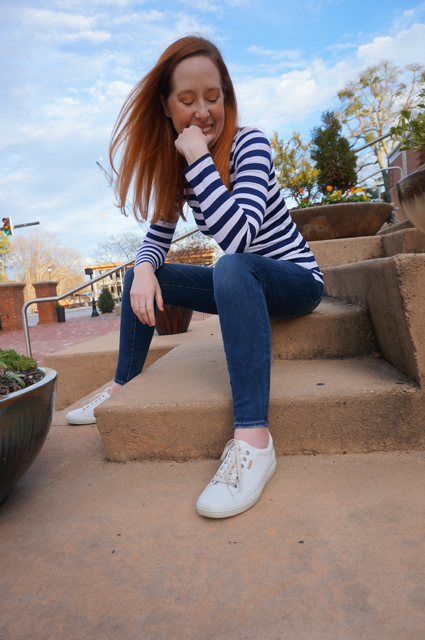
Caitlyn is wearing a long-sleeve striped t-shirt she made, sitting on the steps of a public building, and smiling with her eyes closed as though thinking of a secret

Art Exchange

When my friend Jorren asked me if I’d be willing to do an art exchange, I was beyond flattered—I was intimidated. My D&D group, which is where I met Jorren, is a wildly creative and wickedly clever bunch. To say they’re talented would be to ignore how much work they’ve poured into becoming as good as they are at what they do. Musicians, artists, programmers, writers, cooks, and homesteaders—art and craft are well represented in our group. Jorren could easily be said to be the most dedicated among us, because he’s working toward becoming a freelance illustrator and graphic designer who supports himself full-time with his art. I had seen his work on several occasions, both sketches and completed illustrations, and I was not at all convinced I could put together something comparable to his work.

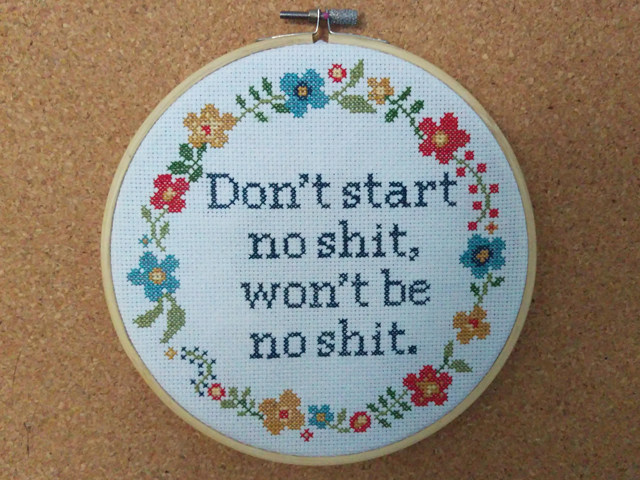
But he had seen the subversive cross-stitch I made for my sister-in-law Heather, and he wanted something in the same vein. He envisioned a design with the expression “Don’t start no shit, won’t be no shit.” The details were up to me: fonts, colors, and borders were left entirely to my imagination. He elaborated by saying that he was at all not turned off by traditional elements such as florals, script, or muted colors, and if I decided to go that route, to lean into it as hard as I wanted.

With that brief, I picked out the Floral Circle Border Trio Set of 3 Cross Stitch Patterns from TheStrandedStitch on Etsy. Since I hadn’t chosen an alphabet yet and wasn’t sure how large I’d need a floral border to be to fit such a long phrase, a trio of patterns was a great way to hedge my bets.

A cross stitch of the words "Don't start no shit, won't be no shit" surrounded by a floral border and framed in a hoop

The patterns are designed for 14 count Aida. I used the 7-inch hoop design, the largest of the three (the other two patterns were for 6-inch and 5-inch hoops). I followed the instructions to use two strands of floss, and I did’t substitute any colors. The text is the same dark blue used in the flowers; the font is Georgia from the Subversive Cross Stitch website.

I printed the pattern’s chart and used it to plot the arrangement of the words, but only after I had already stitched the entire border. Thank goodness it worked out. I’d like to think that in the future I’ll exercise better judgment and check the layout first—but let’s be honest, I probably won’t. When disaster inevitably strikes, I will be forced to admit that yes, there was a better way and I definitely knew it, and really, I have no one to blame but myself. Till then? Caitlyn: 1, Cross Stitch: 0.

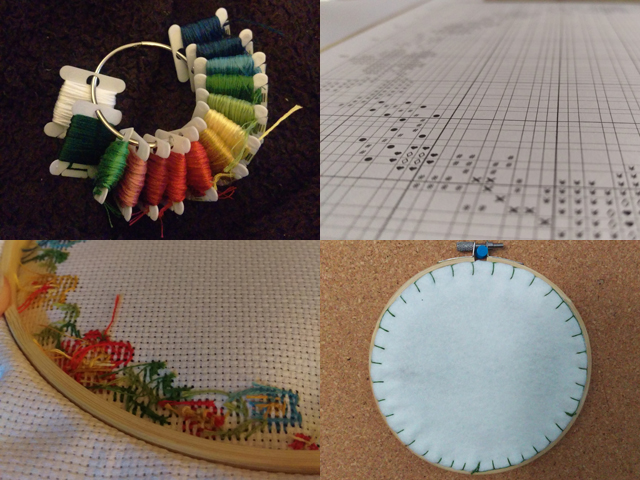
As with Heather’s piece, I finished the back by trimming the excess Aida into a circle a few inches larger than the hoop, using a running stitch to cinch the loose edge, and blanket stitching a piece of white felt as close to the hoop as possible to hide everything.

Half the fun of making the thing was sending these teaser photos to Jorren of my progress:

Collage showing a ring holding bobbins of embroidery floss, a close-up of a cross stitch chart, a close-up of the loose threads on the back of a cross stitch, and the back of a finished hoop covered in felt secured with blanket stitch

He ate it up. 😀 He’s a good friend like that.

You might be wondering what I asked for in exchange. At the time, we didn’t have much in the way of art at home, and basically nothing hanging on the walls. We’d lived in our house for just shy of three years, and we’d come to playfully refer to it as Pineheart because of the heart pine paneling and our own secret love of the idea of having a Big Fancy House with a Name and an Estate. I’d imagined doing some kind of drawing or collage or maybe even cross stitch to represent the house, and in my head I’d pictured a stylized pine tree with shield on it bearing the image of heart. Maybe a sunset in the background, or woodland creatures about the tree.

That’s what I described to Jorren. And do you know what that absolute madman did?

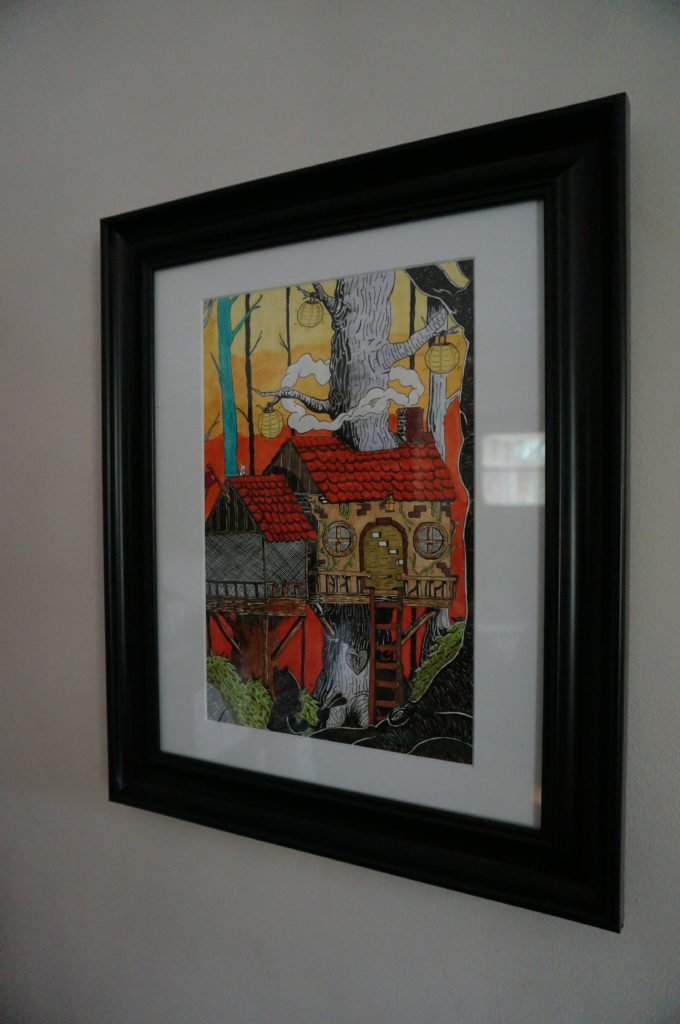
A framed illustration of a cottage-style treehouse with the silhouettes of a cartoon bear and rabbit in the foreground

THIS.

First off, it’s gorgeous. Second, it exceeded my wildest expectations in both scope and detail. He’s put in lots of little nods to us and the house, things I wouldn’t have thought to ask for. Third, whydidyoudothisIdon’tfreakingdeserveit?!

Jorren gave Justin a sneak peek of his progress when he finished the line art, and Justin tipped me off to how to just how awesome it was turning out. I panicked, because even with only a tiny bit of information I knew I was way out of my depth. I didn’t want Jorren to feel disappointed that he’d gotten a bad trade, so I decided to do a companion piece to the one above in attempt to move up to “nice effort” from “laughably unequal.”

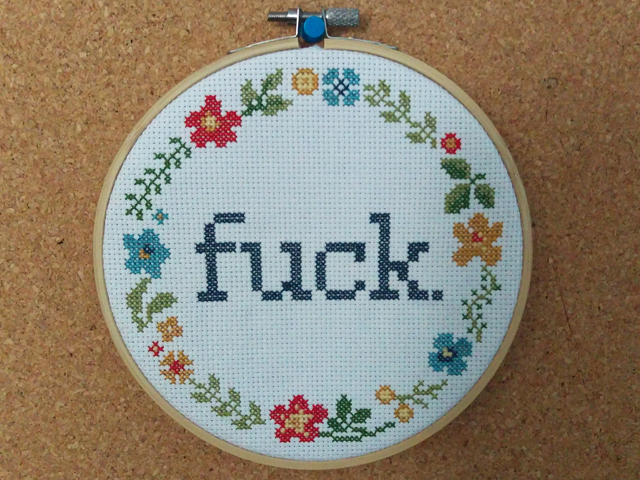
A cross stitch of the word "fuck" surrounded by a floral border and framed in a hoop

Yep. That’s about how I felt about the situation.

The pattern is the 6-inch hoop design; everything else is the same as the larger one.

For his part, Jorren seemed really happy with how things turned out. I still can’t believe I came away with such an incredible and personal piece of original art from someone I respect and admire, and I continue to feel like I owe Jorren a little something extra to make things even.

If you’d like to see more of his work, purchase a print, or commission an original design, check out his positivity brand Mind Fuzz on Instagram!