Geode Swing Tank | Modified New Look 6285

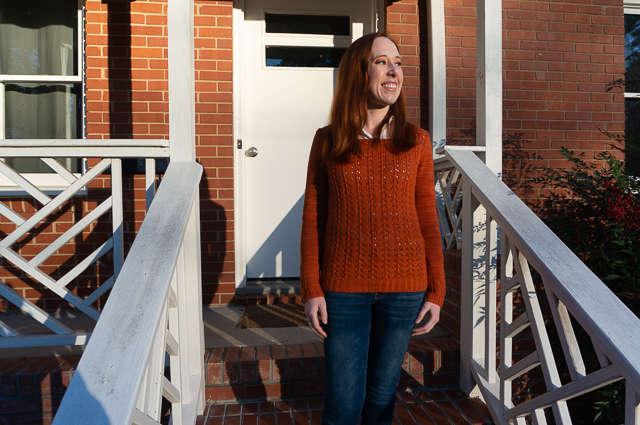
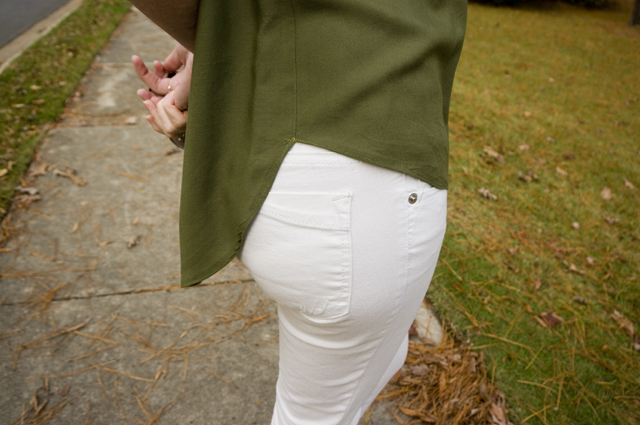
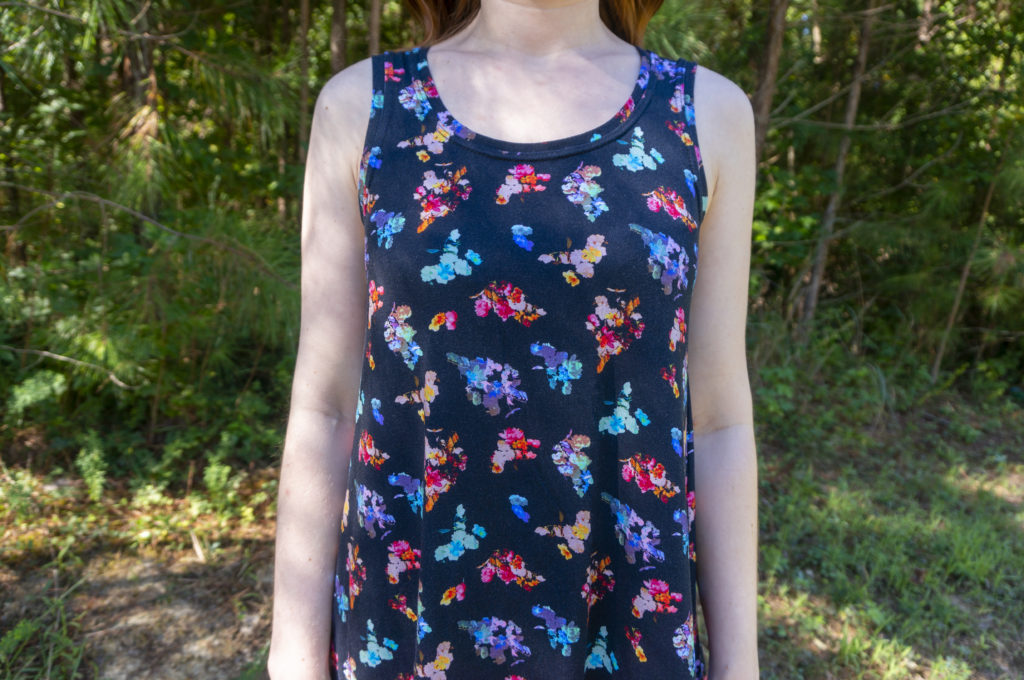
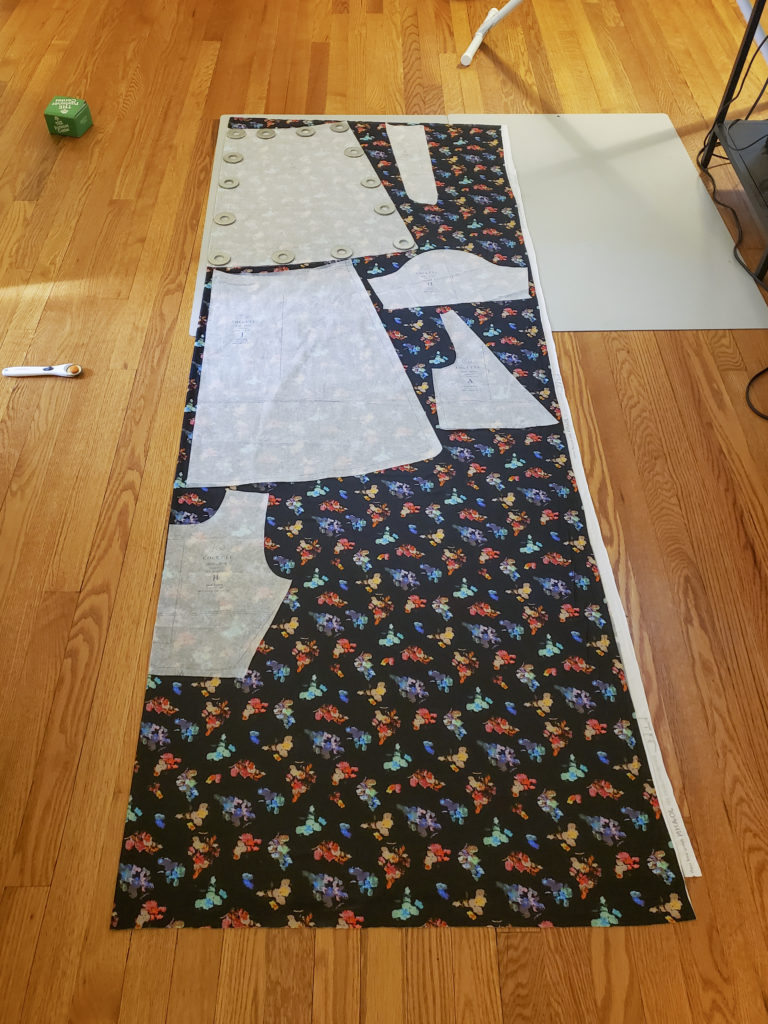
While I was laying out the pieces for my Colette Wren dress, I noticed that I was going to have around half a yard of fabric at the full width and another half yard or so of partial-width pieces. To be honest I was a little surprised by this, since I’d originally planned to turn this yardage into a maxi dress but didn’t have enough length or width to accommodate those pattern pieces. Discovering that I hadn’t had enough fabric for a long dress but did, somehow, have enough fabric for a short dress and a top goes to show that skill with video games is not directly transferable to real life despite how much Tetris I’ve played. Wanting to maximize my use of the remainder and craving another loose top to combat the hot sticky weather, I decided to hack New Look 6285 (a pattern I already own and have used here and here) to make a basic swing tank.

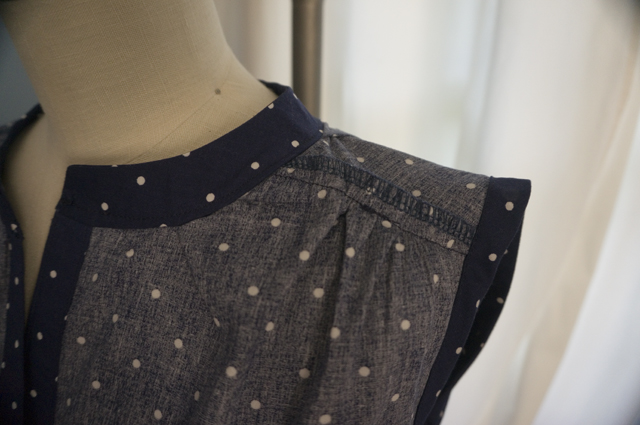
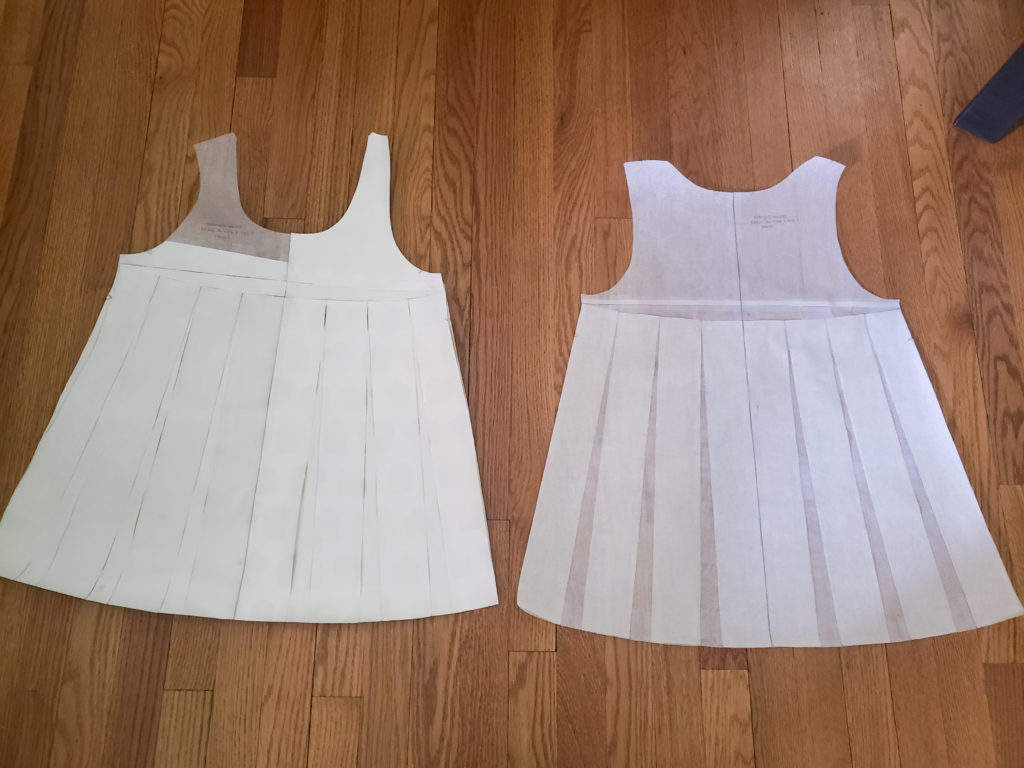
A quick search brought up instructions for turning any knit or woven t-shirt into a swing style on Bernina’s We All Sew blog, provided by the delightful Mary Danielson Perry of Idle Fancy. Because one of the steps is straightening the side seams, I opted to use View A of my pattern since it already has a straighter silhouette and a looser fit overall.

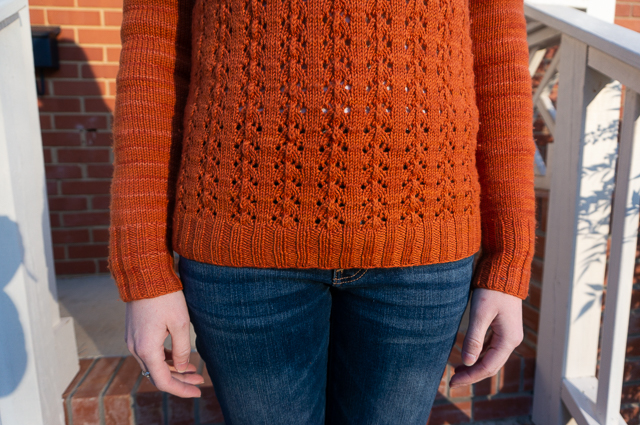
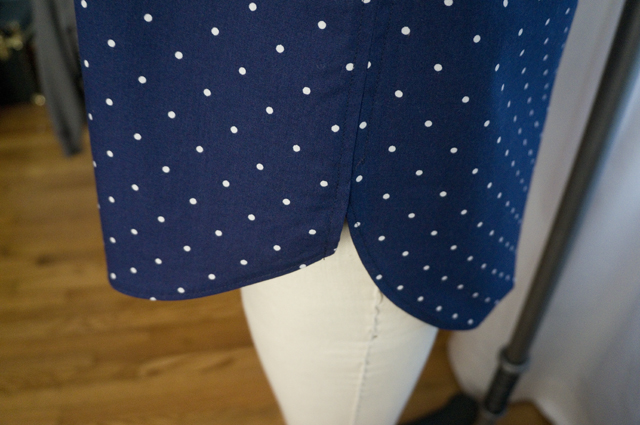
I laid out the original pieces on my fabric, measured to determine the maximum amount I could increase the hem width, and then slashed and spread per the instructions. As you can see below, I ended up making six slashes in the front and six in the back; I spread each slash 1 inch for a total circumference increase of 12 inches.

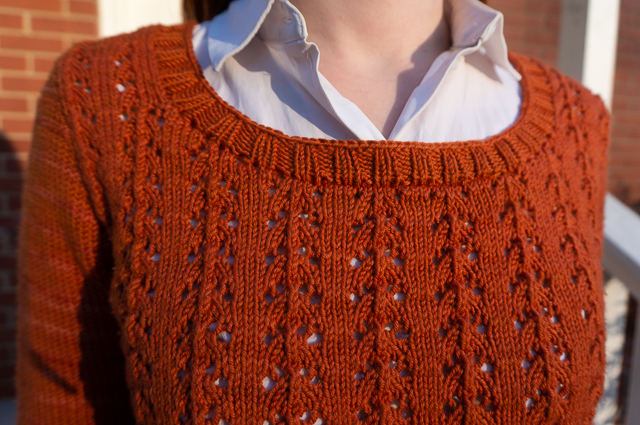
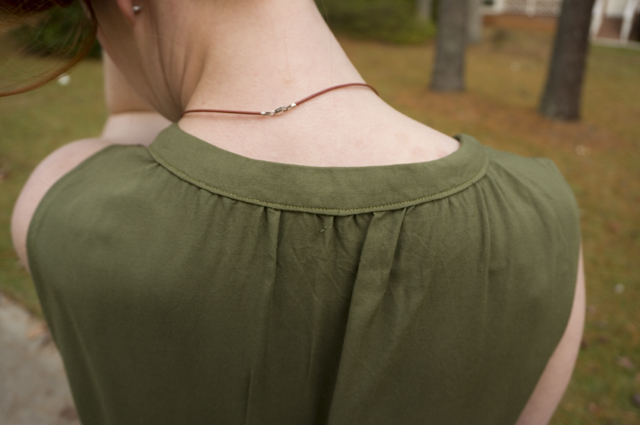
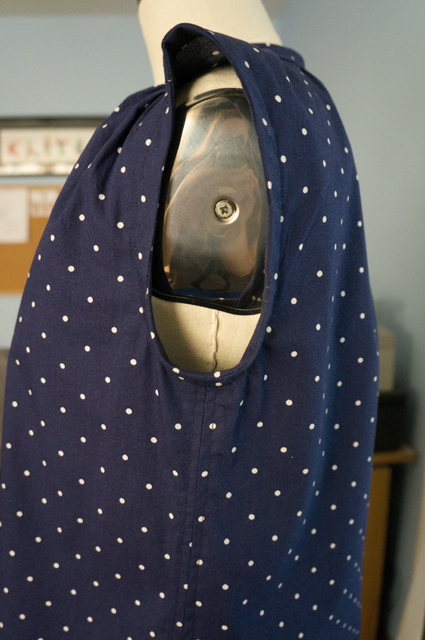
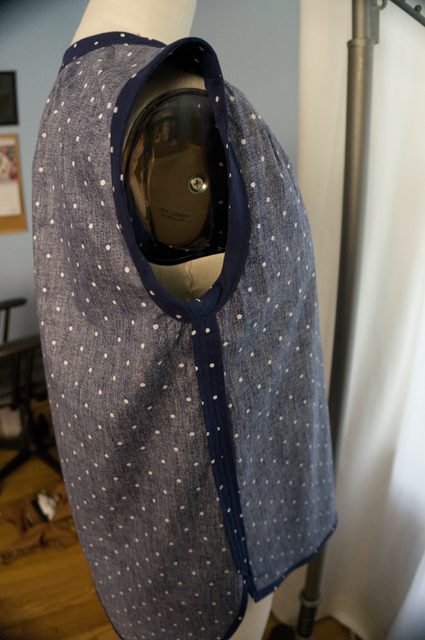
After cutting out the front and back pieces, I didn’t have enough fabric left to cut a neckband and armhole bands on the crossgrain. Luckily this rayon spandex blend has almost as much vertical stretch as it does horizontal stretch, so I cut them on the grain instead. I still ended up piecing together the neckband, but in a dark and patterned fabric it’s not noticeable at all.

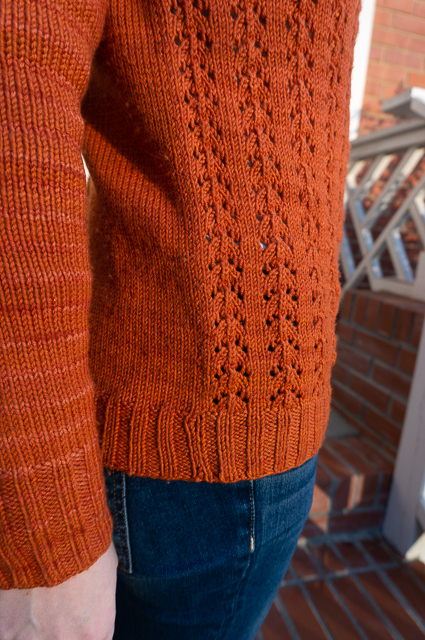
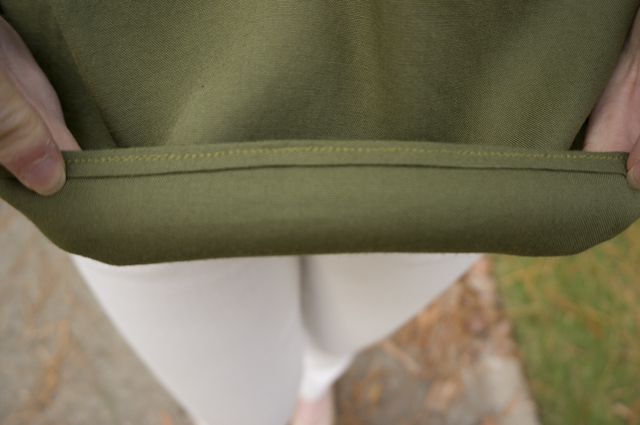
As with Wren, I assembled everything on my sewing machine and finished it on my serger. I was out of clear elastic, so I topstitched down the seam allowances at the shoulders in an attempt to stabilize them; time will tell if that makes a difference or not. I also twin needle topstitched around the neck, armholes, and hem.

Not surprisingly, it took about the same of time to sew up as it did to cut the pattern, and the whole thing was completed in two easy afternoons. My only regret is not being able to make it even swingier, but with only a fistful of scraps remaining at the end, I squeezed as much out of it as I could.

This is my fourth consecutive successful sewing project. While none of the projects I’ve undertaken recently are impressive in any way, having a run of wearable garments I’m satisfied with has been a huge boost to my motivation to sew. In the past I’ve struggled with less-than-stellar fit and various sewing mishaps, and it damped my enthusiasm considerably. It’s hard for me to get excited about the process when something that should work doesn’t, and I have an uneasy relationship with the idea of practicing in a hobby where that means either buying cheap fabric to make up a garment I won’t want to wear, or sacrificing fabric I do want to wear to a garment that is ultimately ill-fitting, uncomfortable, or unflattering.

These recent victories, however mundane they may be, have finally got me looking at my stash with excitement and a desire to plan again. I look forward to sharing what I come up with in the weeks to come.
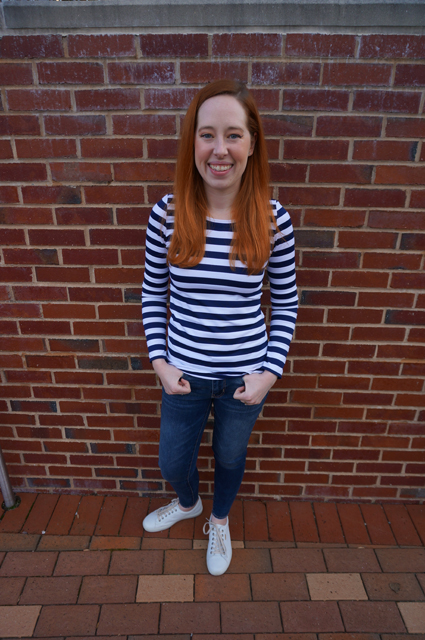
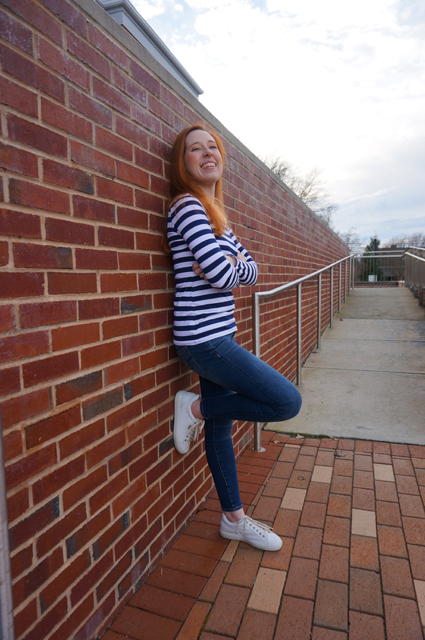

Outfit Details

Top: Modified New Look 6285 | Shorts: Express | Shoes: Mossimo Supply Co. | Bracelet: Unknown/gift

Work-to-Glory Ratio

In the early, sporadic days of my knitting, when I was making the transition from wistfully reading knitting blogs to actually doing some knitting myself, I had the great good fortune to stumble upon TECHknitter. Though their identity remains (to me, at least) a mystery, they are clearly a capable and inventive knitter, because their blog, which spans more than 10 years, is really an electronic book full of improved solutions to many of knitting’s everyday challenges. From them I have learned a gap-less, jog-less way to join a piece of work in the round, three ways to bind off circular knits depending on the type of project, and ten methods for weaving in ends (though I’ve only used four or five of them to date).

Much of TECHknitter’s writing deals with the mechanics of knitting, like why a stockinette edge curls (and why adding a border doesn’t really fix the problem), and how to use that knowledge to your advantage. But sprinkled throughout are bits of knitting philosophy, such as when to choose an excellent but fiddly solution and when to settle for a pretty good one. Very occasionally—only a handful of times in a decade—TECHknitter treats the reader to a pure philosophical refection on the craft.

The one that’s stuck with me, that continues to thread itself through more and more of my thinking, is the work-to-glory ratio. Originally posited by TECHknitter’s friend Carol, the work-to-glory ratio is the relationship between the amount of effort that goes into a project and the degree to which the result is impressive or satisfying. A project that appears difficult but was in fact easy to knit has a good work-to-glory ratio, whereas a project that was tedious or hard and turns out indistinguishable from something machine-made has a bad work-to-glory ratio.

As TECHknitter is quick to point out, there are of course plenty of projects that are both challenging and gratifying: some projects are rewarding precisely because of the time and effort that went into their making. A practical project in a workhorse yarn with a familiar pattern might turn out precisely as useful as the knitter intended. For TECHknitter, the work-to-glory ratio is more an observable phenomenon than a guiding principle.

The orange sweater above, a CustomFit version of Amy Herzog’s Foyle’s Pullover, has proven to have a pretty good work-to-glory ratio. The allover lace on the front is an easy-to-read and memorize six-row repeat where the wrong-side rows are all purled, and it’s a great design to practice decreasing in pattern (though no specific instructions are given for this, and the source I was going to recommend is no longer available online). Meanwhile, the back and sleeves are simple stockinette, yet these large swaths of plain stitching somehow recede into the background so as not to draw attention to the fact that two-thirds of the sweater are mindless TV knitting.

While to my eye there’s nothing really outstanding about this pullover, everyone who’s seen me wear it has been impressed by its handmade origins and convinced that it must have been quite a bit of work to produce. Oh no, I think, it wasn’t nearly as fraught re-knitting every piece of this sweater to get a mediocre fit, or as mind-meltingly tedious as dealing with the kajillion ends on this one to make it wearable. Both of those projects took far more time and mental energy, but you’d never know it by looking at them.

(In case anyone thinks I’m underwhelmed by the results here, let me assure you that I’m very happy with the outcome and feel it’s my best CustomFit sweater yet.)

The smile of someone who wears their new sweater at least once a week

The work-to-glory ratio as a framework for thinking about things that take work—even if they’re not thought of as work, as a task or a job—has slowly crept into other areas of my life. Increasingly I’ve been thinking about it in the context of friendships, and I’ve been struck by how even a healthy friendship can at times have a pretty poor work-to-glory ratio.

The daily work of being friends, of nurturing a relationship, can involve so many small acts to affirm, question, encourage, and comfort. Making time to call, remembering milestones, knowing a person’s favorite treat or pet peeves—these are all part of the skill of being a friend, a skill that must be learned and can be cultivated.

But it’s also work that can go unrewarded. A deliberate effort to ask about something a friend is working on might lead to a dead-end in conversation; a genuine desire to check up on their wellbeing might go completely unanswered or unacknowledged. Frequent small touches become shallow interactions, which can start to feel like more of a rote exercise than the practice of making a genuine human connection.

In my lowest moments, I wonder if the work isn’t worth the paltry sum of glory.

And yet TECHknitter offers another way of thinking about this too: work as product plus process. The idea that the value of a thing lies in the thing itself, and also in all of the moments that went into making the thing added up. A handknit sock is no longer just a sock: it’s an act of care, patiently created to be something functional and comfortable and beautiful that someone can use and enjoy every day. The knitter knows it, and so does the wearer, and that knowing is as much as part of the joy as the sock itself.

The time, place, and emotional space the knitter was in while they knit are also part of that sock, whether the wearer knows it or not. They become folded into the process part of the equation, bringing further dimensions to that sock’s intangible value.

But beyond even these things are the very act of making itself: the friction of yarn sliding over the tensioning finger, the clicking of needles in motion, the rhythm of forming stitches and turning the work. Watching the balance of yarn change, the unraveled cake collapsing as the yarn is raveled back into a slowly lengthening sock. Choosing to see and hear and feel the process of yarn becoming a sock when it would be far faster and simpler to buy socks at the store.

How much better to think of friendships as product plus process! To imagine each moment of connection, no matter how seemingly trivial, as another stitch in the knitting—by itself practically inconsequential, but in aggregate absolutely essential. To treat the intention behind each small act of kindness as equal to the outcome of the act in importance. The goodness of a friendship is thus measured not only in how meaningful are the conversations or how memorable the events, but also in how much love and concern motivated every effort to have those moments, even when those efforts appear to fail.

The work of friendship and the rewards of friendship are not two sides of an equation to be weighed against each other: a friendship is the sum of the work and the rewards, the product and the process added up and divided between friends.

Positive Peer Pressure

Caitlyn holds up a shawl made with Freia Handpaints yarn to show the full wingspan and different lace patterns

Caitlyn stands with one hand on a brick wall and her lace shawl wrapped around her neck like a bandana

Caitlyn sits on the steps of a public building with her shawl wrapped around her neck like a bandana

Caitlyn sits on the steps of a public building and peers playfully from behind her bandana shawl

Peer pressure: the catalyst of lying, cheating, stealing, drinking, smoking, and who-knows-how-many other societal woes. As a topic and a scapegoat, it was a perennial favorite in D.A.R.E. Seemingly all of the world’s vices would, someday, be offered up to us innocent lambs in the guise of friendship, and it was our solemn duty as good citizens to stand our ground and say, “no, thank you, I don’t need that to be cool.” We dutifully role-played each of the tactics, in escalating degrees of righteousness, for declining these tantalizing but ultimately life-destroying activities.

Peer pressure got a bad rap. What about using peer pressure for good? There was precious little talk about how peer pressure is also a lever for positive action. You can call it motivation, or a good influence, or tough love, but let’s be clear: it’s still peer pressure.

Take this shawl, for instance. The pattern is the Local Yarn Shawl from designer Casapinka. It was designed and released to commemorate the inaugural Local Yarn Store Day on April 21, 2018. I don’t particularly follow new pattern releases in the knitting world, and I’m not usually tempted by flash sales, special events, and the like. I will occasionally download free patterns when they’re offered, but I don’t go out of my way for them.

But as it happened, my own local yarn store Warm ‘n Fuzzy was one of the participating vendors. It doesn’t take much to bring me into the store, and the promise of a small discount on yarn purchased to create the pattern was as good a reason as any to at least drop by and see what was new.

While I liked the look of both of the sample shawls shown in the pattern and knew that Warm ‘n Fuzzy would have a delectable array of speckled and tonal yarns to suit the larger design, I kept coming back to the blue gradient. It wasn’t really a mystery to me why: every time I went into the store, I’d eye the Ombré Gradients by Freia Handpaints. I’d seen them used to great effect in yoked sweaters, but as I wasn’t ready to tackle large-scale stranded colorwork yet, and the yarns are on the pricier side anyway, I’d always sigh admiringly over them and then move on to something more “practical.”

On LYS Day, there was a great bustle of people in the tiny store, and energy was high. Despite the crowd, I shopped as was my wont: I went immediately to the Freia, which I loved and which absolutely met my needs; then I proceeded to examine, heft, and pet every other fingering-weight yarn on display, because there might be something more suitable, something better than the thing I wanted most; then I drifted back to the Freia collection to dither a little longer, as though there were a real choice to be made.

Eventually Justin took me by the shoulders and said, more or less, “We’ve taken up space long enough; either we buy this yarn or we leave.” (He has a real knack for getting to the point.)

If it had been a sleepy Sunday afternoon, if we had been the only people in the shop, if I hadn’t gotten a cheerful email saying “come out and support your local business!” I might have put the yarn down and walked away. But I wanted the Freia, and I wanted to show Warm ‘n Fuzzy the love they deserve on a day dedicated to everything great about small (and often woman-owned) craft businesses.

Did I spend more money than I intended, more than I’ve ever spent on a shawl? Yes I did. Was I happy with my purchase? Also yes, very much so.

Of course, since I had something else on the needles at the time (though I’ll be blowed if I have any idea what), I didn’t immediately dive into knitting. In fact, I very nearly forgot I had either the pattern or the yarn until I was casting about for something to knit five months later. I had been seeing more sampler-like shawls popping up on Ravelry—ones that used bands of different lace or textural stitches—and got a hankering to knit one.

After scrolling through several pages of designs and finding nothing that particularly scratched the itch I had, Justin very sagely interrupted to ask whether I might have something in my Favorites already, and to suggest that I ought to work on knitting the things I already liked instead of searching high and low for new things to fall in love with. More positive peer pressure at work.

Once I rediscovered the pattern and the yarn, everything was smooth sailing. In the ongoing cosmic irony of my knitting life, I needed two balls of the Freia to have enough yarn for the small shawl which meant—you guessed it!—alternating skeins as though for stripes. Two balls was a manageable level of hassle, however, and the end result was well worth the minor inconvenience. You can find the (few) technical details on my Ravelry project page.

On a less thrilling, more workaday note, the top I’m wearing in these photos is also handmade. The pattern is the SBCC Tonic 2, the (free) long-sleeve version of their popular t-shirt (also free). The fabric is a mystery blend with a high spandex content; it (appropriately) came from Spandex World in the New York City Garment District. I picked up this fabric and another navy-and-white stripe there, along with a small collection of other fabrics from other stores, during a day-long fabric shop tour we planned as part of our 9th anniversary vacation.

Caitlyn is smiling as she stands with her thumbs hooked through her belt loops and shows off the long-sleeve striped t-shirt she made

Key differences between the Tonic 2 and the original Tonic tee are the higher crew neckline, longer length, and less-slim-fitting waist and hip. I’ve found I prefer the higher neck, and the longer length meant I didn’t need to add any length like I did to my Tonic tees—in fact, I could probably stand to shave off an inch, to perfectly nail the proportion I like. While think the slightly looser waist is probably a good call in such a thin, clinging knit, I don’t love the relaxed hip: it lacks the negative ease to anchor the top the way I feel it should. Fortunately, it should be easy enough to go back and serge a little excess from the side seams, tapering to nothing at the waist.

Caitlyn is standing with her back and one foot against a brick wall, arms crossed but smiling as she shows off the long-sleeve striped t-shirt she made

The armhole on the Tonic 2 is ever so slightly more scooped than the Tonic. The sleeves feel a little weird to me, like the seam isn’t quite in the right place. I can’t tell if it’s because I might have accidentally set the sleeves in backwards, because the bicep is a little too snug, or because I’m being a princess who wants perfection in handmade clothes. Whatever it is, it isn’t bad enough to stop me from wearing it.

Caitlyn is wearing a long-sleeve striped t-shirt she made, sitting on the steps of a public building, and laughing at something off-camera

I also made a short sleeve version of this top, using all of the Tonic 2 pieces but chopping off the sleeves at the Tonic length. I didn’t bother with pictures, though, because yawn. But I’ve worn both tops a ton in both business casual and casual outfits!

I even eked out a pair of underwear using Zoe’s free Pants/Undies/Knickers pattern, but they’re too small. I can’t decide whether I want to size up or find another pattern; I have a couple in my stash I could try before diving into a search online.

Caitlyn is wearing a long-sleeve striped t-shirt she made, sitting on the steps of a public building, and smiling with her eyes closed as though thinking of a secret

Sage Sleeveless Summer Blouse

Caitlyn is standing on residential sidewalk wearing a sleeveless summer blouse, white jeans, nude pumps, and sunglasses

Caitlyn is turned to the side to show the deep armhole, voluminous fit, and high-low hem of her sleeveless summer blouse

Now this is the kind of summer top I dream of. The fabric is a beautifully smooth, soft, and drapey mystery material that my mom (hi Mom!) gave me when she was clearing out her sewing and craft supplies. I’m not sure what she originally bought it for; I can’t recall anything she’s made out of it. The smooth hand and fluid drape remind me of rayon challis, although Allie’s Fabric Files says that wrinkles will fall out of rayon challis within a few minutes of wear, and that’s definitely NOT the case with this material. It loves a good steamy press, but also seems to wrinkle from my body heat alone. Perhaps it’s linen or a linen blend?

To keep the fabric from slithering away from me during cutting and sewing, I filled a dollar store spray bottle with homemade spray starch (made by boiling cornstarch in water) and applied it liberally while pressing. It made a huge difference in how the fabric handled: it remained crisp and even a little grippy throughout the sewing process.

The pattern is a heavily altered McCall’s 7324. I mentioned the modifications I intended to make after muslining the pattern, but here’s a rundown of the changes that happened on the final garment:

  • Cut a size 10 instead of a size 6
  • Narrow the shoulders by 1 inch
  • Deepen the armhole by 0.5 inches
  • Eliminate the vertical pleat extending from the placket
  • Eliminate the gathers along the front neckline between the placket and the shoulder, which necessitated the following compensating changes:
    • Change the shape of the placket opening from a trapezoid (narrow at the top, wider at the bottom) to a V
    • Change the length and angle of the placket bands to match the new opening, ensuring the bottoms of the bands will be horizontal when stitched in place
    • Shorten the neckband (which looks like a collar stand)

I also left the hem curve alone this time instead of trying to shorten the back. A little butt coverage isn’t such a bad thing.

Caitlyn has her back to the camera to show how the curved hem of McCall's 7324 provides full bum coverage

The top is quite voluminous. With the relaxed fit, going up one size would have been sufficient. I also didn’t account for the fact that a two-size increase would change the armhole, so while taking in the shoulder width was definitely a good call, scooping out the bottom of the armhole an extra half-inch wasn’t necessary. In fact, as you probably noticed in the second photo, raising or moving my arms reveals a peek of bra band. I don’t care that much when I’m wearing the top casually, but I’ll throw on a camisole underneath if I’m in a more conservative setting. I’d love to make an obnoxiously colored bralette to wear with it—I keep envisioning orange—because FASHION.

On the inside, I stitched everything on my sewing machine, then finished the side and shoulder seams with my serger and the armholes with self-fabric bias tape. (Starch is the only thing that made bias tape possible, and even then, I’ve got a few spots of wobbly stitching where the raw edge has come untucked. I have no idea how anyone can make bias tape out of things like silk…) The hem is a baby hem made using Carolyn’s instructions.

I think that’s everything? Here are a few up-close shots:

A detail shot of the v-shaped placket and shoulder gathers of her modified McCall's 7324 sleeveless summer blouse

A detail shot of the gathers at the back neckline of the McCall's 7324 sleeveless summer blouse

A detail shot showing the high-low hem of the McCall's 7324 sleeveless summer blouse

A detail shot showing the baby hem used on the McCall's 7324 sleeveless summer blouse

I’m much happier with the gathers on this iteration, and my topstitching on the neckband is marginally better this time. I wore this beauty about once a week from the time it was done until a cardigan wasn’t enough to make it warm. I don’t exactly look forward to summer here in the south, but being able to throw on a cool, comfortable top I made takes a bit of the sting out of it—it’s the closest I’m ever going to come to looking stylish while sweating buckets.

Muslining a Sleeveless Summer Top

My favorite summer top is, without a doubt, Express’s sleeveless Portofino shirt. It’s 100% polyester, but it’s semi-sheer, floaty, and relaxed enough through the waist and hip that it lightly skims the body, which is good news when it’s in the 90s Fahrenheit (30s Celsius). The polyester doesn’t make me sweat, the heat and humidity do, and if I’m going to be soggy anyway I’d rather not feel the cling of spandex or the weight of cotton.

I think I’ve mentioned before that I work in a pretty casual office—despite a nominally business casual dress code, jeans, leggings, and all manner of fashion and athletic shoes have taken over swaths of the company without any pushback from management—so I can wear my sleeveless Portofinos at work with or without a coverup (though I usually throw on a cardigan to stave off the summer AC). Since they transition so easily from office to home for me, they were a logical jumping off point to expand my summer top options.

During a trip to JoAnn last summer, I picked up four top patterns that shared some similarity with my beloved Portofinos:

  • McCall’s 7324, a sleeveless popover top/tunic pattern with a (buttonless) half placket
  • New Look 6345, a sleeveless v-neck tunic with a relaxed fit around the hips (but a more defined waist)
  • New Look 6414, another A-line, v-neck top/tunic, with the option for a keyhole neckline and sleeve variations
  • New Look 6450, an A-line top that sort of looks like a pillowcase dress, but with fixed neckband and more sharply cutaway armholes

I decided to tackle the McCall’s pattern first because I was relatively fresh from the Archer making class with Lladybird and wanted to take advantage of the things I’d learned and lock those tips into my mind. I hadn’t made any woven shirt patterns from McCall’s, just a dress with a very different fit, so I thought it wise to make a muslin before cutting into a more precious fabric I already had in my stash.

The fabric is this 57″ White Dots on Navy from JoAnn. It’s listed as a cotton shirting, but after washing and drying it didn’t soften up much, and the crispness makes it feel more like a quilting cotton than a shirting to me. I wouldn’t use it again for a shirt.

The front of a woman's sleeveless summer top with a half placket and curved hem

The back of a woman's sleeveless summer top with gathers at the neckline and curved hem

As you can probably guess from these dress form photos, this muslin didn’t turn out wearable. I chose View A and cut out a size 6 based on the finished garment measurements and the width of one of my sleeveless Portofinos at the bust. The key difference between the McCall’s pattern and my ready-to-wear garment is that the latter has bust darts. Looking at the pattern, I had reasoned that the gathers at the shoulder were just bust darts that had been rotated into the shoulder and then converted to gathers. I further assumed that most of the room in the bust came from the gathers, and not from the width of the garment. I was incorrect about this, and the whole thing ended up too snug in the shoulders and bust, and not exactly relaxed in the hip either. I also found the shoulders too wide and the armholes too high for my frame; I made a note of those things for the next incarnation, but didn’t fret over them, since they’re easy to fix on a sleeveless garment.

A close-up of the armhole and side seam of a woman's sleeveless summer top

I made one other mistake, a completely brainless one that I should have been able to avoid. While tracing off the pattern, I felt the high-low hem was a little too pronounced, so I decided to shorten it to prevent walking around with a ridiculous butt flap. I did this by shortening just the back pattern piece by two inches—at the lengthen/shorten line. Cue my surprise when I go to sew up the side seams and realize that, surprise! the side seams don’t line up any more, and I have an accidental split hem:

A close-up of the hem of a woman's sleeveless summer top, showing how the front and back curves don't meet up correctly

I don’t remember now whether I sewed up the side seams first or sewed the hem first. At some point in the process I decided I wanted to finish the side seams by turning under the seam allowance and then stitching it down, rather than serging, so that made fixing the issue more annoying (and then the fitting failure made it irrelevant).

A close-up of a woman's sleeveless summer top turned inside-out, showing how the side seam is stitched down

I did, however, serge the shoulder seams (though why I dragged the machine out for just that, I don’t know) and then stitch then down as well for a mock flat felled seam.

A close-up of a woman's sleeveless summer top turned inside-out, showing how the shoulder seam was serged and then stitched down

With all of those little details covered, let’s get to my real gripes: the intersection of design choices, construction, and instructions.

What I didn’t notice when I bought the pattern, and what you almost certainly can’t see because the fabric is so dark, is the vertical pleat coming off the bottom of the placket. On the pattern piece, the placket opening is double the necessary width so that you can hot-dog fold the front of the blouse to create that pleat. It’s unnecessary from a construction standpoint, it doesn’t add anything to the look of the garment, and I hate it. Is that an irrationally strong feeling? Yes. Did I resolve to move heaven and earth to engineer that pleat out on my next version? Also yes.

Constructing the placket was way more challenging than it needed to be, though it’s probably fair to say that’s partially my fault. After preparing and applying the bands for the placket, I could not make sense at all of this instruction: “On inside, lap left front band over right. Stitch lower edge of bands to end of opening.” Or more precisely, I understood that it was supposed to look like this…

A close-up of a woman's sleeveless summer top turned inside-out, showing the completed partial placket

…but I could not get the bands and the opening to cooperate. After reading through Allie’s clearly written and photographed tutorial on sewing partial plackets, I finally figured out I hadn’t made the angled cuts into the corners of the opening. This step should definitely be in bold type, because if you don’t do this correctly (or at all), the origami WILL NOT work.

While we’re staring at the inside of the placket, I’d like to take a moment to complain about the unfinished ends (is this normal in RTW? I don’t have any partial placket shirts I can check) and the weird fold that results where the placket meets that stupid pleat.

A close-up of a woman's sleeveless summer top turned inside-out, showing how the placket intersects with the front pleat

On to the gathers! There are gathers around the curve of the neckline between the placket and the shoulder seam, along the shoulder seam between the neck and armhole, and around the back neck.

A close-up of a woman's sleeveless summer top, showing the gathers at the front neckline and shoulder

As near as I can tell, the gathers between the placket and the shoulder exist solely to pull the V of the placket open, otherwise the bands would neatly overlap each other like a normal (hidden) button placket. The area to gather is quite small, which made it difficult for me to gather evenly and ended up looking like unintentional puckers. In addition, since these gathers are at a roughly 45 degree angle to the ones coming off the shoulder seam, it results in a weird, bunchy, wrinkly mess in that area. Ugh. As with the pleat, I resolved to eliminate the gathers around the front neckline on the next iteration.

The gathering on the back neckline is fine design-wise, although I didn’t execute it well.

A close-up of a woman's sleeveless summer top, showing the gathers at the back neckline

It’s a shame that everything about this was a flop, but I really am glad that I figured out all of my the pattern’s issues before I cut into the fabric I really wanted to use, especially since my real-deal fabric was thin and slithery. It certainly didn’t hurt to practice a few techniques, either: my topstitching remains dodgy, but I’d like to think it’s just improving in very small increments.